
How To
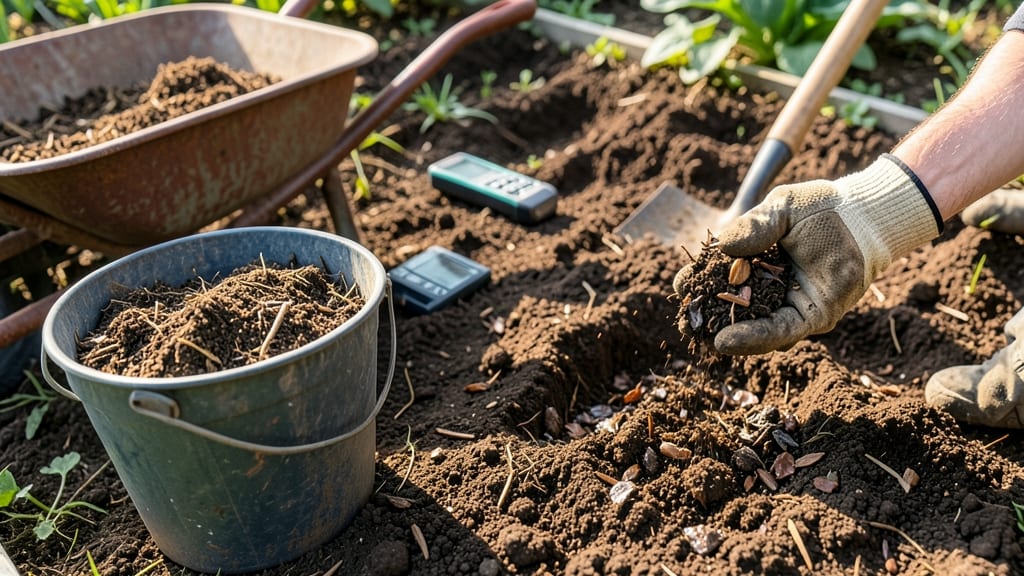
Your garden’s foundation starts with amending soil with compost—the secret weapon behind lush, productive beds that store-bought soil can’t match. 🌱 I learned the hard way that heavy clay or sandy soil drains too fast or holds too much water, but compost transforms both into a crumbly, nutrient-rich base where roots thrive.
The magic happens when you mix compost into the top 6-12 inches of soil, not just sprinkling it on top. That’s where earthworms, microbes, and plant roots get the space to work together. For veggies, aim for 25-30% compost by volume; for ornamentals, 10-20% keeps things balanced without overfeeding.
What you’ll end up with is soil that holds moisture like a sponge but drains freely, packed with slow-release nutrients that feed plants all season. The first sign of success? Healthy, dark-green leaves by midseason, and fewer wilting plants in heatwaves.
Works for raised beds, in-ground gardens, or even potted plants. The key is patience—compost improves soil over time, not overnight. Let’s get your beds ready!
📚 In This Guide
- What you need
- Instructions
- Tips and common mistakes
- Wrapping up and next steps
What you need
- ● Compost: 2–4 inches (5–10 cm) of finished, well-aged compost (avoid fresh manure or unfinished piles). Pro tip: Aim for a 20–30% compost-to-soil ratio for best results! 💡
- ● Garden soil: Existing topsoil (test for pH and texture—ideal is loamy and slightly acidic to neutral, pH 6.0–7.0).
- ○ Organic matter (optional but helpful): Leaf mold or shredded leaves (1–2 inches)
- ● Peat moss or coconut coir (for sandy soils, 1–2 cups per sq. ft.)
- ● Worm castings (1–2 cups per sq. ft. for extra nutrients)
- ● Garden fork or spade: For turning soil (18–24 inches deep for best aeration).
- ● Garden trowel or hand fork: For mixing in smaller areas.
- ● Wheelbarrow or bucket: To haul compost and soil (5–10 gallons capacity).
- ● Gloves & knee pads: Because gardening is hard work! 😅
- ○ pH test kit (optional): To check soil acidity before amending.
- ● Watering can or hose: For moistening soil before mixing.
- ● Clear the area of weeds, rocks, or debris.
- ● Choose a dry, overcast day (or water the soil lightly beforehand).
- ● Work when soil is not frozen or waterlogged.
Step-by-Step guide to amending soil with compost
Transforming dense, lifeless soil into a thriving root environment starts here—this is how I do it.
🌱 Step 1: Test and Assess Your Soil’s Current Condition
Before adding compost, understand what you're working with. Grab a handful of moist soil and squeeze it—if it forms a tight ball that doesn’t crumble, your soil is too dense. If it falls apart completely, it may already have good structure but lacks nutrients. I like to do a simple jar test: fill a quart jar halfway with soil, add water to the top, and shake vigorously. Let it settle for 24 hours—clay soils will show a thick layer of sediment at the bottom, while sandy soils will have clear water on top.
For a quick nutrient check, dig a small hole and examine the roots of nearby plants. If roots are sparse or appear stunted, your soil needs organic matter. Healthy roots spread freely and have fine, fibrous growth. This step ensures you’re not over-amending soil that’s already balanced.
💧 Step 2: Choose and Prepare the Right Compost
Not all compost is created equal—look for dark, crumbly material that smells earthy (not sour or chemical-like). I prefer finished compost with a 2:1 carbon-to-nitrogen ratio—this means it’s broken down enough to feed plants without burning roots. Avoid fresh manure or unfinished compost, which can introduce weeds or pathogens. If you’re making your own, ensure it’s been curing for at least 3-6 months before use.
Spread a 2-3 inch layer of compost over the soil surface in your garden bed or container. For heavy clay soil, you’ll need more—up to 4 inches—to improve drainage. For sandy soil, a 1-2 inch layer is usually sufficient. Work it into the top 6 inches of soil using a garden fork or tiller. This aerates the soil while incorporating the compost.
☀️ Step 3: Mix Compost Evenly Into the Soil
Use a broadfork or digging fork to loosen the soil to a depth of 6-12 inches, depending on your plant type. For vegetables and flowers, 6 inches is ideal, while perennials and shrubs benefit from deeper incorporation—12 inches or more. Break up any large clumps of compost and distribute it evenly. You’ll see the soil darken and feel lighter as you work, which means better drainage and root penetration.
For containers, mix 25-50% compost with your existing potting mix, depending on how dense it is. Fill the container halfway with the amended mix, then add plants and backfill with more. Water thoroughly to help the compost settle and integrate. This step is where the magic happens—your soil is now a nutrient-rich, well-aerated base ready for planting.
✂️ Step 4: Water and Monitor for Ideal Soil Structure
After amending, water the area deeply to help the compost settle and activate microbial activity. You’ll notice the soil holds moisture better and drains more evenly than before. Over the next 2-4 weeks, keep the soil consistently moist but not soggy—this encourages beneficial microbes to break down the compost further. Avoid heavy foot traffic or tilling, as this can disrupt the newly improved structure.
Watch for signs of improvement: plants will show stronger growth, and weeds may become less aggressive. If you planted test crops, you’ll see faster germination and healthier seedlings. This is your confirmation that the amendment worked. For long-term results, add a 1-2 inch layer of compost annually to maintain soil health.
Tips & tricks for perfect soil amendments
Here's the thing about compost—it's not just dirt, it's a living amendment that transforms your garden. These are the insights I've gathered after years of trial and error in my own garden.
The Jar Test Secret: That 24-hour jar test in Step 1 isn't just about identifying soil type—it's about understanding your soil's water retention capacity. Clay soils with thick sediment layers will hold too much water, while sandy soils with clear water on top drain too quickly. I've found that adding a 3-inch layer of compost to clay and 1.5-inch layer to sandy soil creates the perfect balance for most vegetables and flowers.
Compost Quality Check: The 2:1 carbon-to-nitrogen ratio mentioned in Step 2 is crucial, but I've learned to trust my nose too. Fresh compost should smell earthy, not like rotten eggs or ammonia. If you're unsure, do a quick hand test: grab a handful of compost—if it crumbles easily and doesn't stick to your gloves, it's ready to use. For container gardens, I often blend my finished compost with worm castings for an extra nutrient boost.
Layering Technique: When working compost into the top 6-12 inches of soil in Step 3, I've found that alternating layers of compost and native soil creates better root penetration. For example, start with 2 inches of compost, then 4 inches of native soil, repeating this pattern down to your target depth. This method prevents compaction while maximizing nutrient distribution. For heavy clay soils, I'll add a handful of perlite to the mix to improve aeration.
Post-Amendment Care: The 2-4 week monitoring period in Step 4 is where you'll see the real transformation. I've noticed that plants respond differently based on their needs—leafy greens like spinach show improvement within 2 weeks, while root crops like carrots need the full 4 weeks to develop properly. During this time, I avoid tilling or disturbing the soil, as this can disrupt the newly established microbial communities that are breaking down the compost.
Pro Tips for Amending Soil With Compost
- Here's the thing about compost—it's not just dirt, it's a living amendment that transforms your garden.
- The Jar Test Secret: That 24-hour jar test in Step 1 isn't just about identifying soil type—it's about understanding your soil's water retention capacity.
- Compost Quality Check: The 2:1 carbon-to-nitrogen ratio mentioned in Step 2 is crucial, but I've learned to trust my nose too.
Frequently asked questions
Got questions about amending soil with compost?
You’re not alone! Here are some of the most common ones—and their straightforward answers to help you get started with confidence.
How often should I add compost to my soil?
For most gardens, a light application every 3–6 months keeps soil healthy. Heavy feeders (like tomatoes or peppers) may need it more often—aim for a 1–2 inch layer per season. Top-dressing annually is a great low-maintenance habit!
Can I compost and plant at the same time?
Fresh compost is fantastic, but wait 2–4 weeks after adding it before planting to avoid nutrient burn or fungal issues. If you’re in a hurry, opt for aged compost (6+ months old) or mix it into the soil a month ahead.
What if I don’t have compost—are there alternatives?
No compost? No problem! Try these soil boosters:
- Leaf mold: Decomposed leaves (rich in organic matter).
- Worm castings: Nutrient-dense and gentle on roots.
- Peat moss or coconut coir: Improves drainage (but use sparingly).
- Manure (well-aged!): Chicken or cow manure adds nitrogen.
Why does my soil smell bad after adding compost?
A sour or rotten odor usually means the compost wasn’t fully broken down or is too wet. Fix it by:
If the smell lingers, your compost may need more time to cure.
Does compost work for all types of plants?
Compost benefits every plant, from veggies to flowers to trees. However, sandy soils may need extra organic matter to retain moisture, while clay-heavy soils benefit from compost’s ability to improve drainage. Just adjust the amount based on your soil type.
Wrapping up and next steps
Amending your soil with compost isn’t just a gardening task—it’s a game-changer for healthier plants and a more sustainable garden. 🌱 By enriching your soil with organic matter, you’re creating a nutrient-dense foundation that supports strong roots, improves water retention, and reduces the need for synthetic fertilizers.
The best part? Every shovel full of compost is a step toward a greener, more resilient ecosystem.
Ready to transform your garden? Start small—whether it’s a single raised bed or a corner of your yard—and watch your plants thrive. Your soil (and future harvests) will thank you!