
Neem Oil
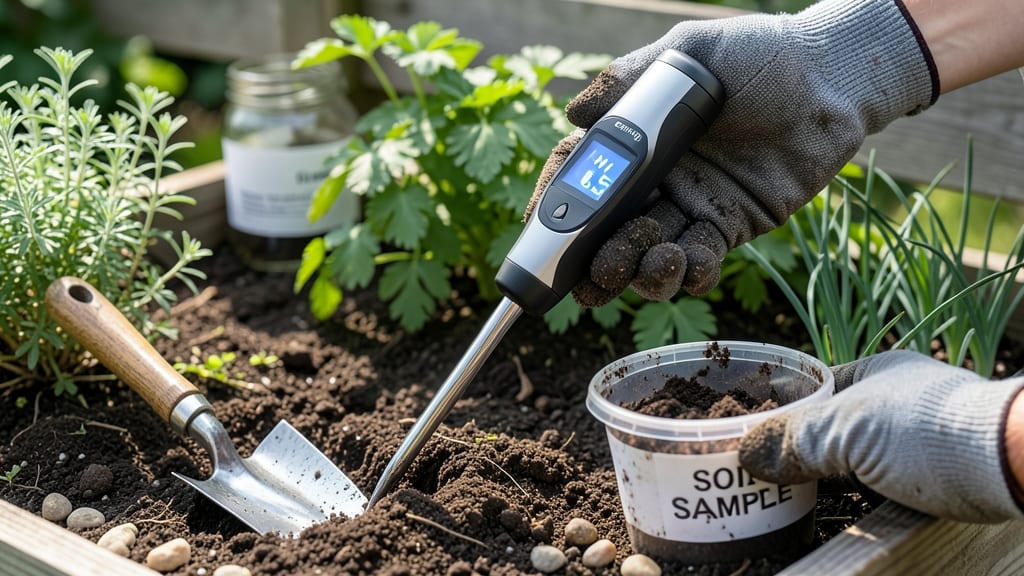
How to use a soil tester is the secret weapon for growing plants that actually thrive—not just survive. 🌱 I’ve used mine to turn my struggling garden into a vibrant, productive oasis by fixing pH, moisture, and nutrient issues before they become problems. The key? Testing before planting, not after your tomatoes start looking sad. Most testers come with simple instructions, but the real magic happens when you calibrate properly (yes, even those "plug-and-play" meters). A quick rinse with distilled water, a minute of air-drying, and a test on known soil (like your potting mix) ensures accurate readings. Ignore this step, and you might think your soil is perfect when it’s actually starving your plants. Once you’ve got clean readings, the numbers tell you exactly what to fix: too acidic? Add lime. Too dry? Adjust your watering. Low nutrients? Feed the soil, not just the plants. My zucchini went from yellowing leaves to foot-long monsters in one season after I fixed my soil’s pH imbalance. This isn’t just about fixing problems—it’s about preventing them. Test your soil now, and you’ll skip the guesswork for the whole growing season. Let’s get those readings right the first time.
📚 In This Guide
- What you need
- Instructions
- Tips and common mistakes
- Wrapping up and next steps
What you need
- ● Soil tester kit – Choose a digital or analog tester (e.g., Bluelab Soil Tester or Atago STX22). Digital testers are more precise but may require calibration.
- ● Clean container or bucket – A 5-gallon bucket or similar for collecting soil samples (avoid metal to prevent contamination).
- ● Trowel or soil auger – For digging 4-6 inches deep in multiple garden spots. A stainless-steel auger is ideal for precision.
- ● Gloves – Nitrile or rubber gloves to keep hands clean and protect from soil-borne pathogens.
- ● Notebook or data sheet – To record pH levels, moisture content, and location notes for each sample.
- ● Water (distilled or dechlorinated) – For rinsing the tester and mixing soil samples if required.
- ● Plastic spoon or spatula – For stirring soil samples evenly.
- ● pH calibration strips – If your tester doesn’t auto-calibrate, these ensure accuracy.
- ● Soil moisture meter – Pair with your tester for a full soil health analysis.
- ● Labeling tags – To mark sample locations (e.g., "Tomato Bed – pH 6.2").
- ● Garden journal – Track seasonal changes and amendments over time.
- ● Neem oil or compost – For adjusting soil health based on test results (since you’re in the Neem Oil category!).
Step-by-step guide to using a soil tester
Here's how I test soil health like a pro—no guesswork, just data-driven growing.
🌱 Step 1: Calibrate Your Tester Before Testing
Every soil tester needs calibration to ensure accuracy. Most models include a calibration button or require you to press it for 5-10 seconds while holding the probe in distilled water. I always double-check this step because uncalibrated readings can throw off your entire soil analysis.
After calibration, let the probe air-dry completely—this prevents false readings from residual moisture. You'll know it's ready when the display shows "0.0" or "Calibrated"—this is your baseline for accurate pH and nutrient measurements.
💧 Step 2: Collect Representative Soil Samples
Grab a clean trowel and dig 4-6 small samples from your garden bed, spacing them 6-12 inches apart and 2-4 inches deep. Mix them in a clean bucket to create a composite sample—this gives you an average reading rather than spot-check results that might mislead you.
Remove any debris like rocks, roots, or organic matter that could skew readings. The goal is pure soil substrate. If your garden has varied conditions (like sunny vs. shady spots), test each area separately—soil chemistry changes dramatically even across short distances.
☀️ Step 3: Test pH First—Adjust Before Nutrients
Insert the probe into the moistened soil sample and wait 30-60 seconds for the pH reading to stabilize. Most vegetables thrive in 6.0-7.0 pH, while blueberries need 4.5-5.5. If your reading is off, don't panic—this is your first clue about what amendments you'll need.
I like to test pH first because it's the foundation of nutrient availability. For example, if your soil is below 6.0, adding lime (calcium carbonate) will take 4-6 weeks to adjust. If it's above 7.0, sulfur or peat moss can lower it gradually. Always test again after amending to confirm progress.
✂️ Step 4: Measure Nutrient Levels and Interpret Results
Most testers measure nitrogen (N), phosphorus (P), and potassium (K), often displaying them as low/medium/high. Compare these to your plants' needs—tomatoes, for example, thrive with high potassium for fruit production, while leafy greens need more nitrogen for lush growth.
If readings show deficiencies, don't overcorrect. A medium nitrogen reading might just need a light application of compost tea or a balanced 10-10-10 fertilizer. For severe deficiencies, I recommend a soil lab test for precise micronutrient analysis—home testers often miss iron, manganese, or zinc issues.
🪴 Step 5: Record and Track Changes Over Time
Write down your readings in a garden journal, including the date, location, and any amendments added. I use a simple spreadsheet to track pH and nutrient trends—this helps me spot patterns, like how my vegetable beds drop 0.5 pH points every year without lime.
Retest every 3-6 months or after major amendments. Soil isn't static—rain, irrigation, and plant uptake constantly alter its chemistry. By keeping records, you'll catch problems early, like a sudden nitrogen drop that signals root rot or poor drainage.
Tips & tricks for accurate soil testing
Real talk: Soil testing isn't just about plugging in a probe—it's about getting reliable data that actually helps your garden. Here's what I've learned the hard way about avoiding common pitfalls.
Calibration is Non-Negotiable: That 5-10 second calibration in distilled water isn't optional—it's your quality control step. I once skipped this and got readings that were consistently 0.5 pH points off for weeks. Always verify the "0.0" or "Calibrated" display before testing, and never rush this step. A damp probe from calibration can throw off your entire analysis, so let it air-dry completely between uses.
Sampling Strategy Matters More Than You Think: Those 4-6 samples spaced 6-12 inches apart create a true average, but here's the catch: Test different zones separately if your garden has varied conditions. I had a raised bed that tested 6.8 pH while my in-ground soil was 7.2—treating them as one would have given me completely wrong amendments. Think of it like taking your temperature in multiple spots when you're sick—you need the whole picture.
pH Timing is Critical: The 30-60 second wait for pH stabilization isn't arbitrary—it accounts for the time soil solution needs to reach equilibrium with the probe. I used to pull readings too early and got inconsistent results. For best accuracy, wait until the number stops fluctuating before recording. Pro tip: Test your soil when it's moist but not soggy—this gives the most consistent readings across different testers.
Nutrient Interpretation Needs Context: When your tester shows "medium nitrogen," don't assume you need to add more. Compare it to your plants' needs—tomatoes might need that boost, but blueberries could be getting too much. I learned this the hard way when my nitrogen-loving kale turned yellow from over-fertilization. Always pair your soil test with what you're actually growing.
Pro Tips for Use A Soil Tester
- Real talk: Soil testing isn't just about plugging in a probe—it's about getting reliable data that actually helps you...
- Calibration is Non-Negotiable: That 5-10 second calibration in distilled water isn't optional—it's your quality contr...
- Sampling Strategy Matters More Than You Think: Those 4-6 samples spaced 6-12 inches apart create a true average, but ...
Frequently asked questions
about using a soil tester can help clarify doubts and ensure you get the most accurate results for your garden. Here are some common queries:How often should I test my soil?
Test your soil every 1–2 years for established gardens, or before planting new crops. If you’re troubleshooting poor growth, pests, or nutrient deficiencies, test more frequently—every 6 months can help track progress. Freshly amended soil (like after composting or fertilizing) should also be retested after 3–6 months to monitor changes.
Can I use a soil tester in wet soil?
No—wait until the soil is dry to test for accurate readings. Wet soil can dilute nutrients, skew pH levels, and damage electronic probes. Test after rain or watering only when the top 1–2 inches of soil feel dry to the touch (usually 24–48 hours later). For clay-heavy soil, let it dry out longer to avoid false readings.
What if my soil tester gives inconsistent results?
Inconsistent readings often mean uneven sampling or calibration issues. Double-check your tester’s batteries or follow the manufacturer’s calibration steps. Test multiple spots (5–10 samples) in your garden and average the results. If using a DIY tester (like vinegar/baking soda), ensure you’re using fresh, measured ingredients each time.
Are there alternatives to a digital soil tester?
Yes! For a quick, budget-friendly check, try these DIY methods:
- pH Test: Mix 1 tbsp soil with ½ cup water, then add a few drops of red cabbage juice (purple = neutral, pink = acidic, green = alkaline).
- Nutrient Check: Grow a "test crop" like radishes (sensitive to soil quality) or observe leaf color (yellow = nitrogen deficiency, purple stems = phosphorus lack).
How long do soil test results last?
Results are valid for 1–2 years if your garden conditions (like irrigation, fertilization, or crop rotation) haven’t changed drastically. However, if you’ve amended the soil (added compost, lime, or fertilizer), retest after 3–6 months to see how pH and nutrients have shifted. Keep records to track trends over time!
Wrapping up and next steps
Mastering how to use a soil tester is your first step toward a lush, healthy garden—and you’ve got this! 🌱 By following these simple steps, you’ve gained the power to diagnose, adjust, and nurture your soil like a pro.
Whether you’re a seasoned gardener or just starting, your plants will thank you for the personalized care.
Ready to take it further? Test a few spots in your garden to compare soil health, then use your findings to plan your next planting or amendments. Happy testing—and may your green thumb grow even greener! 🌿✨