
How To
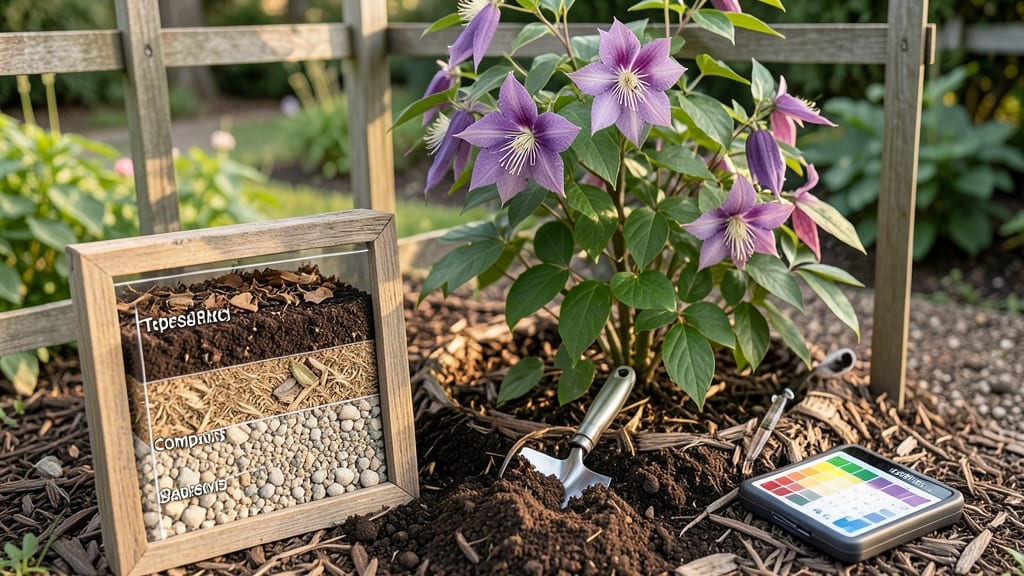
Clematis thrives when its clematis soil requirements mirror the rich, loamy forests where it grows wild—acidic, well-draining loam with just the right balance of organic matter. 🌿 I learned the hard way that heavy clay or sandy soil stunts growth, while the perfect mix unlocks those showstopping blooms.
The secret isn't complicated: it's about replicating nature's recipe with a few simple amendments. Start with a 6.0 to 7.0 pH—too alkaline, and your plant fights for nutrients; too acidic, and it struggles to absorb calcium.
Mix equal parts garden soil, compost, and coarse sand or perlite to improve drainage. For clay-heavy areas, add 3-4 inches of organic matter (like leaf mold or well-rotted manure) to loosen the texture. The goal? Soil that feels like a damp sponge—not soggy, not dusty.
You'll know you've nailed it when new shoots emerge sturdy and green, not leggy or yellowing. By midsummer, your clematis will reward you with vibrant blooms that last for weeks. The key is keeping the roots cool and moist (but never waterlogged) while the top growth basks in sunlight.
Think of it as giving your plant the perfect foundation—like a good handshake before the dance begins. For troubleshooting, watch for yellowing leaves (too much water) or stunted growth (poor drainage). If your soil feels compacted, aerate it annually with a fork.
And remember: clematis roots are shallow but extensive—mulch heavily in spring to protect them from temperature swings. Small adjustments now mean big rewards come bloom season.
📚 In This Guide
- What you need
- Instructions
- Tips and common mistakes
- Wrapping up and next steps
What you need
- ● Topsoil: 50% of the mix (well-draining, organic-rich)
- ● Compost: 30% (aged, nutrient-dense for fertility)
- ● Perlite or coarse sand: 10-15% (for aeration and drainage)
- ● Peat moss or coconut coir: 5-10% (for moisture retention and acidity)
- ○ Balanced fertilizer (10-10-10 or 5-10-10): 1 tbsp per plant (optional but recommended)
- ● Lime (if needed): Small amounts (1-2 tbsp) to adjust pH if soil is too acidic (test first!)
- ● Garden fork or trowel: For mixing soil and aerating roots
- ● pH testing kit: To check soil acidity (ideal range: 6.0–7.0)
- ● Gloves & knee pads: For comfort while working
- ● Watering can or hose: For hydrating the soil post-planting
- ○ Mulch (optional): 2–3 inches of shredded bark or straw to retain moisture
How to prepare the perfect soil for clematis vines
Clematis thrives when its roots enjoy the right balance—rich, well-draining loam with just enough acidity to fuel those dramatic blooms.
🌱 Step 1: Test and Amend Your Existing Soil
Clematis prefers a slightly acidic to neutral pH (6.0-7.0)—never alkaline. Grab a soil test kit or send a sample to your local extension office for precise readings. If your soil tests too alkaline, amend it with elemental sulfur (1-2 pounds per 100 square feet) or peat moss to lower the pH gradually over months.
Work the sulfur or peat moss into the top 12 inches of soil where roots will establish. Avoid quick fixes like vinegar—it burns roots and disrupts soil structure. You’ll know the soil is ready when a pH test confirms the ideal range—no guesswork needed.
🌿 Step 2: Create a Well-Draining Loam Mix
Clematis roots need oxygen and moisture balance—heavy clay or sandy soil will either suffocate or dehydrate them. Mix equal parts garden loam, compost, and coarse sand or perlite (think 50% loam, 25% compost, 25% sand/perlite). This creates a light, crumbly texture that drains excess water while holding enough moisture for deep roots.
For container-growing clematis, use a premium potting mix blended with 20% perlite or orchid bark to prevent compaction. The goal is a mix that holds moisture like a slightly damp sponge—not soggy, not bone-dry.
☀️ Step 3: Build a Root-Friendly Planting Mound
Clematis roots prefer cooler, moister conditions than the top growth. Create a 12-inch-high mound of amended soil where the base of the plant will sit. This keeps roots shaded and protected while allowing the vine to climb upward into sunlight. Spread 3-4 inches of mulch (wood chips or shredded leaves) around the base but keep it 6 inches away from the stem to prevent rot.
Water deeply after planting to settle the soil around roots. You’ll see new shoots emerge within 3-4 weeks—a sign the roots have established in their ideal environment. Avoid overwatering now; clematis roots rot faster than they thrive in soggy soil.
✂️ Step 4: Maintain Soil Health Through the Season
Top-dress the soil with 2-3 inches of compost in early spring and again after flowering to replenish nutrients. Clematis are heavy feeders, especially during bloom season, so side-dress with a balanced 10-10-10 fertilizer (1 tablespoon per plant) every 4-6 weeks. Water immediately after feeding to prevent root burn.
Monitor soil moisture—top 2 inches should dry out between waterings in summer. If leaves yellow or wilt, it’s often a sign of overwatering or poor drainage, not thirst. Adjust your watering schedule based on soil texture and rainfall; clay soils stay moist longer than sandy mixes.
🪴 Step 5: Adjust for Containers or Urban Spaces
Container-grown clematis need larger pots (15+ gallons) to prevent root-bound stress. Use a fast-draining mix (50% potting soil, 30% perlite, 20% compost) and elevate the pot on feet to improve drainage. In urban areas with compacted soil, amend the planting hole with 50% native soil and 50% your loam mix to give roots room to breathe.
If your space has poor drainage, install a French drain around the base or plant clematis near a slight slope to encourage runoff. You’ll notice stronger vines and bigger blooms within a season when roots aren’t struggling for air or water.
Tips & tricks for perfect clematis soil conditions
These pro insights will help you avoid common mistakes and create the ideal growing environment for your clematis.
Soil Testing Accuracy: Don't rely on guesswork when testing pH—kits from garden centers can vary in accuracy. For precise results, send a sample to your local cooperative extension office. They'll provide lab-tested data showing exactly how much elemental sulfur (1-2 pounds per 100 square feet) or peat moss you need to adjust your soil to that perfect 6.0-7.0 range. This level of precision prevents over-amending, which can actually harm your clematis roots.
Layering Your Loam Mix: When creating your 50-25-25 blend of garden loam, compost, and coarse sand/perlite, work in layers. Start with 4-6 inches of the coarse sand/perlite mixture at the bottom of your planting area to create immediate drainage. Then add your loam and compost mixture on top. This layering prevents waterlogging while still maintaining moisture retention—exactly what clematis roots crave for those vibrant blooms.
Mulch Placement Matters: That 3-4 inches of mulch you spread around your planting mound serves a critical purpose beyond just aesthetics. Place it in a donut shape around the base, keeping it 6 inches away from the stem to prevent rot. For extra protection in hot climates, consider using a light-colored mulch like pine straw—it reflects sunlight and helps maintain cooler soil temperatures where those vital roots reside.
Container Drainage Hacks: For container-grown clematis, never skip the elevation step. Place your 15+ gallon pot on feet or bricks to create space for drainage. You can also drill additional drainage holes in the bottom if your pot doesn't have them, then cover with landscape fabric to prevent soil from washing out. This simple adjustment prevents the number one killer of container clematis—root suffocation from poor drainage.
Pro Tips for Clematis Soil Requirements
- These pro insights will help you avoid common mistakes and create the ideal growing environment for your clematis.
- Soil Testing Accuracy: Don't rely on guesswork when testing pH—kits from garden centers can vary in accuracy.
- Layering Your Loam Mix: When creating your 50-25-25 blend of garden loam, compost, and coarse sand/perlite, work in layers.
Frequently asked questions
about clematis soil requirements—because even the best gardeners need a little clarity!What type of soil is best for clematis?
Clematis thrives in well-draining, slightly acidic to neutral loam (pH 6.0–7.0). Avoid heavy clay or waterlogged soil—amend with compost or organic matter to improve drainage and fertility. A mix of 60% topsoil, 30% compost, and 10% perlite or sand works wonders!
How long does it take for clematis to adapt to new soil?
With proper soil prep, clematis usually adjusts within 4–6 weeks. Focus on keeping the roots moist but not soggy during the first month. Mulch lightly to retain moisture and regulate temperature. Patience pays off—vibrant blooms often follow in the second year!
Can clematis grow in sandy soil?
Yes, but you’ll need to boost water retention and nutrients. Amend sandy soil with 3–4 inches of compost or peat moss and use a slow-release fertilizer. Mulching helps retain moisture. Monitor soil moisture closely—sandy soil dries out faster!
What if my clematis isn’t blooming? Could it be the soil?
Poor soil (too alkaline, compacted, or nutrient-poor) can stunt blooms. Test your soil’s pH—aim for 6.0–7.0. Add bone meal or composted manure for phosphorus (key for flowers) and ensure 6+ hours of sunlight. Overwatering or root rot can also kill blooms—check drainage!
Are there clematis varieties that tolerate poor soil?
Some hardy varieties, like Clematis montana or Clematis armandii, adapt to rocky or lean soils. However, even these benefit from annual compost top-dressing. For best results, improve soil gradually—even "tough" clematis love fertile, well-draining beds!
Wrapping up and next steps
Growing stunning clematis starts with understanding their soil needs—well-draining, slightly acidic loam with plenty of organic matter is key! 🌱 Whether you’re adjusting pH, improving drainage, or amending clay-heavy soil, small tweaks can lead to vibrant blooms and a thriving vine.
Don’t let intimidation hold you back; clematis are forgiving once their basic needs are met.
Ready to transform your garden? Test your soil today and take the first step toward a clematis paradise. Happy gardening! 🌸