
Flowers
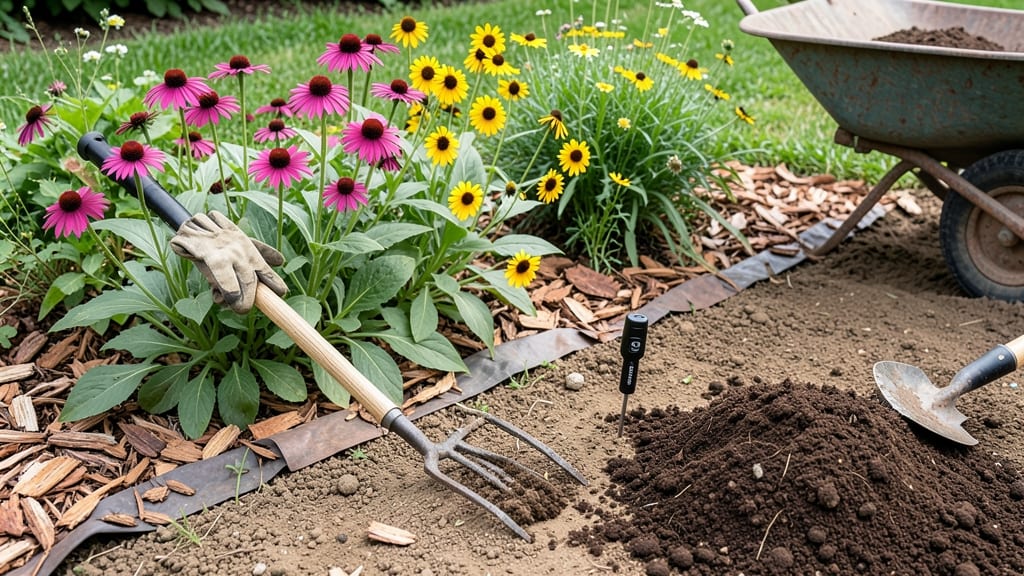
Flower bed soil preparation isn’t just about digging—it’s about creating the perfect loose, aerated base that lets roots breathe and thrive. 🌸 I've learned that the difference between a lackluster garden and one bursting with color often comes down to soil prep, not just the flowers you plant. A well-prepared bed holds moisture, drains properly, and gives plants the nutrients they need to flourish from the first bloom to the last frost.
The process starts with testing your soil's pH and texture—clay soils need sand and compost, sandy soils need organic matter to hold moisture, and loamy soils just need a boost of compost.
Most gardeners skip this step, but taking 10 minutes with a simple soil test can save you from struggling plants later. Once you know your soil type, amending it with 2-3 inches of compost or well-rotted manure works wonders for structure and fertility.
What you end up with is a bed where roots spread easily, water penetrates instead of pooling, and nutrients are available exactly when your flowers need them. The payoff? Vibrant blooms that last longer, healthier plants that resist disease, and a garden that looks stunning from spring to fall.
This prep work might feel tedious now, but it's the foundation of a garden that performs year after year.
Works for any flower bed size, from small borders to large perennial gardens. Whether you're starting fresh or reviving an old bed, the principles stay the same—just adapt the tools and timing to your space and climate. Let's get that soil ready for showstopping blooms!
📚 In This Guide
- What you need
- Instructions
- Tips and common mistakes
- Wrapping up and next steps
What you need
- ● Topsoil: 2–3 inches (5–7.5 cm) of high-quality, well-draining topsoil (check for organic content). Quantity depends on bed size—aim for ~1 cubic yard per 100 sq ft.
- ● Compost: 1–2 inches (2.5–5 cm) of well-aged compost (look for dark, crumbly texture). Boosts fertility without overwhelming roots.
- ● Perlite or Vermiculite: 1 part per 4 parts soil mix (by volume) to improve aeration and drainage.
- ● Garden Gloves: Heavy-duty, chemical-resistant gloves to protect your hands.
- ● Garden Rake: A sturdy, 12–18-inch bow rake for leveling and breaking up clumps.
- ● Shovel or Spade: A round-point shovel for digging and a border spade for edging.
- ● Wheelbarrow or Bucket: For hauling soil and amendments (10–15 gallons minimum).
- ○ Soil pH Test Kit: Optional but helpful to check acidity/alkalinity (ideal range: 6.0–7.0 for most flowers).
- ● Sand: Coarse sand (like horticultural sand) if your soil is heavy clay (mix 1 part sand to 3 parts soil).
- ● Slow-Release Fertilizer: Granular 10-10-10 or organic options like bone meal (follow package rates).
- ● Mulch: Shredded bark or straw (1–2 inches) to retain moisture and suppress weeds.
- ● Soil Aerator: Manual or powered tool for deep aeration in compacted soil.
- ● Knee Pads or Pad: For comfort during extended prep work.
Step-by-Step guide to preparing flower bed soil
Here's how to create the perfect loose, aerated base for flowers that bloom beautifully all season.
🌱 Step 1: Clear and Loosen the Existing Soil
Start by removing any weeds, rocks, or debris from your flower bed. I like to use a garden rake to pull out weeds at the roots—this prevents them from growing back. Once the bed is clear, use a broadfork or digging fork to loosen the soil to a depth of 12-16 inches. This breaks up compacted layers and allows roots to grow deeper.
Work the fork in and out in a crisscross pattern, lifting the soil slightly with each pass. You'll know you're doing it right when the soil feels light and crumbly, almost like fluffy cake batter. If the soil is extremely hard, you might need to water it first to make it easier to work with.
💧 Step 2: Amend the Soil with Organic Matter
Spread a 2-3 inch layer of compost or well-rotted manure evenly over the loosened soil. This adds essential nutrients and improves soil structure. I prefer compost because it's less likely to burn plants with excess nitrogen. Work the compost into the top 6 inches of soil using a garden fork or tiller.
Mix until the soil looks dark and rich, with no visible clumps of compost remaining. If your soil is sandy, you'll want to add 1-2 inches of peat moss or coconut coir to help retain moisture. For clay-heavy soil, mix in 1-2 inches of coarse sand or perlite to improve drainage.
☀️ Step 3: Test and Adjust Soil pH and Drainage
Take a small sample of your amended soil and do a simple pH test using a soil testing kit. Most flowers thrive in soil with a pH between 6.0 and 7.0. If your soil is too acidic or alkaline, you can adjust it by adding lime to raise the pH or sulfur to lower it. Follow the instructions on the product packaging for the correct amounts.
Next, check drainage by digging a small hole about 6 inches deep and filling it with water. If the water drains away within 30-60 minutes, your soil has good drainage. If it takes longer, mix in more sand or perlite to improve drainage. Well-draining soil prevents root rot and keeps plants healthy.
✂️ Step 4: Level and Prepare for Planting
Use a rake to level the soil surface, creating a smooth, even bed. Remove any large clumps or rocks that might interfere with planting. I like to walk over the bed to check for uneven spots—this helps ensure that water will distribute evenly when you water your flowers.
Finally, lightly tamp down the soil with the back of a rake or your hands to create a firm base for planting. This prevents seeds or young plants from sinking too deeply into the soil. Your flower bed is now ready for planting—loose, aerated, and full of nutrients for vibrant blooms all season long.
Tips & tricks for perfect flower bed soil preparation
Here's what I've learned after years of gardening—these small details make all the difference for that dreamy, loose soil your flowers will love.
Tool Technique: When loosening soil in Step 1, I've found that working the broadfork in a crisscross pattern is key. Start by inserting it at a 45-degree angle and lift gently—don't force it. Think of it like fluffing a pillow: you want to create air pockets without compacting the soil further. If you hit a particularly stubborn layer at 12-16 inches, stop and water that spot first to soften it up. This makes the job easier and prevents you from creating new compaction deeper down.
Compost Consistency: In Step 2, don't just eyeball that 2-3 inch layer of compost—use your rake to spread it evenly. I like to think of it like frosting a cake: you want an even distribution. For sandy soils, mix in that 1-2 inches of peat moss right after spreading the compost. The peat moss will absorb moisture and hold it near the roots where your flowers need it most. For clay soils, work the perlite into the top 6 inches as you mix—this creates tiny air pockets that break up the dense structure.
Drainage Test: That 30-60 minute drainage test in Step 3 is your soil's report card. If water disappears in 30 minutes, you're golden—your soil drains perfectly. But if it's still standing after 60 minutes, you need more sand or perlite. I've seen people add too much and create desert-like conditions, so aim for just enough to get that water moving. A good test is to squeeze a handful of your amended soil—it should hold together when moist but crumble easily when dry. This is the ideal texture for most flowers.
Pro Tips for Flower Bed Soil Preparation
- Here's what I've learned after years of gardening—these small details make all the difference for that dreamy, loose soil your flowers will love.
- Tool Technique: When loosening soil in Step 1, I've found that working the broadfork in a crisscross pattern is key.
- Compost Consistency: In Step 2, don't just eyeball that 2-3 inch layer of compost—use your rake to spread it evenly.
Frequently asked questions
Got questions about prepping your flower bed soil for the best blooms?
Here are answers to the most common ones—so you can skip the guesswork and get straight to gardening success!
When is the best time to prepare flower bed soil?
The ideal time is early spring (before planting) or late fall (6–8 weeks before the first frost). This gives soil time to settle, decompose, and warm up (or cool down) naturally. For perennials, fall prep is often best—it lets winter rains work organic matter into the soil.
Do I need to remove all grass before planting?
Not necessarily! If the grass is thin, smother it with cardboard or black plastic for 4–6 weeks to kill it. For thick grass, dig it out or use a glyphosate-free herbicide first. A mix of both methods works well for stubborn lawns.
What if my soil is too clay-heavy or sandy?
Clay soil? Amend with compost, peat moss, or coarse sand to improve drainage. Sandy soil? Mix in organic matter (compost, leaf mold, or aged manure) to retain moisture. Aim for a loamy texture—think crumbly, like cake batter!
How deep should I till or loosen the soil?
Loosen soil to a depth of 12–18 inches for roots to spread easily. Use a broadfork (for minimal disturbance) or a tiller for larger areas. Avoid over-tilling—just break up compaction without pulverizing the soil.
What should I do if my soil smells bad after adding compost?
A rotten-egg or sour smell usually means too much fresh organic matter or poor drainage. Fluff the soil, mix in dry amendments (like perlite or coarse sand), and water lightly. If the smell persists, let the compost age longer next time—hot composting speeds up decomposition!
Can I reuse old flower bed soil, or do I need fresh?
You can reuse soil, but refresh it with 2–3 inches of compost or aged manure. Test for pH (most flowers prefer 6.0–7.0) and add lime (to raise pH) or sulfur (to lower it) if needed. Drainage issues? Mix in vermiculite or sand.
Pro tip: Keep a soil journal! Note what you add each year—it’ll help you fine-tune your flower bed’s mix over time.
Wrapping up and next steps
Preparing your flower bed soil is the secret sauce for lush, thriving blooms that steal the show all year! 🌸 By focusing on loose, aerated soil, you’ve set the stage for roots to breathe, nutrients to flow, and flowers to flourish.
Remember—consistency is key, whether you’re amending clay-heavy soil or boosting sandy beds with organic matter.
Now that you’re armed with the know-how, roll up your sleeves and get digging! Start small with a single bed, test your progress, and watch your garden transform. Happy planting—your future floral masterpiece awaits! 🌱✨