
Tools
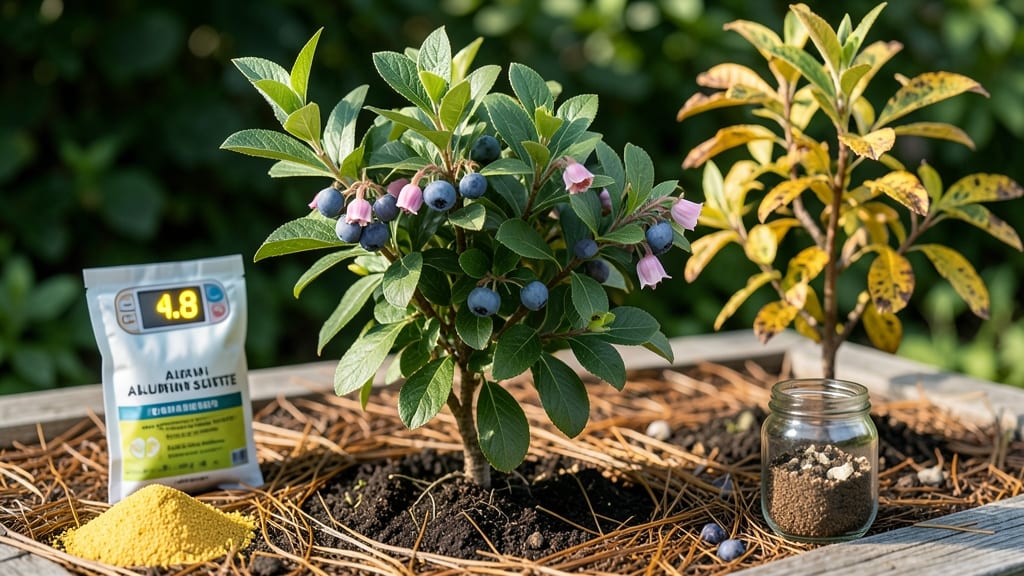
Your garden soil acidity is off—not because of water, but because the pH is wrong. 🌿 The secret to growing acid-loving plants like azaleas, rhododendrons, and blueberries lies in understanding soil acidity, and I’ve cracked the code after years of trial and error.
A simple pH test reveals whether your garden soil is too alkaline or too acidic, and small adjustments can transform struggling plants into thriving powerhouses.
The magic number for most acid-loving plants is 4.5 to 6.0—any higher, and nutrients like iron and manganese become locked away, leaving plants yellow and weak. I’ve seen gardens go from patchy, stunted growth to lush, vibrant beds just by adding a handful of elemental sulfur or pine needles.
The key is testing first, then making precise changes based on what your plants actually need.
By the end of this, you’ll know exactly how to raise or lower your soil’s pH using organic or chemical amendments, without overcorrecting. Your blueberries will produce bigger berries, your azaleas will bloom like crazy, and you’ll finally understand why your tomatoes keep turning yellow.
Let’s get those numbers just right.
Works for both in-ground gardens and containers, and the methods adapt to different climates. No more guessing—just science-backed adjustments for plants that thrive when the soil is just right.
📚 In This Guide
- What you need
- Instructions
- Tips and common mistakes
- Wrapping up and next steps
What you need
- ● Soil pH Testing Kit: Digital or liquid test kit (e.g., LaMotte or MySoil) for accurate readings.
- ● Garden Gloves: 1 pair (nitrile or rubber) to protect hands from soil and amendments.
- ● Garden Trowel or Shovel: Medium-sized (12–18") for soil sampling and mixing.
- ● 5-Gallon Bucket: For collecting and storing soil samples.
- ● pH Adjustment Amendments: Sulfur (Elemental or Pelletized): 10–20 lbs (for lowering pH—aim for 0.25–0.5 pH units per application).
- ● Lime (Dolomitic or Agricultural): 20–50 lbs (for raising pH—follow package rates).
- ● Peat Moss or Pine Bark: 5–10 cubic feet (organic matter to buffer pH naturally).
- ● Watering Can or Hose: For hydrating soil post-adjustment.
- ● Soil pH Meter: Portable probe for quick field tests (e.g., Apera or Bluelab).
- ● Compost or Worm Castings: 1–2 cubic feet (to improve soil structure and microbial activity).
- ● Calcium Sulfate (Gypsum): 10–15 lbs (for adjusting pH and improving soil texture).
- ● Spreader (Broadcast or Drop): For even distribution of amendments.
- ● pH Journal/Notebook: To track changes over time (because consistency is key!).
How to test and adjust garden soil acidity for perfect plant growth
Here's how I fine-tune soil pH for acid-loving plants—no guesswork, just science-backed results.
🌱 Step 1: Test Your Soil's Current pH Level
Grab a soil pH test kit (digital or liquid) and follow the instructions to collect a sample. I always test in multiple spots since pH varies across the garden. Dig down about 6 inches and scoop up a handful of soil from each area, then mix them together in a clean container.
Moisten the soil with distilled water (tap water can skew results) and insert the test probe or add the liquid reagent. Wait 30 seconds to 2 minutes for the reading. Most acid-loving plants thrive between 4.5 and 6.0 pH. If your reading is higher than 6.5, you'll need to lower the pH. Below 4.5? You'll need to raise it gently.
🌿 Step 2: Choose the Right Amendments for Your pH Goal
For lowering pH (raising acidity), I use elemental sulfur—it's slow-acting but reliable. Sprinkle 1-2 pounds per 100 square feet over the soil and water it in. It takes 2-3 months to adjust pH, so plan ahead. You'll see results when new growth appears with deeper green leaves.
To raise pH (reduce acidity), use garden lime (calcium carbonate) or wood ash. Apply 5-10 pounds per 100 square feet for lime or 1-2 pounds per 100 square feet for ash. Work it into the top 6 inches of soil and water thoroughly. Test again in 4-6 weeks—you'll notice a difference when leaves stop yellowing at the edges.
⏰ Step 3: Apply Amendments and Monitor Progress
Spread the chosen amendment evenly over the garden bed using a broadcast spreader or by hand. Lightly rake it into the top 1-2 inches of soil to avoid direct contact with plant roots, which can cause burning. Water the area deeply to help the amendments integrate.
Wait 4-6 weeks before retesting. I like to mark test spots with small flags so I remember where I sampled. If the pH still isn't in the ideal range, repeat the process with a slightly higher or lower dose. Over time, you'll learn how your soil responds—this is where patience pays off.
☀️ Step 4: Maintain Ideal pH for Long-Term Success
Once you've achieved the right pH, keep it stable by adding a slow-release amendment like peat moss (for acidity) or composted wood chips (for slight acidity) during spring planting. I mix 1-2 inches into the topsoil annually. This prevents drastic shifts while feeding beneficial microbes.
Watch your plants closely—they'll tell you if the pH drifts. Blueberries, azaleas, and hydrangeas love acid soil, so if their leaves turn yellow or growth stalls, test again. A happy plant in the right pH range grows strong, resists disease, and produces vibrant blooms or fruit.
Tips & tricks for perfect soil pH adjustments
These practical tips will help you get precise, long-lasting results when fine-tuning your garden's acidity.
Testing Accuracy: For the most reliable pH reading in Step 1, test your soil in multiple spots—especially if your garden has different areas or microclimates. I've seen pH readings vary by 0.5 points or more just a few feet apart! Mix the samples thoroughly and use distilled water only—tap water's minerals can skew your results by up to 0.3 points. The 30 seconds to 2 minutes wait time is crucial; don't rush this step or you might misread by 0.5 points or more.
Amendment Application Strategy: When applying elemental sulfur in Step 2, focus on the root zone where most plants absorb nutrients. Lightly rake it into the top 1-2 inches rather than sprinkling on the surface—this prevents wind from blowing it away and ensures better contact with moisture. For garden lime, I find it works best when applied in late fall or early spring when soil is naturally moist, helping the amendments integrate faster.
Monitoring Progress: The 4-6 week retest window in Step 3 is your best friend for tracking changes. I recommend marking test spots with small flags or stakes so you remember exactly where you sampled. If you're impatient, you can test as early as 3 weeks, but results may be less accurate. Watch for visual cues too—blueberries with deep purple leaves or hydrangeas with vibrant blooms often indicate successful pH adjustment.
Long-Term Maintenance: For maintaining ideal pH in Step 4, consider adding composted pine bark fines instead of peat moss—it's more sustainable and provides similar acidity while improving soil structure. I mix about 1 inch annually into my garden beds. Remember that organic matter naturally buffers pH changes over time, so you'll need to retest every 1-2 years rather than annually.
Pro Tips for Garden Soil Acidity
- These practical tips will help you get precise, long-lasting results when fine-tuning your garden's acidity.
- Testing Accuracy: For the most reliable pH reading in Step 1, test your soil in multiple spots—especially if your garden has different areas or microclimates.
- Amendment Application Strategy: When applying elemental sulfur in Step 2, focus on the root zone where most plants absorb nutrients.
Frequently asked questions
Got questions about garden soil acidity?
You’re not alone—balancing pH levels can feel tricky! Here are answers to the most common concerns to help you fine-tune your soil like a pro.
How do I know if my soil is too acidic for my plants?
Test your soil’s pH using a soil pH meter or test kit (available at garden centers). Most plants thrive between 6.0–7.0, but acid-lovers like blueberries, azaleas, and rhododendrons prefer 4.5–5.5. Yellowing leaves, stunted growth, or nutrient deficiencies (like iron chlorosis) are red flags!
How long does it take for lime or sulfur to adjust soil pH?
Results vary! Sulfur (to lower pH) can take 2–6 months to work, while lime (to raise pH) may show changes in 1–3 months, depending on soil type and weather. Test again after 3–6 months for accuracy. Pro tip: Mix amendments into the top 6 inches of soil for faster results!
Can I use vinegar or coffee grounds to acidify my soil?
While vinegar (acetic acid) can lower pH quickly, it’s risky—overuse burns plants and disrupts soil microbes. Coffee grounds (slightly acidic) are safer but won’t drastically change pH. For precision, stick to elemental sulfur or peat moss for long-term adjustments.
Will adjusting soil pH harm beneficial fungi or worms?
Extreme pH shifts (e.g., below 4.0 or above 8.0) can stress soil life, but gradual changes are usually safe. Mycorrhizal fungi (which help plants absorb nutrients) thrive in slightly acidic soil (5.5–6.5). Earthworms prefer 6.0–7.0, so monitor their activity if you’re targeting lower pH.
When is the best time to amend soil acidity?
Fall or early spring is ideal—soil is moist, and amendments have time to integrate before planting. Avoid adjusting pH right before sowing seeds or transplanting, as sudden changes can shock roots. Plan ahead: Test soil 2–3 months before planting acid-lovers for best results!
What if my soil pH keeps bouncing back after adjustments?
Persistent pH swings often mean organic matter depletion or high rainfall leaching amendments. Boost organic content with compost or pine needles (natural acidifiers), and retest every 6 months. Clay soils hold pH better than sandy soils—amend more frequently if yours is light and drains fast.
Wrapping up and next steps
Mastering your garden soil’s acidity is all about precision and patience—but the rewards are worth it! 🌱 By testing your soil’s pH and making thoughtful adjustments, you’ll create the perfect environment for acid-loving plants like blueberries, azaleas, or hydrangeas to thrive.
Start small, monitor changes, and soon, your garden will flourish with vibrant, healthy growth.
Ready to take the next step? Grab your soil test kit, roll up your sleeves, and experiment! Every tweak brings you closer to a stunning, plant-perfect paradise. Happy gardening! 🌿