
How To
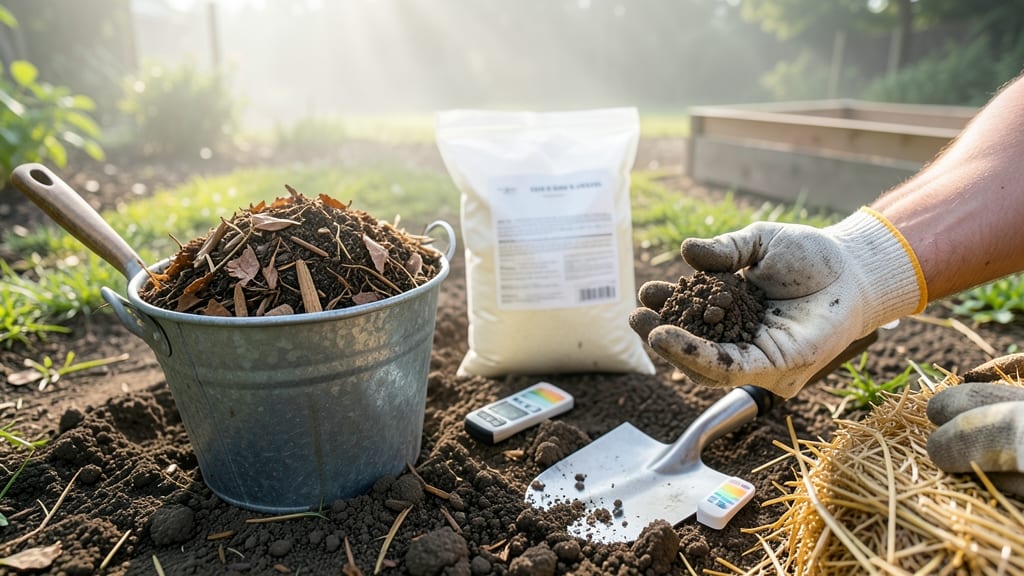
Amending clay soil for vegetable gardening isn't just possible—it's the secret to growing shockingly lush tomatoes and carrots in your backyard. 🌱 I spent years wrestling with my heavy clay, until I discovered the 30-minute mix that transforms it into a dream for roots.
The key? A strategic blend of organic matter, gritty materials, and a little patience to let nature do the rest.
Start with a simple test: grab a handful of damp soil and squeeze it—if it holds its shape like a brick, you're dealing with classic clay.
The fix comes from three core amendments: well-aged compost (for structure), coarse sand or perlite (for drainage), and a sprinkle of gypsum (to break up compacted layers). Most gardeners overlook the gypsum, but it’s the game-changer for stubborn clay.
By the time you’re done, your soil will crumble like cake instead of clinging to your shovel. Roots breathe easier, water drains properly, and vegetables thrive—no more soggy patches or stunted growth.
The best part? This mix lasts years with annual top-dressing of compost, so you’re not stuck redoing the work every season.
Fair warning: clay soil won’t transform overnight. Give it 6-8 weeks of regular watering and occasional tilling to fully integrate the amendments. But trust me—once your carrots grow straight and your tomatoes burst with flavor, you’ll wonder why you didn’t do this sooner.
📚 In This Guide
- What you need
- Instructions
- Tips and common mistakes
- Wrapping up and next steps
What you need
- ● Organic matter: Compost (2–4 inches spread evenly over the garden bed)
- ● Well-rotted manure (e.g., cow, horse, or chicken—avoid fresh!; 1–2 inches per square foot)
- ○ Amendments for structure & drainage: Peat moss or coconut coir (1–2 inches per square foot; optional but helpful for moisture retention)
- ● Coarse sand (e.g., builder’s sand or horticultural sand; 1–2 inches per square foot; skip if your soil is already sandy)
- ● Perlite or vermiculite (½ cup per square foot; boosts aeration and drainage)
- ● Soil conditioners: Gypsum (1–2 pounds per 100 square feet; breaks up clay without altering pH)
- ● Lime (if soil pH is below 6.0; test kit required; follow package instructions)
- ● Garden fork or broadfork (for deep tilling; rent or borrow if needed)
- ● Shovel or spade (for mixing amendments)
- ● Garden rake (for leveling and smoothing)
- ● Wheelbarrow or large bucket (for hauling materials)
- ○ Soil pH test kit (optional but highly recommended)
- ● Gloves and knee pads (for comfort!)
- ● Biochar (½ cup per square foot; improves water retention and microbial life)
- ● Worm castings (1 cup per square foot; adds nutrients and aeration)
- ● Cover crops (e.g., clover or winter rye; plant before amending for long-term soil health)
- ● Soil moisture meter (to monitor drainage progress)
Step-by-Step instructions for amending clay soil for vegetable gardens
Transform dense clay into a loose, fertile growing medium in under an hour—no heavy machinery needed.
🪴 Step 1: Test Your Soil’s Current Condition
Dig a hole about 6 inches deep and grab a handful of undisturbed soil. Squeeze it tightly—if it holds its shape like a brick, you’ve got classic clay. When wet, clay forms a slick, sticky mess that repels water; when dry, it cracks like desert earth. This texture suffocates roots and starves plants of oxygen, which is why we’re fixing it.
Look for signs of compaction: if the soil feels hard as a rock when dry or turns to mud when wet, you’re dealing with extreme clay. Even slightly dense clay benefits from amendments, but severe cases may need deeper work. I always test a few spots in my garden—what looks uniform on the surface often varies underground.
🌱 Step 2: Spread Organic Matter Evenly Across the Area
Use 2-4 inches of compost (the higher number for severe clay) spread evenly over the planting area. I like to work with well-aged compost—fresh manure can burn roots and create nitrogen spikes that disrupt the amendment process. Rake it lightly to break up clumps, but don’t dig it in yet. The goal is to create a loose top layer that will blend with the native soil during tilling.
For larger gardens, I divide the area into sections and work one at a time. This prevents compaction from foot traffic and lets me focus on even distribution. If you’re planting in rows, spread a 2-inch band of compost directly where vegetables will go—this creates ideal growing conditions right where roots will develop.
✂️ Step 3: Till the Amendments Into the Top 6-8 Inches
Use a broadfork or tiller to blend the compost into the top 6-8 inches of soil. I prefer a broadfork for small plots because it aerates without pulverizing soil structure—clay benefits from large air pockets, not fine dust. Work in one direction first, then turn at a 90-degree angle to break up compaction layers without creating a tilled pan.
Stop when the soil looks like crumbly chocolate cake—not smooth and silty, but with visible organic matter mixed throughout. If you hit a layer of pure clay, don’t force it. Instead, add another 1-inch layer of compost and till again. The key is patience: clay wants to stay compacted, so you’ll need to work it until resistance gives way.
💧 Step 4: Add Structural Amendments for Long-Term Drainage
For vegetable gardens, blend in 1 part coarse sand or perlite per 3 parts soil to improve drainage without altering texture too drastically. I use builder’s sand (not fine beach sand) because its larger particles create channels for water movement. Work it into the top 4-6 inches where most roots will grow, focusing on areas where water pools after rain.
If your clay is extremely dense, consider adding 10-20% peat moss to the mix—it holds moisture while improving aeration. The trick is balance: too much sand makes soil gritty and nutrient-poor, while too much peat can create a waterlogged mess. I like to mix amendments in layers: compost on top, then sand/peat below, then till everything together for even distribution.
☀️ Step 5: Build a Permanent Mulch Layer
Top the amended soil with 2-3 inches of straw or wood chips to protect your work. Mulch prevents rain from compacting the newly loosened soil and slowly breaks down, adding more organic matter over time. I use straw because it decomposes predictably and doesn’t draw nitrogen from the soil like fresh wood chips might.
Leave a 2-inch gap around plant stems to prevent rot. Water the mulch layer lightly after application to help it settle and make contact with the soil below. This final step is what keeps your clay soil improvements lasting through multiple growing seasons—without mulch, heavy rains will quickly re-compact the surface.
Tips & tricks for perfect clay soil amendments
Transforming heavy clay into a thriving vegetable garden takes patience—and these insider tricks make all the difference.
Soil Testing Precision: When testing your soil in Step 1, look for both texture and color clues. Healthy clay should crumble between your fingers when dry and hold moisture without becoming waterlogged. If your sample feels like wet cement, you're dealing with severe compaction that will need extra compost (up to 4 inches) and deeper tilling. The color should be dark brown or black—not gray or white—which indicates better organic content.
Compost Layer Strategy: In Step 2, I recommend working in sections because clay soil can quickly re-compact under foot traffic. For raised beds, you can actually skip tilling entirely and just layer compost (2-3 inches) directly on top, then plant through it. This "lasagna gardening" method works beautifully for heavy clay and saves time. The key is maintaining that 2-inch gap around plants when you finally add mulch—this prevents rot while allowing air circulation.
Tilling Technique: For Step 3, if you don't have a broadfork, a sturdy garden fork works just as well. The secret is to angle the tines downward at 45 degrees when you pull upward—this breaks compaction layers more effectively than vertical stabbing. I've found that working the soil when it's slightly damp (not wet) prevents clumping. Stop when you see visible organic matter throughout, not when the soil looks perfectly smooth—clay benefits from some texture.
Layering Secrets: When adding structural amendments in Step 4, think of it like building a lasagna. Start with your native clay at the bottom, then add a 1-inch layer of coarse sand or perlite, followed by 2 inches of compost. This creates drainage channels while keeping nutrients near the surface. For extreme clay, mix in 10% peat moss only in the top 4 inches where most vegetable roots will grow—this prevents waterlogging without creating a soggy mess.
Pro Tips for Amend Clay Soil For Vegetable Gardening
- Transforming heavy clay into a thriving vegetable garden takes patience—and these insider tricks make all the differe...
- Soil Testing Precision: When testing your soil in Step 1, look for both texture and color clues. Healthy clay should ...
- Compost Layer Strategy: In Step 2, I recommend working in sections because clay soil can quickly re-compact under foo...
Frequently asked questions
Got questions about transforming your heavy clay soil into a veggie-growing paradise?
You’re not alone! Here are answers to the most common concerns—plus a few pro tips to keep your garden thriving.
1. How often should I amend clay soil for best results?
For dramatic improvement, amend your clay soil once a year—ideally in early spring or fall. If your soil is extremely dense, spread a 2–3 inch layer of compost or organic matter annually to maintain structure. For quick fixes before planting, mix in amendments 2–4 weeks ahead to let them integrate.
2. Can I use just compost, or do I need sand and other additives?
While compost is a must-have (it improves fertility and structure), sand alone isn’t enough—it can create a cement-like mix. Instead, combine compost with coarse sand (50% or less), peat moss, or perlite for drainage. Aim for a 30-40% sand ratio max to avoid compacting the soil further.
3. How long does it take to see improvements in clay soil?
You’ll notice immediate drainage changes after amending, but full transformation takes 1–2 growing seasons. Roots will penetrate deeper, and soil structure improves as organic matter breaks down. Test progress by squeezing a handful—if it crumbles easily, you’re on the right track!
4. What’s the best way to test if my amendments worked?
Try the “squeeze test”: Grab a moist clump of soil—if it holds shape but crumbles when dropped, drainage is good. For a science-backed check, use a soil permeability test kit or dig a hole to observe water drainage (it should seep away in 1–2 hours, not pool).
5. My plants still look stressed—what am I missing?
Stressed plants in amended clay often signal one of three issues:
- Over-amending with sand: Reduce sand; focus on organic matter (compost, leaf mold).
- Poor watering habits: Clay holds moisture—water deeply 2–3x/week (not daily).
- Nutrient imbalance: Add a balanced fertilizer (like 10-10-10) or bone meal for phosphorus.
If roots look waterlogged, improve aeration with gypsum (calcium sulfate) or deep tilling (if soil isn’t rock-hard).
Wrapping up and next steps
Amending clay soil doesn’t have to be a daunting task—with the right mix of organic matter, patience, and a little elbow grease, you can transform dense, compacted earth into a thriving vegetable garden.
Remember, consistency is key: regular testing, mulching, and organic additions will keep your soil light, fertile, and perfect for root growth. 🌱
Now that you’re armed with the know-how, grab your tools and start small. Test a patch, observe changes, and gradually expand. Before you know it, you’ll be harvesting homegrown veggies from soil that’s as easy to work as it is rewarding!