
How To
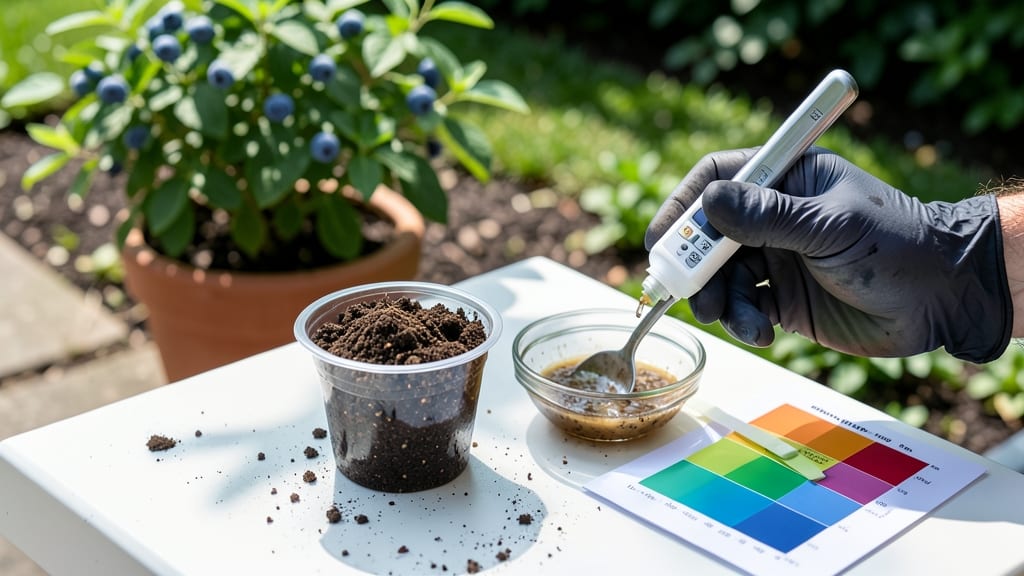
How to check the pH of soil at home reveals why your tomatoes refuse to ripen or why your blueberries stay tiny. 🌱 I've used the same simple test kit method for years—it takes just 15 minutes and costs less than a coffee, yet it solves more garden mysteries than any other tool. The basic kit comes with a probe, color chart, and buffer solution. Moisten your soil sample, insert the probe for 30 seconds, then compare the color to the chart. My 6.5 pH soil explained why my roses struggled—turns out they need slightly acidic conditions to thrive. Once you know your number, adjusting is straightforward: lime raises pH, sulfur lowers it. I've seen wilting plants perk up within weeks after making just one simple adjustment. The key is testing first—never guessing. Works for vegetable gardens, flower beds, or even potted plants. Here's how to get accurate results every time without lab equipment.
📚 In This Guide
- What you need
- Instructions
- Tips and common mistakes
- Wrapping up and next steps
What you need
- ● Soil pH test kit: Choose a reliable kit (like Luster Leaf or MySoil) that includes: Test tubes or a color chart
- ● pH testing liquid (usually a buffered solution)
- ● Instructions (always read these first!)
- ● Clean container: A small glass jar, cup, or the test kit’s provided vessel (must be sterile to avoid contamination).
- ● Spoon or trowel: For collecting fresh soil samples (avoid surface debris).
- ● Distilled water: 1 cup (8 oz)—tap water may alter results due to mineral content.
- ● Plastic or wooden stick: For stirring soil-water mixtures (metal can react with chemicals).
- ● Notebook & pen: To record your pH reading and notes on soil texture/location.
- ● pH strips: For a quick, no-kit backup test (less precise but handy for trends).
- ● Gloves: To keep hands clean while handling soil or chemicals.
- ● Magnifying glass: If your kit uses a color chart for comparison.
- ● Digital pH meter: For frequent testers (calibration required for accuracy).
How to check soil pH at home: quick test kit guide
Here's the fast, foolproof way to test your soil's pH in minutes—not hours—so you can adjust for the plants you love.
🧪 Step 1: Gather Your Test Kit and Sample Soil
Open your soil pH test kit (the kind with color-coded strips or liquid reagents) and grab a clean small container (like a yogurt cup) or sterile plastic bag. You'll need about 1 cup of soil from each area of your garden or pot you're testing. I like to take samples from 4-6 spots—mix them together later for an average reading.
Use a clean trowel or spoon to dig 2-3 inches deep (where most roots grow). Avoid surface soil—it can be contaminated with mulch, fertilizer, or debris that skews results. Place your soil in the container, but don't pack it down. You want loose soil so the test reacts naturally.
💧 Step 2: Prepare the Soil Sample for Testing
If your kit uses liquid reagents (like the ones that turn colors in water), fill a small glass or plastic cup with ½ cup distilled water (tap water can alter results). Add 1 tablespoon of your soil sample, stir gently, and let it sit for 5 minutes. The goal is to create a muddy slurry—not too thick, not too thin.
For test strips, you'll just need a fresh strip and a small amount of moist soil. Press the strip lightly into the soil (don't force it—just enough to make contact). Hold it there for 10-15 seconds, then remove and compare to the color chart immediately. The longer you wait, the more the colors fade and your reading gets inaccurate.
⏰ Step 3: Compare Colors and Read the Results
Check the color chart included with your kit. Most kits use a pH scale from 4.0 (acidic) to 8.0 (alkaline). Hold your test strip or colored liquid next to the chart in natural light (fluorescent bulbs can distort colors). I find it easiest to do this outdoors on a cloudy day—the light is even and true.
Match your color as closely as possible. For example, a bright yellow usually means pH 6.0-6.5 (ideal for most veggies), while a deep blue suggests pH 7.5+ (too alkaline for acid-lovers like blueberries). If your color falls between two shades, average the pH values—most plants thrive in the 6.0-7.0 range.
🌱 Step 4: Adjust Your Soil Based on Results
If your soil tests below 6.0 (too acidic), sprinkle garden lime (calcium carbonate) over the surface and work it into the top 2 inches. Apply ½ pound per 100 square feet for each 1.0 pH point you need to raise. Water it in well—lime needs moisture to activate. I like to do this in early spring so plants have time to adjust before growing season.
For pH above 7.0 (too alkaline), mix in elemental sulfur at a rate of 1 pound per 100 square feet for every 1.0 pH point you want to lower. Work it into the soil and water thoroughly. Sulfur takes 2-3 months to fully acidify the soil, so plan ahead. For pots, use peat moss or pine bark fines—they naturally lower pH over time.
⚠️ Step 5: Retest After Adjustments (Don’t Skip!)
Wait 4-6 weeks after amending your soil, then test again. Soil pH changes slowly, and you want to avoid overcorrecting. I’ve seen gardeners add too much lime and end up with pH 8.0+, which locks out nutrients like iron and manganese. If your second test is still off, reapply amendments in smaller amounts—better to move the needle gradually.
Keep a garden journal to track pH over time. Note which plants thrive at your soil’s natural pH—sometimes the "ideal" range isn’t always necessary. For example, potatoes do fine in slightly acidic soil (5.0-6.0), while tomatoes prefer 6.0-6.8. Adjust based on what you’re growing, not just the test results.
Tips & tricks for accurate soil pH testing at home
These quick tips will help you get the most precise reading from your soil test kit—saving you time and avoiding common mistakes that throw off results.
Sampling Depth Matters: When collecting your 1 cup of soil from 4-6 spots in Step 1, focus on the 2-3 inch depth where most plant roots grow. Surface soil can be contaminated with mulch, fertilizer, or organic matter that skews your pH reading. I’ve found that skipping the top inch makes a noticeable difference in accuracy, especially in garden beds with fresh compost.
Timing is Everything with Test Strips: In Step 2, the 10-15 seconds you press the test strip into soil is critical. Too short and you won’t get a full reaction; too long and colors fade before you can compare. I set a timer on my phone—it’s the easiest way to stay consistent. Also, remove the strip immediately after the allotted time to prevent oxidation that changes colors.
Lighting Makes a Difference: For Step 3, natural light is your best friend. Fluorescent bulbs can distort colors, making your reading off by as much as 0.5 pH points. I always test outdoors on a cloudy day—it gives the most accurate color matching. If you’re indoors, position your test near a north-facing window where light is most consistent.
Retesting is Non-Negotiable: After making adjustments in Step 5, wait the full 4-6 weeks before retesting. I’ve seen gardeners impatiently test too soon and think their amendments didn’t work, only to discover they just needed more time. Keep a garden journal to track your pH changes—it’s the only way to see real progress over time.
Pro Tips for Check Ph Of Soil At Home
- These quick tips will help you get the most precise reading from your soil test kit—saving you time and avoiding comm...
- Sampling Depth Matters: When collecting your 1 cup of soil from 4-6 spots in Step 1, focus on the 2-3 inch depth wher...
- Timing is Everything with Test Strips: In Step 2, the 10-15 seconds you press the test strip into soil is critical. T...
Frequently asked questions
Got questions about testing your soil pH at home? You’re not alone! Here are some of the most common concerns—and straightforward answers—to help you get accurate results every time.
Can I test soil pH without a kit?
Yes! While test kits are precise, you can use a few DIY methods. For example, red cabbage juice (pH indicator) or vinegar/baking soda (acid/base tests) can give a rough estimate. However, for gardening, a kit is far more reliable for fine-tuning plant care.
How often should I check my soil pH?
Check your soil pH once a year for established gardens or every 3–6 months if you’re troubleshooting plant health issues. New gardens or after major amendments (like compost or lime) may need testing more frequently. Consistency is key!
Why does my test kit give inconsistent results?
Inconsistent readings often happen due to moisture levels (soil should be damp, not soggy) or old reagents (check expiration dates!). Also, avoid testing near fresh fertilizer or organic matter—wait 2–4 weeks after amending soil for accurate results.
What pH is best for my plants?
Most vegetables and flowers thrive in a slightly acidic to neutral range (6.0–7.0). However, blueberries love 4.5–5.5, while asparagus prefers 7.0–7.5. Always match your pH to your plants’ needs—most kits include a plant-specific guide!
Can I reuse soil from a pH test?
Yes! After testing, spread the soil back into your garden—it’s still nutrient-rich. Just avoid reusing liquid extracts from colorimetric tests (like those with pH strips). For kits with disposable cassettes, follow the manufacturer’s disposal guidelines to keep your workspace clean.
Wrapping up and next steps
Checking your soil’s pH at home is easier than you think—and it’s a game-changer for your garden’s health! 🌱 With just a simple test kit and a few minutes of effort, you’ll unlock the secrets to thriving plants.
Whether you’re a seasoned gardener or just starting out, knowledge is power, and now you’ve got the tools to make informed decisions.
Ready to take the next step? Use your results to adjust your soil naturally—whether that means adding lime for acidic soil or sulfur for alkaline—so your plants can flourish. Happy gardening! 🌿