
How To
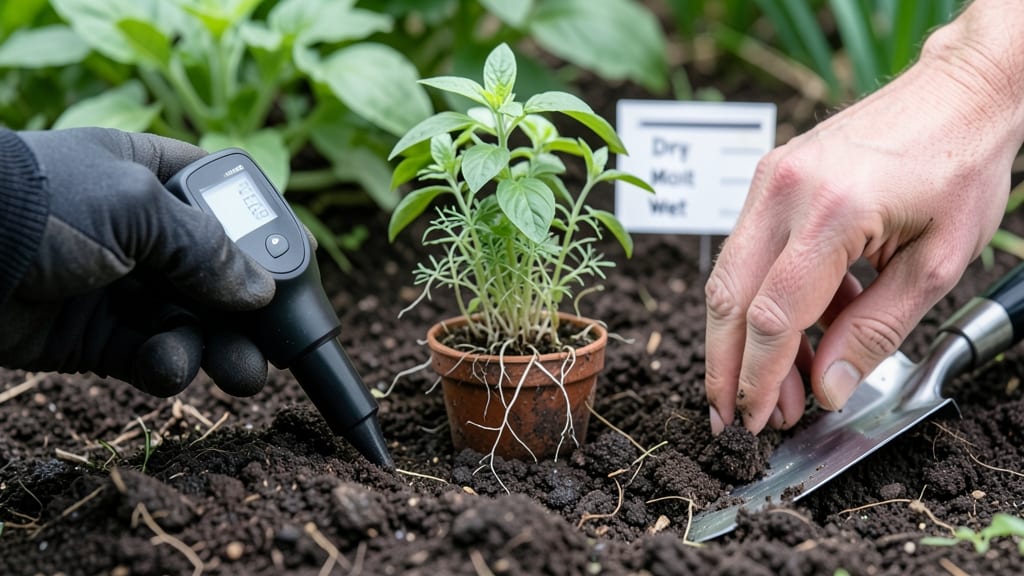
Your plants' health starts with how to check soil moisture—and the finger-dip test is the simplest way to get it right. 🌱 I've watered by schedule for years, only to watch roots suffocate or leaves crisp from thirst, until I learned this foolproof method that keeps soil perfectly moist without guesswork.
The secret is in the texture: stick your finger about 1-2 inches deep, and if the soil feels dry, it's time to water. Sandy soil drains fast, so check daily, while clay holds moisture longer—adjust your routine based on what you find.
Most plants prefer soil that's damp but not soggy, like a wrung-out sponge.
You'll spot the difference immediately: roots stay white and active, leaves stay plump, and you'll never overwater again. The test takes 10 seconds but saves hours of trial-and-error watering that wastes resources and stresses plants.
Works for containers, raised beds, or in-ground gardens—just adjust the depth for larger plants. Here's how to master it every time.
📚 In This Guide
- What you need
- Instructions
- Tips and common mistakes
- Wrapping up and next steps
What you need
- ● Healthy plants – Any potted or garden plant with visible soil (the more the merrier!)
- ● Clean hands – No dirt under your nails (trust us, this matters!)
- ○ Notebook & pen (optional but helpful) – To log moisture levels and plant responses over time.
- ● Soil moisture meter – A digital or analog probe for exact readings (great for data lovers!).
- ● Trowel or small shovel – For digging deeper (1-2 inches) if you’re curious about moisture layers.
- ● Timer or stopwatch – To track how quickly soil dries out after watering.
- ● Spray bottle with water – For a light mist test on delicate plants.
Step-by-step instructions for mastering the finger-dip soil moisture test
Here's how I check soil moisture with precision—no guesswork, just science-backed results.
💧 Step 1: Prepare Your Hands and Soil Surface
Wash your hands thoroughly first—clean fingers detect subtle moisture differences. Choose a spot 2-3 inches deep where roots actively grow, avoiding surface crust or mulch that can mislead readings. I like to test near the base of stems where water first drains.
Use your index finger (longest and most sensitive) to gently break through the soil surface. If it's crumbly and dry, you're ready. If it's sticky or glistening, wait 10-15 minutes for surface moisture to evaporate before testing deeper.
🌱 Step 2: Perform the Finger-Dip Test at Correct Depth
Insert your finger 1-2 inches deep—this is where most plant roots absorb water. Press lightly but firmly to feel soil texture. Sandy soils feel gritty even when moist, while clay holds dampness longer. The goal is to detect consistent moisture, not just surface dampness.
Twist your finger slightly to break soil bonds and get an accurate reading. You'll feel three distinct textures: dry (powdery), ideal (slightly resistant), or overwatered (soggy). I keep a small notebook nearby to track daily readings—patterns reveal your plant's true water needs.
☀️ Step 3: Interpret Results with Plant-Specific Guidelines
For most container plants, soil should feel lightly moist but not saturated—like a wrung-out sponge. Succulents and cacti should feel completely dry at 2-3 inches deep, while tropical plants prefer top 1 inch consistently damp. I've learned to adjust my watering schedule based on these readings rather than sticking to rigid timelines.
Watch for visual cues too: wilted leaves often signal underwatering, while yellowing or moldy soil means overwatering. The finger test catches problems before they appear. Real talk: I used to water based on time, but now I water based on what my fingers tell me—and my plants thrive.
⏰ Step 4: Schedule Watering Based on Findings
Water when the soil reaches your plant's ideal moisture level. For example, if your basil prefers top 1 inch damp and your test shows dryness at 1 inch deep, water thoroughly until it runs out the drainage holes. For drought-tolerant plants like lavender, wait until 3 inches deep feels completely dry before watering again.
I set a timer for 10 minutes after watering to let excess drain, then check again. The soil should feel evenly moist but not waterlogged. This method prevents both underwatering (stressed plants) and overwatering (root rot). You'll develop an intuitive sense of when to water after a few weeks of testing.
🌿 Step 5: Adjust for Seasonal and Environmental Changes
In summer, soil dries faster due to heat and wind—check moisture daily for container plants. In winter, reduce testing frequency as evaporation slows. I also adjust based on humidity: my indoor plants need watering more often in dry winter months when home heating kicks in.
Pay attention to your local climate too. Coastal areas with high humidity may require less frequent watering than inland regions. Keep a log of your findings—you'll notice patterns that help you anticipate watering needs before problems arise. This test isn't just about moisture; it's about understanding your specific growing conditions.
Tips & tricks for perfect soil moisture testing
A few subtle adjustments can transform this simple test into a precise gardening tool that prevents both underwatering and overwatering.
Finger Sensitivity Training: Your fingers become more accurate with practice—start by testing different soil types (sandy vs. clay) to develop a reference for textures. I notice most beginners confuse dry sandy soil with moist soil because of its gritty texture. Try this: press your finger into a known-dry soil sample first, then compare it to your plant's soil. The difference in resistance becomes your benchmark.
Depth Consistency Matters: Always test at the same depth for each plant type—1-2 inches for most plants, 2-3 inches for established perennials. I keep a small ruler nearby to verify depth, especially when testing multiple plants. Shallow tests give false readings because surface moisture doesn't reflect root zone conditions. This is where most overwatering mistakes happen.
Time of Day Testing: Test soil moisture in the morning after surface evaporation has occurred but before afternoon heat dries deeper layers. I've learned that afternoon tests often show artificially dry conditions. For container plants, test right after removing them from saucers to get an accurate reading of what the roots actually experienced.
Environmental Logging: Keep a simple log of your test results alongside weather conditions. Note whether it rained the night before, if winds were strong, or if your home's humidity was unusually low. After tracking for two weeks, you'll spot patterns—like how your basil needs water every 3 days in summer but stretches to 5 days in winter. This turns the finger test from a one-time check into a predictive tool.
Pro Tips for Check Soil Moisture
- A few subtle adjustments can transform this simple test into a precise gardening tool that prevents both underwaterin...
- Finger Sensitivity Training: Your fingers become more accurate with practice—start by testing different soil types (s...
- Depth Consistency Matters: Always test at the same depth for each plant type—1-2 inches for most plants, 2-3 inches f...
Frequently asked questions
Got questions about checking soil moisture? You're not alone!
Here are answers to the most common queries to help you keep your plants thriving with ease.
How often should I check soil moisture?
Check soil moisture before watering—typically 1-2 times a week for most plants. Newly planted or potted plants may need daily checks until established. Adjust based on weather: hot/dry days mean more frequent checks, while cool/rainy days reduce the need. Pro tip: Overwatering is riskier than underwatering, so err on the side of caution!
What if my finger test feels inconsistent?
Inconsistencies often mean uneven water distribution. Try these fixes:
- Gently loosen compacted soil with a fork to improve drainage.
- Water deeply (until it runs out the drainage holes) to saturate roots.
- Use a moisture meter for a second opinion if results vary drastically.
Can I use a moisture meter instead of the finger test?
Moisture meters are great for precision and are especially useful for:
- Large gardens or hard-to-reach areas.
- Plants sensitive to over/underwatering (e.g., succulents, orchids).
- Soils that feel deceptive (like sandy or clay-heavy mixes).
Why does my soil feel moist but my plant still looks wilted?
Wilted plants in "wet" soil often suffer from root rot or poor drainage. Check these signs:
- Yellowing leaves or a foul smell = overwatering.
- Dry topsoil but damp lower layers = uneven watering.
- Crusty or waterlogged soil = drainage issues.
Does the finger test work for all types of soil?
The finger test works best for loamy or well-draining soils. For tricky soils:
Soil Type
Adjustment
Sandy soil
Feels dry faster—check more often and water deeply.
Clay soil
Holds moisture longer; insert your finger deeper (2-3 inches).
Peat moss or coconut coir
Can feel moist but dry out quickly—use a meter for accuracy.
Wrapping up and next steps
Checking soil moisture doesn’t have to be complicated—with just your fingers and a little practice, you can give your plants the perfect care they deserve! 🌱 Whether you’re a seasoned gardener or a beginner, mastering this simple technique ensures your greens thrive without over- or under-watering. Now that you’re equipped with the know-how, why not take the next step? Experiment with different plants, track moisture patterns, and fine-tune your watering schedule for a lush, healthy garden.
Happy growing! 🌿