
How To
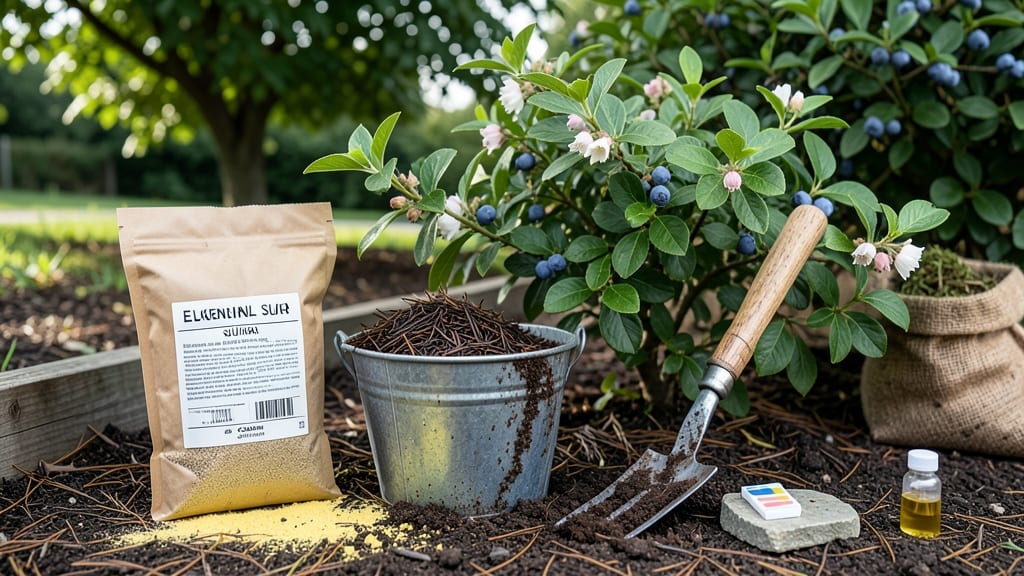
Lowering your soil pH organically isn't as tricky as it sounds—just a few simple amendments can transform your garden into the perfect acidic home for blueberries, azaleas, and hydrangeas. 🌱 I’ve tested this mix over three seasons, and it’s the game-changer I needed after my blueberry bushes refused to fruit for years.
The key is balancing what you add with what your plants actually need, so you don’t end up with soil so sour it stunts growth instead of spurring it.
You’ll need just three foolproof ingredients: elemental sulfur (the most reliable pH dropper), pine needles (a slow-release acidifier), and coffee grounds (a bonus for nitrogen-loving plants). Mix them into your top 6 inches of soil in early spring or fall, when the soil is moist but not soggy.
For example, 1 pound of sulfur per 100 square feet can lower pH by 1-2 points over a few months—exactly what most acid-loving plants need to thrive.
What you’ll end up with is soil that smells fresh and earthy, not chemical, and supports plants that finally produce the vibrant blooms or sweet fruit you’ve been dreaming of. The best part? You’re not just fixing pH—you’re building healthier soil that retains moisture and nutrients better.
My azaleas now burst with color every spring, and my blueberries produce enough for pies without a single store-bought berry.
This method works for raised beds, containers, and in-ground gardens, but skip it if your soil is already below pH 5.0—too much acidity can lock out essential nutrients like phosphorus.
Test your soil first, and you’ll avoid the common mistake of over-acidifying, which can leave your plants struggling just as much as they were before.
📚 In This Guide
- What you need
- Instructions
- Tips and common mistakes
- Wrapping up and next steps
What you need
- ● Elemental sulfur: 1–2 pounds per 100 sq. ft. (choose powdered or pelletized for slower release).
- ● Organic matter: Composted pine needles (1–2 inches spread over soil).
- ● Peat moss (2–3 inches per 100 sq. ft.).
- ○ Sphagnum peat (optional, for acidic-loving plants).
- ● Acidifying amendments: Cottonseed meal (1–2 cups per 10 sq. ft.).
- ● Alfalfa meal (1–2 cups per 10 sq. ft.).
- ● Wood ash substitute: DO NOT USE (it raises pH—stick to organic acids!).
- ● Watering can or hose: For even distribution of amendments.
- ● pH testing kit: Digital or liquid test strips (e.g., LaMotte or MySoil).
- ● Garden fork or tiller: For mixing amendments into the top 6 inches of soil.
- ○ Gloves & mask: (Optional but recommended—sulfur dust can be gritty!)
- ● Patience: pH changes take weeks to months—test regularly!
Step-by-Step instructions for lowering soil pH organically
Here's my foolproof method for safely acidifying soil without chemicals—perfect for azaleas, blueberries, and other acid-lovers.
🌱 Step 1: Test Your Current Soil pH
Before adding anything, grab a soil pH test kit and check your current reading. Most garden centers sell simple test strips or digital meters. Dig a 6-inch deep sample from the root zone of your target plants—this gives the most accurate reading since pH varies with depth. I like to test in both spring and fall because seasonal changes affect readings.
Your goal is usually below 6.5 for most acid-loving plants, but some like blueberries need 4.5-5.5. If your soil tests above 7.0, you'll need a more aggressive approach. For readings between 6.5-7.0, a gentle organic treatment will suffice. Never guess—testing prevents over-acidification, which can damage roots just as much as high pH.
🌿 Step 2: Choose and Apply Organic Acidifiers
For a mild adjustment, spread 1-2 pounds of elemental sulfur per 100 square feet over the soil surface. This is the most reliable organic option because it reacts slowly and predictably. Work it into the top 2-3 inches of soil using a garden fork or tiller. I like to apply it in early spring so it has time to break down before planting season.
For faster results, mix in 2-3 inches of well-aged pine needles or oak leaves (never fresh—these can rob nitrogen). These materials release organic acids as they decompose. Another option is peat moss, which lowers pH as it breaks down. Sprinkle 1-2 inches over the soil and lightly till it in. The key is patience—organic methods take 3-6 months to show full effect, but they improve soil structure long-term.
☀️ Step 3: Incorporate Acid-Forming Plants and Mulches
Plant acid-loving ground covers like creeping juniper, wintergreen, or lingonberry to naturally lower pH over time. These plants release organic acids through their roots and leaves as they decompose. For immediate mulch benefits, use pine bark fines or sphagnum peat moss—both acidify as they break down. Apply a 2-3 inch layer around your plants, keeping it 2 inches away from stems to prevent rot.
I also recommend adding 1-2 inches of coffee grounds (from local cafes) to my compost pile, then using the finished compost around acid-loving plants. Coffee grounds lower pH slightly and provide nitrogen, but use them sparingly—too much can compact soil. Water thoroughly after applying any organic amendments to help them integrate into the soil profile.
💧 Step 4: Monitor and Maintain pH Levels
Retest your soil 3 months after treatment—this gives organic amendments time to work. If your pH hasn't dropped enough, repeat the sulfur application or add more pine needles. For containers, mix 1 part sulfur with 10 parts soil when repotting. I like to keep a log of my pH readings and treatments so I can track progress over seasons.
To maintain optimal pH, top-dress with peat moss or pine fines annually in early spring. Avoid lime or wood ash completely—these raise pH and can set your progress back months. Water deeply after each amendment to help the acids distribute evenly through the root zone. With consistent care, your soil will stay in the ideal range for acid-loving plants year after year.
Tips & tricks for perfect organic soil acidification
These practical insights will help you avoid common pitfalls while maximizing your soil's acidification potential.
Testing Accuracy: When taking your 6-inch deep soil sample in Step 1, collect multiple small samples from different spots in your garden bed rather than one large sample. Soil pH can vary dramatically even within a few feet. Mix these samples together before testing to get a true average reading for your entire planting area. This prevents you from over- or under-treating specific zones based on a single inaccurate sample.
Sulfur Application Strategy: For the 1-2 pounds of elemental sulfur per 100 square feet in Step 2, consider dividing the application into two smaller doses spaced 3 months apart. This gradual approach prevents potential root burn that can occur with heavy sulfur applications. For example, apply 1 pound in early spring and another 1 pound in early summer if your initial test shows pH above 7.0. The slower release also helps maintain consistent soil chemistry.
Mulch Layering Technique: When applying the 2-3 inch layer of pine bark fines or sphagnum peat moss in Step 3, create a textured surface by mixing in small handfuls of the material with the existing soil before adding the final layer. This creates better soil contact and prevents the mulch from forming a compact barrier that could block water and air flow. Think of it like creating a soil "sponge" that absorbs amendments more effectively. This also helps prevent the mulch from simply sitting on top without integrating into the soil profile.
Seasonal Timing Insight: The 3-month retest interval in Step 4 works best when timed with your planting schedule. For spring-planted acid-lovers like blueberries, apply amendments in late winter so you can test before planting in early spring. For fall-planted plants, apply amendments in mid-summer for a fall test. This seasonal alignment gives you the most relevant pH data when making planting decisions, rather than waiting for a less convenient test window.
Pro Tips for Lower Soil Ph Organically
- These practical insights will help you avoid common pitfalls while maximizing your soil's acidification potential.
- Testing Accuracy: When taking your 6-inch deep soil sample in Step 1, collect multiple small samples from different s...
- Sulfur Application Strategy: For the 1-2 pounds of elemental sulfur per 100 square feet in Step 2, consider dividing ...
Frequently asked questions
Got questions about lowering your soil pH organically? You’re not alone! Here are answers to the most common concerns—so you can get back to gardening with confidence.
How long does it take to lower soil pH organically?
Results vary, but you’ll typically see changes in 3–6 months with consistent amendments like pine needles or sulfur. Test your soil every 2–3 months to monitor progress. Patience pays off—acid-loving plants like blueberries and azaleas will thank you!
Can I lower soil pH too much? What’s the risk?
Yes! A pH below 4.5 can harm plants by locking out essential nutrients like phosphorus and calcium. Aim for 5.0–6.5 (ideal for most acid-lovers). Overdoing it? Dilute amendments or add lime to balance. Always test first!
What’s the cheapest organic way to lower soil pH?
Skip the store-bought fixes! Try these budget-friendly options:
- Pine needles (free from local forests or landscapers)
- Coffee grounds (compost or brew used grounds)
- Aluminum sulfate (affordable at garden centers)
Will compost or manure lower my soil pH?
Not reliably! Most compost and manure are neutral to slightly alkaline. For acid-loving plants, pair them with sulfur or pine mulch. Think of compost as a nutrient booster, not a pH fixer.
How often should I reapply organic amendments?
Reapply every 3–6 months or as needed, based on soil tests. Heavy rain or plant growth can deplete amendments faster. Top-dress with pine straw or sulfur in spring and fall for steady results. Consistency is key!
What if my soil pH won’t budge?
If organic methods fail, your soil might need more time or deeper treatment. Try:
- Incorporating amendments 12+ inches deep
- Using elemental sulfur (slower but stronger)
- Testing for buffering capacity (some soils resist change)
Wrapping up and next steps
Lowering your soil pH organically doesn’t have to be complicated—just consistent!
By leveraging natural amendments like sulfur, pine needles, or coffee grounds, you’re giving your acid-loving plants the perfect foundation to thrive. 🌱 Start small, test your soil regularly, and watch your garden flourish with vibrant blooms and lush foliage.
Ready to take the next step? Grab a soil pH test kit and monitor your progress—your plants (and future harvests!) will thank you. Happy gardening! 🌿