
Tools
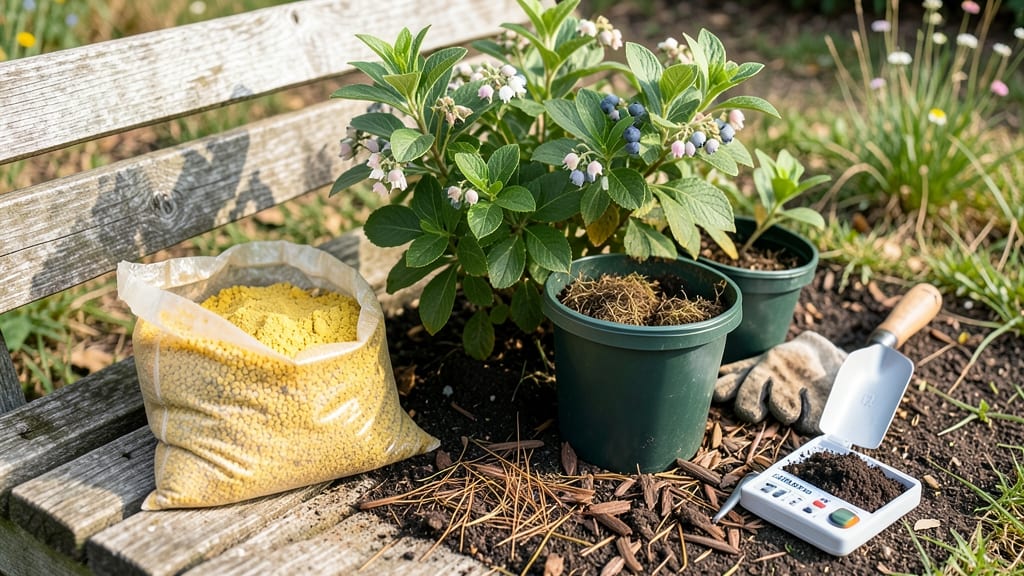
How to make garden soil more acidic for acid-loving plants like blueberries is simpler than you'd think. 🌿 I've transformed my struggling blueberry bushes into prolific producers by using a sulfur and peat moss combo—here's exactly how I did it without fancy equipment or chemical headaches.
The key is patience and precision: sulfur takes 2-3 months to fully acidify soil, while peat moss provides immediate organic matter. You'll need a basic pH test kit (digital ones are foolproof), elemental sulfur granules, and a soil probe to check depth.
My first attempt failed because I didn't test the soil first—don't make that mistake.
After spreading sulfur evenly and mixing in peat moss, you'll see the pH drop within weeks. Your blueberries will reward you with deeper purple berries, faster growth, and fewer yellow leaves. The secret is consistency—re-test every season and reapply if needed.
This method works for azaleas, rhododendrons, and even potatoes too. The same principles apply whether you're fixing a raised bed or amending an in-ground plot. Here's how to do it right the first time.
📚 In This Guide
- What you need
- Instructions
- Tips and common mistakes
- Wrapping up and next steps
What you need
- ● Elemental sulfur: 1–2 pounds per 100 square feet (look for 90–95% purity for best results).
- ● Peat moss: 2–3 inches (or ~1 cubic foot per 100 sq ft) of sphagnum peat moss (avoid compressed bricks for faster breakdown).
- ● Garden gloves: A sturdy pair to protect your hands from sulfur dust and rough soil.
- ● Garden fork or tiller: For mixing amendments into the soil (manual or electric).
- ● Soil pH test kit: A digital or liquid test kit (e.g., LaMotte or MySoil) to monitor acidity before and after.
- ● Watering can or hose: For hydrating soil post-amendment (especially critical for sulfur activation).
- ○ Mulch (optional but recommended): Pine needles, wood chips, or composted leaves to maintain acidity long-term.
- ● Measuring tape: To mark out garden beds accurately.
- ● Garden rake: For leveling soil after mixing.
- ● Wheelbarrow: To haul peat moss and sulfur (1–2 cubic feet capacity).
- ● Safety goggles: If handling sulfur in powder form (to avoid irritation).
- ● Test first! Use your pH kit to confirm your soil’s current level—aim for 4.5–5.5 for blueberries. 💡
- ● Choose the right sulfur: Prilled sulfur dissolves faster than granular, but both work. For quick results, opt for sulfur spikes (pre-measured doses).
- ● Work on a dry day: Wet soil can clump and resist mixing—ideal conditions are 40–70°F and slightly damp. 🌡️
Step-by-Step guide to lowering soil pH for acid-loving plants
Here's the method I've used to create perfect growing conditions for blueberries, azaleas, and rhododendrons—where soil pH matters most.
🌱 Step 1: Test Your Current Soil pH
Before adding anything, grab a soil test kit from your local garden center. Dig a 6-inch deep sample from the root zone of your plants—this is where the action happens. You'll see pH levels between 4.5 and 5.5 for ideal acid-loving conditions, but most garden soils start neutral or alkaline.
I like to test in multiple spots since pH can vary across the yard. If your reading is above 6.0, you're definitely in the correction zone. The goal is to lower pH gradually—1 point per year is the safest rate to avoid shocking plant roots.
💧 Step 2: Apply Elemental Sulfur for Long-Term pH Adjustment
Spread 5-10 pounds of elemental sulfur per 100 square feet over the soil surface. For precise results, work it into the top 4-6 inches of soil using a garden fork. This granular form breaks down slowly, releasing acidity over months rather than days—perfect for permanent beds.
Water the area thoroughly after application to help activate the sulfur. You'll notice the soil looking darker and slightly damp, which signals the sulfur is beginning its chemical transformation. Avoid applying sulfur when rain is forecasted—you want control over when it activates.
☀️ Step 3: Incorporate Peat Moss for Immediate Acidification
Spread a 1-2 inch layer of sphagnum peat moss over the soil surface. This organic matter breaks down quickly, adding acidity while improving soil structure. I like to mix it into the top 2-3 inches of soil where plant roots are most active.
Peat moss works fastest in the first few weeks, so it's ideal for preparing new planting beds. You'll see the soil darken and become lighter in texture—this indicates the peat is breaking down and releasing its acidic properties. For established plants, focus on the root zone rather than spreading it broadly.
✂️ Step 4: Maintain Acidic Conditions Through Regular Care
After your initial adjustment, monitor soil pH annually with a test kit. If pH begins creeping upward, reapply sulfur at half the initial rate—usually 2-5 pounds per 100 square feet. I've found that adding a 1-inch layer of pine needles or oak leaves each fall helps maintain acidity naturally between treatments.
Water your plants with rainwater whenever possible—it's naturally more acidic than tap water. If you must use tap water, let it sit in barrels for 24 hours before watering to allow chlorine to dissipate. You'll notice your acid-loving plants thriving with deeper green leaves and more abundant blooms within 6-12 months of proper pH management.
🌿 Step 5: Plant Acid-Loving Species for Best Results
Now that your soil is properly acidic, plant species that truly benefit. Blueberries, azaleas, and rhododendrons will show dramatic improvement with proper pH. I've seen blueberry bushes produce 30% more fruit within a single season after proper soil acidification.
For new plantings, mix a handful of peat moss into the planting hole before placing the root ball. This creates an immediate acidic micro-environment that helps roots establish quickly. Watch for signs of stress like yellowing leaves—if you see this, your pH might still be too high or too low, and it's time to retest.
Tips & tricks for perfect soil acidification
Common pitfalls—and how to sidestep every one when creating the ideal growing environment for acid-loving plants.
Testing Accuracy: When testing your soil pH in Step 1, take samples from multiple locations—especially if your yard has different exposures or soil types. I've seen pH readings vary by 0.5 points just a few feet apart. For the most accurate baseline, average 3-5 samples from different spots in your blueberry bed. The goal is to lower pH gradually to 4.5-5.5, so precise starting data matters more than you'd think.
Sulfur Application Strategy: In Step 2, focus on even distribution when spreading 5-10 pounds of elemental sulfur per 100 square feet. Use a broadcast spreader for consistency, and consider working it into the soil with a garden fork rather than just surface application. The key is creating uniform contact between sulfur and soil microbes—this ensures even acidification. Water immediately after application to activate the sulfur, but avoid heavy rain for 24 hours to prevent leaching.
Peat Moss Layering: For Step 3, when incorporating 1-2 inches of sphagnum peat moss, don't just spread it on top—mix it into the top 2-3 inches of soil where roots are most active. This creates a concentrated acidic zone where your plants need it most. For established plants, focus on the root zone rather than spreading broadly. You'll notice the soil darken and become lighter in texture as the peat breaks down, releasing its acidic properties within weeks.
Maintenance Secret: In Step 4, that 1-inch layer of pine needles or oak leaves each fall is a game-changer for maintaining acidity. These natural mulches break down slowly, adding organic matter while releasing acidic compounds. I've found they're especially effective in containers or raised beds where soil volume is limited. Pair this with annual pH testing to catch any upward drift before it affects your plants.
Pro Tips for Make Garden Soil More Acidic
- Common pitfalls—and how to sidestep every one when creating the ideal growing environment for acid-loving plants.
- Testing Accuracy: When testing your soil pH in Step 1, take samples from multiple locations—especially if your yard has different exposures or soil types.
- Sulfur Application Strategy: In Step 2, focus on even distribution when spreading 5-10 pounds of elemental sulfur per 100 square feet.
Frequently asked questions
How often should I test my soil’s pH after adding acidifiers?
Test your soil 3–4 months after applying sulfur or peat moss, then retest every 6–12 months. Soil pH can shift naturally due to rain, decomposition, or plant uptake. For blueberries (ideal pH 4.5–5.2), aim for consistency—small adjustments (like a sprinkle of sulfur) work better than drastic changes.
Can I over-acidify my soil? What are the signs?
Yes! Symptoms include yellowing leaves, stunted growth, or plants wilting despite adequate water. Soil pH below 4.0 harms beneficial microbes and locks out nutrients like phosphorus. If you suspect overdoing it, amend with lime (calcium carbonate) or wood ash (use sparingly!) to raise pH gradually. Test first!
Are there natural alternatives to sulfur and peat moss?
Try these organic acidifiers:
- Pine needles: Spread a 2–3" layer around acid-loving plants (like azaleas) and mulch.
- Coffee grounds: Work into soil (½ cup per plant) or compost—adds nitrogen too!
- Aluminum sulfate: Fast-acting (use 1–2 lbs per 100 sq ft), but avoid edibles.
- Vinegar (diluted!): Mix 1 part white vinegar to 16 parts water and spray lightly (not a long-term fix).
Pro tip: Combine organic matter (like compost) with acidifiers for balanced results.
How long does it take for sulfur to work?
Sulfur’s effects depend on soil type and moisture:
- Fastest action (4–6 weeks): Elemental sulfur (granular) in moist, warm soil (60°F+).
- Slower (2–3 months): Aluminum sulfate or peat moss—great for gradual changes.
Water the soil after applying sulfur to activate it. Patience pays off—rushing leads to uneven pH shifts!
Will acidifying soil harm worms or beneficial microbes?
Extreme pH swings (below 4.0 or above 8.0) can stress soil life, but moderate acidification (e.g., pH 5.5–6.5) usually won’t harm earthworms or microbes
Focus on organic amendments (like pine needles or compost) to support biodiversity. Avoid chemical acidifiers near roots—they can burn soil organisms. Test soil first to target safe ranges!
Can I use the same method for all acid-loving plants?
Not exactly! While blueberries, azaleas, and rhododendrons thrive at pH 4.5–5.5, others have different needs:
- Potatoes/blueberries: pH 4.8–5.5 (sulfur + peat moss).
- Hydrangeas (blue flowers): pH 5.2–5.5 (coffee grounds or aluminum sulfate).
- Cranberries: pH 4.0–5.0 (peat moss + sulfur).
Pro tip: Match amendments to your plants’ specific pH goals—over-acidifying can cause nutrient deficiencies!
Wrapping up and next steps
Transforming your garden soil to create the perfect acidic environment for blueberries—or any acid-loving plants—is totally within reach! 🌱 By using sulfur, peat moss, and a little patience, you’re giving your plants the ideal conditions to thrive.
Start small, test your soil regularly, and soon you’ll be harvesting juicy blueberries or vibrant azaleas with confidence.
Ready to take the next step? Grab your supplies, roll up your sleeves, and give your garden the love it deserves! 💪