
How To
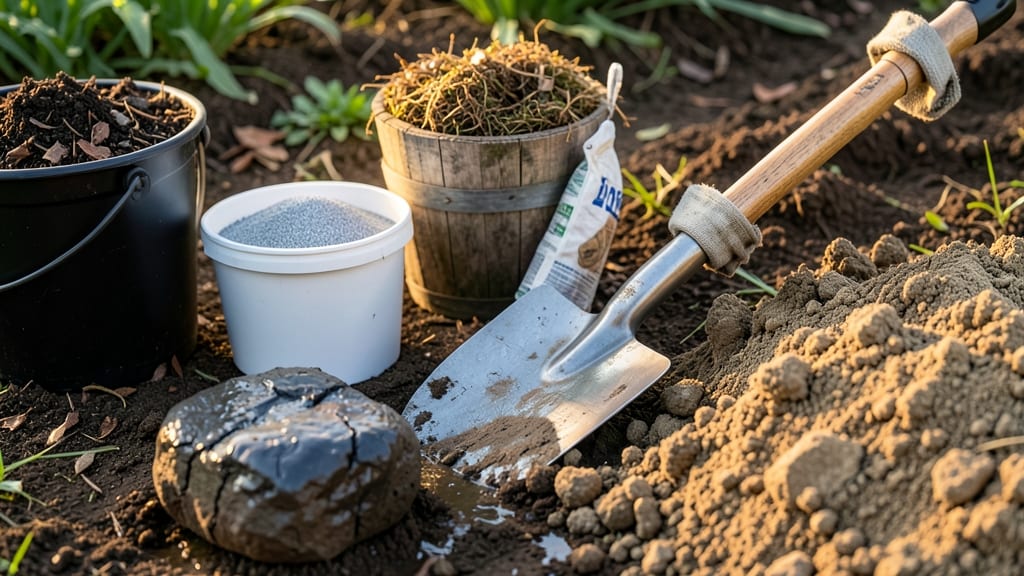
How to soften clay soil for digging—that stubborn, brick-hard earth that clings to your shovel like glue? I’ve turned my once-impossible clay into workable ground using these air-pocket tricks that save your back—and your sanity. The secret lies in breaking up compaction before you dig, not after you’ve sweated through a failed attempt. Start with organic matter (compost or peat moss) to create pockets where roots and tools can glide, then let nature do the rest over time.
You’ll need a few simple tools: a broadfork (for deep aeration), compost or aged manure, and patience—this isn’t a one-day fix. Mix in 2-3 inches of compost into the top 6 inches of soil, then fork it in to loosen.
If your clay is extremely dense, a sprinkle of gypsum (not lime!) can help over 6-12 months by improving structure without altering pH. Think of it like untangling a knotted rope: slow, steady pressure wins.
By the time you plant, your soil will crumble like cake—not the gluey mess that made digging feel like wrestling. Roots breathe easier, water drains better, and your shovel slides through instead of fighting.
The best part? This method builds long-term fertility, so next season’s digging becomes a breeze. No more cursing clay—just effortless tilth that rewards every forkful.
Pro tip: Test your soil’s moisture before working—clay stays workable when it’s damp but not soggy. If it’s bone-dry, water it first; if it’s muddy, wait. Timing matters more than brute force.
For heavy clay gardens, repeat this process every 2-3 years to maintain that perfect, fluffy texture. Your plants (and your back) will thank you.
📚 In This Guide
- What you need
- Instructions
- Tips and common mistakes
- Wrapping up and next steps
What you need
- ● Organic matter: Compost (5–10 gallons per 10 sq ft) – must be well-aged
- ○ Peat moss (2–3 bags per 10 sq ft) – optional but speeds up results
- ● Leaf mold or grass clippings (1–2 inches thick layer) – free and effective!
- ● Amendments (pick one or mix): Sand (coarse, 20–30 lbs per 10 sq ft) – improves drainage
- ● Perlite or vermiculite (5–10 lbs per 10 sq ft) – lightens texture
- ● Coco coir (1–2 bags per 10 sq ft) – retains moisture
- ● Tools: Garden fork or broadfork (heavy-duty, 18–24 inches long)
- ● Shovel (round-point or spade)
- ● Rake (bow or leaf rake)
- ● Wheelbarrow (for hauling amendments)
- ● Garden hose with spray nozzle (for wetting soil)
- ● Gypsum (10–20 lbs per 100 sq ft) – breaks up clay without altering pH
- ● Soil pH tester – check if amendments are needed
- ● Knee pads or gardening gloves – because comfort matters!
- ● Soil aerator (manual or powered) – for deep air pockets
- ● Rain tarp – protects your work if weather delays
Step-by-Step instructions for softening clay soil
This method transforms stubborn clay into workable soil without heavy equipment or chemicals.
Test Soil Moisture and Condition
Before adding anything, grab a handful of dry clay soil and squeeze it. If it forms a hard, tight ball that cracks when dropped, it's too dry. If it sticks to your hands and feels slick, it's too wet. You want soil that holds together when squeezed but crumbles easily when touched—this is your target consistency.
Clay soil holds moisture tightly, so you'll need to work in dry conditions. Check the forecast for a dry spell of at least 2-3 days before starting. This ensures any water you add will penetrate rather than just sit on top. If your soil is already waterlogged, skip to Step 3—you'll need to dry it out first.
Aerate the Soil with Organic Matter
Spread a 2-3 inch layer of coarse organic matter—like compost, leaf mold, or well-rotted manure—over the area you're preparing. This isn't just filler; it creates tiny air pockets that break up the dense clay structure. Work it into the top 6 inches of soil using a broadfork or sturdy garden fork, inserting it vertically and rocking back and forth to loosen without turning the soil.
Don't dig deeply at first—focus on the top layer where roots will grow. You'll see the clay start to break into clumps rather than one solid mass. If the soil resists, add a little more organic matter and repeat. The goal is to create a spongy texture, not perfectly loose soil. This process might take 30-60 minutes for a 4-foot by 4-foot area, depending on how compacted your clay is.
Water Deeply and Strategically
Once the soil has organic matter mixed in, water it deeply but slowly using a hose with a gentle spray nozzle or a soaker hose. You're not trying to flood the area—aim for 1-2 inches of water to penetrate 6-8 inches deep. Let the water soak in completely before moving on. If the water pools on top, you're adding too much too fast; clay soil can't absorb it quickly.
Wait 24-48 hours before tilling again. This gives the water time to soften the clay and allows the organic matter to start breaking it down. You'll know it's working when the soil surface feels slightly damp but not soggy, and you can press your finger into it 1 inch deep without resistance. If it still feels hard, repeat the watering process.
Till When Soil is Workable
Now, use a broadfork, tiller, or even a sturdy shovel to work the soil. The key is to till when the soil is damp but not wet—this is the only time you'll get clean, clump-free tilth. Start at the edges and work inward, lifting and dropping the fork to break up large clods. Avoid walking on freshly tilled soil; your weight will compact it again.
If you hit a layer of hardpan (a dense, almost rock-like layer 6-12 inches down), stop tilling. Instead, use a soil knife or chisel to score the surface in a grid pattern. This creates channels for water and roots to penetrate without disturbing the entire layer. Over time, the organic matter and roots will naturally break it down.
Maintain Soil Structure Long-Term
After tilling, spread a 1-inch layer of mulch (like straw or wood chips) over the area. This protects the newly loosened soil from drying out too quickly and prevents the clay from re-sealing. Water lightly every 2-3 days for the first 2 weeks to encourage root growth and keep the soil from hardening again.
For future projects, add 1-2 inches of compost annually and avoid heavy foot traffic on the bed. Over time, the organic matter will keep the clay loose and improve drainage. You'll notice the difference in the first planting season—roots will spread easily, and water will drain better, reducing puddles and erosion.
Tips & tricks for working with stubborn clay soil
These practical insights will help you transform even the toughest clay into garden-friendly ground with minimal effort.
Organic Matter Selection: Not all organic matter works equally well for clay soil. I've found that well-rotted manure breaks down clay faster than compost because of its higher nitrogen content, which helps microbial activity. If you're using leaf mold, make sure it's fully decomposed—fresh leaves won't provide the same air-pocketing benefits. For best results, mix your organic matter with the top 6 inches of soil using a broadfork rather than turning it, which prevents compacting the clay further.
Weather Timing Secret: The 2-3 day dry spell mentioned in Step 1 isn't just about water penetration—it's about giving the organic matter time to start working before you add moisture. I've learned the hard way that trying to work clay soil after rain just makes it stickier and harder to till. Check the forecast for a dry window, and if you're in doubt, wait an extra day. The soil will thank you when you finally get that spongy texture instead of a brick-like mass.
Watering Technique: When you're aiming for that 1-2 inch deep water penetration in Step 3, think of it like making a smoothie—you want the water to blend in, not just sit on top. Use a soaker hose placed in a zigzag pattern across the bed, or create small mounds in the soil to help direct water deeper. The goal is to get that water working with the organic matter to break down the clay from within, not just sitting on the surface where it'll evaporate.
Pro Tips for Soften Clay Soil For Digging
- These practical insights will help you transform even the toughest clay into garden-friendly ground with minimal effort.
- Organic Matter Selection: Not all organic matter works equally well for clay soil.
- Weather Timing Secret: The 2-3 day dry spell mentioned in Step 1 isn't just about water penetration—it's about giving the organic matter time to start working before you add moisture.
Frequently asked questions
How long does it take for clay soil to soften after adding amendments?
This depends on the method used! Watering and aeration (like forking) can soften soil in hours, while organic matter (compost, peat moss) may take weeks to months to fully break down. For quick results, combine both—water first, then add amendments and till. Patience is key for deep, long-term improvements!
Can I soften clay soil overnight for digging?
Not reliably, but you can speed up the process! Soak the area thoroughly with water, then use a broadfork or aerator to create air pockets. For faster results, mix in gypsum or sand (if drainage is the issue) and cover with plastic sheeting to trap moisture. Check in the morning—it’ll be much easier to work with!
What’s the best organic matter to break up clay soil?
Start with compost (rich in microbes) or well-rotted manure—these improve structure over time. For quicker fixes, try peat moss or coconut coir (holds moisture) or leaf mold (great for long-term fluffiness). Avoid fresh sawdust or wood chips; they can compact further as they decompose.
Will tilling clay soil without softening it first damage my tools?
Dry, hard clay is like concrete—it’ll dull blades, strain engines, and even bend tines. Always prep the soil first (water + aerate) or use a heavy-duty tilling tool with sharp blades. If you’re renting equipment, ask for a rototiller with a depth control to avoid overworking the soil.
What if it rains right after I amend my clay soil?
Rain can be a double-edged sword: it helps soften soil but may also compact it if the ground is too wet. If heavy rain follows, let the soil dry slightly (1–2 days) before tilling again. If it’s muddy, wait until it’s damp but crumbly—like a well-wrung sponge. Overworking soggy clay = more problems!
Wrapping up and next steps
Softening clay soil doesn’t have to be a battle—with the right techniques, you can transform stubborn ground into workable earth in no time! 🌱 Whether you’re using organic matter, air pockets, or simple tools, these methods will make digging a breeze and set you up for healthier plants.
Now that you’re armed with the know-how, grab your tools and get ready to turn that tough soil into garden gold.
Your next step? Try one of these methods this weekend—start small, observe how your soil responds, and adjust as needed. Happy digging!