
Propagation
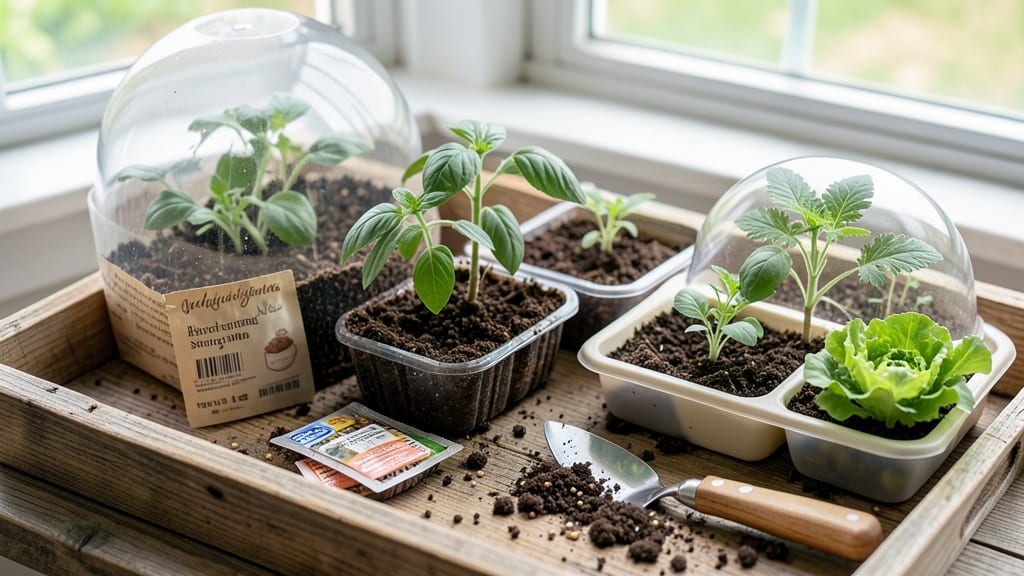
The right potting soil for seeds isn't just dirt—it's the foundation for fast, reliable germination. I learned this the hard way after my first batch of seedlings rotted in dense garden soil. Seed-starting mix is sterile, fluffy, and designed to cradle tiny roots while preventing disease.
Most garden soils contain pathogens and compact too tightly, smothering new sprouts. A good seed mix has 30-50% perlite or vermiculite for aeration, plus peat or coconut coir to hold moisture without drowning roots. The texture should resemble crumbled cake—not packed earth.
You'll see sprouts emerge in half the time compared to regular soil, with stronger stems that resist damping-off. The secret is keeping it consistently moist (not soggy) and warm—just above room temperature works best.
Avoid common mistakes like reusing last year's mix (sterility degrades) or mixing in compost (too many nutrients burn seedlings). For best results, top with a thin layer of sterilized sand or perlite to lock in moisture.
📚 In This Guide
- What you need
- Instructions
- Tips and common mistakes
- Wrapping up and next steps
What you need
- ● Seed-starting mix (sterile potting soil): 1–2 cubic feet (or 1–2 gallons per seed tray) of lightweight, sterile mix (look for labels like "seed-starting mix" or "soilless mix"). Avoid garden soil—it’s too dense and may contain pathogens.
- ○ Optional but recommended: Add perlite or vermiculite (10–20% by volume) for better aeration and drainage.
- ● Containers: Seed trays, peat pots, or small pots (2–4 inches deep) with drainage holes. Pro tip: Repurpose yogurt cups or egg cartons if you’re budget-friendly! 💡
- ● Plastic wrap or a humidity dome (to retain moisture during germination).
- ● Watering tools: Spray bottle (for gentle hydration) or a watering can with a fine rose attachment.
- ● Sterilization supplies (for reuse): Bleach solution (1 part bleach to 9 parts water) or a sterilizing agent (like hydrogen peroxide) to clean containers.
- ● Heat mat: Speeds up germination for slow starters (like peppers or tomatoes).
- ● Grow lights: LED or fluorescent lights (12–16 hours/day) for seedlings that need extra light.
- ● Fertilizer: A balanced, water-soluble fertilizer (5-10-5 or 10-10-10) diluted to half-strength for post-germination feeding.
- ● pH testing kit: Ensures your soil is in the ideal range (usually 6.0–7.0 for most seeds).
How to prepare potting soil for seed germination
Here's my foolproof method for creating the ideal seed-starting mix that speeds germination and prevents disease.
Select the Right Base Soil
Start with a high-quality seed-starting mix designed specifically for germination—not garden soil or potting mix meant for mature plants. These blends contain fine, sterile particles that encourage even moisture distribution and root development. I always check the label for "sterile" or "seed-starting" on the bag, as regular potting mixes may contain compost or organic matter that introduces pathogens.
For larger batches, you can blend 50% peat moss or coconut coir with 50% perlite or vermiculite to create a lightweight, airy medium. The key is avoiding anything that compacts or holds too much moisture—seeds rot before they sprout in dense soil. If you're planting delicate seeds like snapdragons or petunias, I recommend adding a handful of sand to improve drainage further.
Sterilize the Mix
Even sterile seed-starting mixes can harbor dormant fungi or bacteria, so I sterilize everything before use. Spread the mix on a baking sheet and bake at 200°F for 30 minutes to kill pathogens. Alternatively, microwave the mix in 2-cup increments for 2-3 minutes until steaming hot—just don't overdo it, or the structure will break down.
Let the mix cool completely before handling. I like to store sterilized batches in airtight containers until ready to use, which keeps them fresh for up to 3 months. This step is non-negotiable for seeds like lettuce or basil, which are particularly susceptible to damping-off disease. If you skip sterilization, you risk losing your entire batch to mold before germination even begins.
Adjust Moisture and Texture
Add warm water gradually to the cooled mix until it reaches a consistency like a damp sponge—squeeze a handful, and just a few drops should bead on the surface. Overwatering at this stage compacts the soil and suffocates seeds. For fine seeds like carrots or parsley, I sift the mix through a ¼-inch mesh screen to remove clumps and ensure even planting depth.
For heavier seeds like beans or peas, a slightly coarser texture works better. I test consistency by filling a small container and pressing gently—if it holds its shape but crumbles easily, it's ready. Too loose, and seeds won't stay in place; too firm, and roots struggle to penetrate. This is where patience pays off—take your time to get it right.
Pre-Warm for Faster Germination
Place filled seed trays on a seedling heat mat set to 75-85°F for 12-24 hours before planting. The gentle warmth jumpstarts metabolic activity in the seeds, often cutting germination time in half. I cover the trays with plastic wrap during this phase to retain moisture and create a mini greenhouse effect.
Watch for condensation on the plastic—this indicates the ideal humidity level. If you don't have a heat mat, place trays on top of your refrigerator or near a sunny window (but not in direct sunlight yet). The goal is to mimic the warm, moist conditions seeds experience in nature. Once seeds are planted, maintain this warmth until you see 50% germination, then reduce heat to prevent leggy growth.
Maintain Sterility After Planting
After sowing, avoid disturbing the soil surface to prevent introducing contaminants. Water from below by placing trays in ½-inch of water for 10-15 minutes instead of top-watering, which can dislodge seeds or spread disease. I use a clean spray bottle for delicate seeds, keeping it just above the soil to avoid forceful streams.
Keep trays covered with plastic or a humidity dome until germination occurs, but prop the cover slightly to allow airflow and prevent mold. Once seeds sprout, remove the cover immediately—excess moisture now invites damping-off. You'll know your mix is working when seedlings emerge uniformly and stand strong, not stretched or weak. This consistency is your reward for the prep work.
Tips & tricks for perfect seed-starting mixes
Here's what nobody tells you about creating the ideal seed-starting environment that actually works.
Base Soil Selection: When blending your own mix in Step 1, opt for coconut coir over peat moss if possible—it's more sustainable and holds moisture better without compacting. For delicate seeds like snapdragons, I've found that adding 1 part sand to the 50-50 blend prevents waterlogging. The goal is a texture that crumbles easily when dry but holds shape when moist—almost like damp coffee grounds.
Sterilization Safety: In Step 2, the 200°F for 30 minutes baking time is critical, but don't skip the cooling phase. I've ruined batches by handling hot mix—wait until it's completely cool to the touch before storing. For microwave sterilization, use 2-cup increments and stir between minutes to ensure even heat distribution throughout the mix.
Moisture Mastery: The damp sponge consistency in Step 3 is tricky—if your mix feels too dry, add water drop by drop. For fine seeds like parsley, I sift through a ¼-inch mesh screen twice to eliminate any remaining clumps that could smother tiny seedlings. Too much moisture here is worse than too little—seeds need air to breathe during germination.
Germination Timing: During Step 4's pre-warming phase, watch for condensation on the plastic wrap—this indicates perfect humidity. If you don't have a heat mat, place trays on top of your refrigerator (not inside) for consistent 75-85°F warmth. Remove the cover as soon as you see 50% germination to prevent leggy seedlings from stretching toward light.
Pro Tips for Potting Soil For Seeds
- Here's what nobody tells you about creating the ideal seed-starting environment that actually works.
- Base Soil Selection: When blending your own mix in Step 1, opt for coconut coir over peat moss if possible—it's more sustainable and holds moisture better without compacting.
- Sterilization Safety: In Step 2, the 200°F for 30 minutes baking time is critical, but don't skip the cooling phase.
Frequently asked questions
Got questions about getting the best start for your seeds? You’re not alone—here are some of the most common queries (and answers!) to help you grow with confidence.
What’s the difference between potting soil for seeds and regular potting mix?
Potting soil for seeds is sterile, lightweight, and free of weeds or pathogens to prevent damping off (a fungal disease that kills seedlings). Regular potting mix may contain compost or organic matter that can harbor harmful microbes or pests—risky for delicate seeds! Opt for seed-starting blends labeled "sterile" or "seedling mix."
Can I use old potting soil for seeds?
Nope! Old soil can harbor fungi, bacteria, or weed seeds, which stunts germination or kills seedlings. If you’re repurposing soil, sterilize it first by baking it at 200°F (93°C) for 30 minutes or using a microwave-safe container (stir every 2 minutes). Better yet, buy fresh seed-starting mix for foolproof results.
What if I don’t have seed-starting mix? Can I make my own?
Mix 50% peat moss or coco coir (for moisture retention) with 50% perlite or vermiculite (for aeration). Avoid garden soil—it’s too dense and may contain pests. For extra safety, add a sprinkle of perlite to any homemade blend to improve drainage. Pro tip: Add a pinch of cinnamon to homemade mixes to deter fungal growth!
How long can I store unused potting soil for seeds?
Unopened bags last 1–2 years if stored in a cool, dry place (like a garage or shed). Once opened, use it within 3–6 months or seal the bag tightly with a rubber band to retain moisture and sterility. If the soil smells musty or looks clumpy, toss it—it’s past its prime!
My seedlings aren’t germinating—could the soil be the problem?
Possibly! Check these fixes:
- Moisture: Keep soil consistently damp (not soggy) by misting or using a spray bottle.
- Temperature: Most seeds need warmth (70–85°F). Use a heat mat if germination is slow.
- Depth: Plant seeds at the depth twice their width (check seed packets). Too deep = no sprouts!
- Light: Seeds need bright, indirect light (not direct sun). A grow light helps.
Wrapping up and next steps
Choosing the right potting soil for seeds is your first step toward a thriving garden—sterile, nutrient-rich soil ensures faster germination and healthier seedlings. 🌱 With the perfect blend of ingredients and a few simple tips, you’re already setting yourself up for success!
Now that you’re armed with knowledge, grab your supplies and get planting. Watch those tiny sprouts emerge, and soon you’ll be nurturing a lush, vibrant garden from the ground up.