
How To
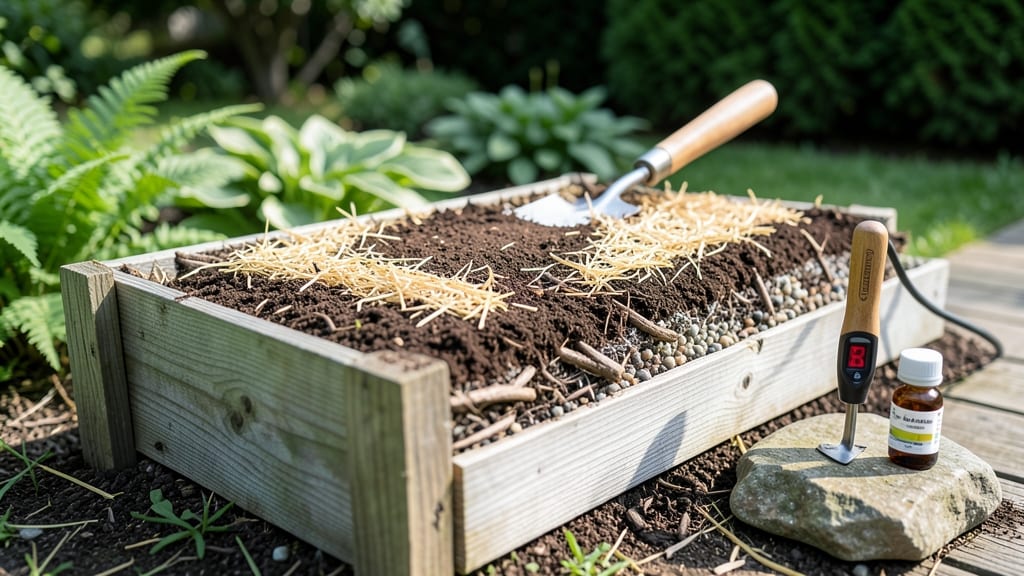
My raised bed soil layers start with a bottom layer that solves drainage forever—no more soggy roots or wasted water. 🌱 After killing two raised beds from compacted soil, I finally layered mine right, and now my tomatoes hit the fence by midsummer instead of struggling midseason.
The secret isn't fancy: 3 inches of gravel at the bottom for drainage, topped with 6 inches of coarse wood chips to break down slowly and improve structure.
Then comes the good stuff—12 inches of your custom soil mix (equal parts compost, peat moss, and garden soil) where roots will thrive. This setup keeps moisture where it belongs while preventing waterlogging.
You'll notice plants growing stronger and faster than ever before, with deep roots accessing nutrients all season. The soil stays loose, warm, and full of life—exactly what hungry plants crave. No more guessing if your soil is "good enough."
Works for vegetables, flowers, or herbs—just adjust the topsoil mix for your plants' needs. Here's how to build it right the first time, without the trial-and-error headaches.
📚 In This Guide
- What you need
- Instructions
- Tips and common mistakes
- Wrapping up and next steps
What you need
- ○ Cardboard or landscape fabric (1 layer, cut to bed dimensions) – optional but recommended to block weeds and grass.
- ● Coarse gravel or rocks (2–3 inches deep) – ¼–½ inch diameter for drainage.
- ● Branches or twigs (4–6 inches deep) – chopped or whole for aeration.
- ● Compost (6–12 inches deep) – well-aged, organic for nutrients.
- ● Topsoil (6–12 inches deep) – high-quality, garden-grade for structure.
- ○ Peat moss or coconut coir (optional, 2–3 inches) – improves moisture retention in sandy soils.
- ● Perlite or vermiculite (1–2 cups per bed) – boosts drainage and aeration.
- ● Wooden raised bed frame – untreated cedar or redwood (4x4x8 ft or custom size).
- ● Garden gloves, shovel, wheelbarrow, and level.
- ● Biochar (½ cup per layer) – enhances soil fertility and water retention.
- ● Worm castings (1–2 cups) – natural fertilizer for root growth.
- ● Slow-release fertilizer (e.g., osmacote) – mix into topsoil for steady nutrients.
- ● Mulch (straw or wood chips) – top layer to retain moisture.
Step-by-Step guide to building raised bed soil layers
Here’s how I create the perfect layered soil mix for raised beds—root-friendly and built to last.
🪴 Step 1: Start With a Sturdy Base Layer
Begin by lining the bottom of your raised bed with 2-3 inches of coarse material like gravel, broken bricks, or hardware cloth. This layer prevents weeds from creeping up and ensures proper drainage. I like to use 1-2 inches of gravel first, then top it with 1 inch of hardware cloth if deer or gophers are a problem in your area.
Press everything down lightly so it’s stable but not compacted. You want roots to grow downward without hitting a solid barrier. If your bed has drainage holes, skip the hardware cloth—just focus on the gravel base. This layer also helps prevent soil from washing out over time.
🌱 Step 2: Add a Carbon-Rich Foundation Layer
Next, spread 4-6 inches of coarse organic matter like shredded hardwood bark, straw, or composted leaves. This layer breaks down slowly, improving aeration and water retention. I use shredded bark because it resists clumping and stays loose longer than straw.
Don’t compact this layer—just spread it evenly. The goal is to create space for roots to explore while adding structure. If you’re working with sandy soil, this layer helps hold moisture longer. For clay-heavy areas, it prevents compaction and improves drainage.
💧 Step 3: Build the Nutrient-Rich Middle Layer
Now, add 6-8 inches of a mix of compost and topsoil. I like to use equal parts compost and high-quality garden soil (about 3-4 inches each) to balance nutrients and texture. This is where most of your plants’ roots will grow, so don’t skimp.
Fluff this layer with a garden fork to loosen it up—you want it to feel like a well-aerated sponge. Avoid garden soil from your yard, as it often compacts and can harbor weeds or pests. Instead, opt for bagged topsoil or screened compost for the best results.
☀️ Step 4: Finish With a Top Layer of Finished Compost
Top off your raised bed with 2-3 inches of finished compost. This layer provides immediate nutrients and helps retain moisture. I like to use well-aged compost (no fresh manure—it can burn roots) mixed with a little perlite or vermiculite to keep it light and fluffy.
Spread it evenly and rake lightly to create a smooth surface. This top layer also prevents soil from splashing onto leaves during watering. Over time, it’ll blend into the middle layer, enriching the entire bed.
⏰ Step 5: Water and Let It Settle
Give your newly layered bed a deep watering to help everything settle. You’ll see the layers compress slightly—this is normal. Wait 24-48 hours before planting to let the soil stabilize. If the top feels too dry, add a thin layer of mulch to lock in moisture.
Now your raised bed is ready for planting! The layered approach ensures roots have room to grow downward while accessing nutrients at every level. Check the soil occasionally and add more compost as needed—your plants will thank you.
Tips & tricks for perfect raised bed soil layers
These simple strategies will help you create a thriving garden foundation that lasts seasons.
Material Selection Matters: When choosing your base layer materials in Step 1, opt for 1-2 inches of crushed gravel rather than smooth river rocks. The jagged edges create better drainage channels, and the smaller particles prevent soil from washing through. For weed barriers, hardware cloth works best—it’s more durable than landscape fabric and won’t break down over time. If you're in a wet climate, consider adding a 1-inch layer of coarse sand above your gravel to improve drainage further.
Layer Thickness Precision: The 4-6 inch carbon-rich layer in Step 2 is your secret weapon for long-term soil health. Too little (under 4 inches) won't provide enough structure, while too much (over 6 inches) can create an anaerobic zone where roots suffocate. I like to measure by hand—hold up your palm against the layer; it should be about the width of your fist when spread evenly. For clay-heavy soils, you can increase this layer to 6-8 inches to prevent compaction.
Middle Layer Fluffing Technique: In Step 3, when fluffing your 6-8 inch nutrient-rich mix, use a garden fork to create vertical channels rather than just loosening horizontally. This mimics natural soil structure and gives roots pathways to grow downward. Work the fork in a crisscross pattern, lifting and dropping the tines to create air pockets without compacting. If your soil feels gummy after adding water, sprinkle in 1/4 inch of perlite and mix it in to improve aeration.
Settling Time Strategy: The 24-48 hour settling period in Step 5 is non-negotiable for root health. During this time, the layers compress naturally, creating a stable foundation. To speed up the process slightly (especially in hot climates), give your bed a light misting every 12 hours instead of one deep watering. This prevents the top layer from crusting over while still allowing proper settling. After 48 hours, gently rake the surface to break up any crust that may have formed.
Pro Tips for Raised Bed Soil Layers
- These simple strategies will help you create a thriving garden foundation that lasts seasons.
- Material Selection Matters: When choosing your base layer materials in Step 1, opt for 1-2 inches of crushed gravel rather than smooth river rocks.
- Layer Thickness Precision: The 4-6 inch carbon-rich layer in Step 2 is your secret weapon for long-term soil health.
Frequently asked questions
Got questions about building the perfect raised bed soil layers? You’re not alone!
Here are some of the most common concerns—and their answers—to help you create a thriving garden bed with ease.
What’s the best order for raised bed soil layers?
The classic approach is: bottom to top—start with cardboard or landscape fabric (to block weeds), followed by large rocks or gravel (for drainage), then wood chips or straw (for aeration), and finally a mix of topsoil, compost, and organic matter (for nutrients). This order prevents waterlogging while giving roots room to grow!
How long should I wait before planting after layering?
Ideally, wait 2–4 weeks to let the layers settle and decompose slightly. If you’re in a hurry, mix in extra compost or aged manure to speed up nutrient availability. Pro tip: Test soil moisture—it should feel like a damp sponge, not soggy!
Can I skip the drainage layer if my climate is dry?
Even in arid regions, a thin drainage layer (2–3 inches of gravel or coarse sand) is wise. It prevents salt buildup and helps roots access water efficiently. Skip it only if your bed is extremely shallow (under 6 inches) and you’re growing drought-tolerant plants like succulents.
How do I keep pests out of my layered raised bed?
Line the bottom with hardware cloth (not just cardboard) to block burrowing pests like gophers or rodents. Add diatomaceous earth or neem oil to the topsoil layer for extra protection. Bonus: Plant pest-repelling herbs (like basil or marigolds) among your veggies!
What’s the easiest way to refresh soil layers in an existing bed?
Top-dress with 2–3 inches of compost annually and mix it into the top 6 inches of soil. For deeper renewal, remove the top layer, add fresh organic matter, and replace it. No need to redo the entire bed! Just focus on the “active” growing zone.
Wrapping up and next steps
Creating the perfect raised bed soil layers is all about balance—giving your plants the room to thrive with optimal drainage, nutrients, and aeration. By layering materials like cardboard, compost, and topsoil, you’re setting up a thriving ecosystem that supports root growth and reduces maintenance.
Whether you’re a beginner or a seasoned gardener, this method makes gardening more efficient and rewarding!
Ready to transform your garden? Start by gathering your materials, then roll up your sleeves and build those layers. Your plants—and your future harvests—will thank you! 🌱✨