
How To
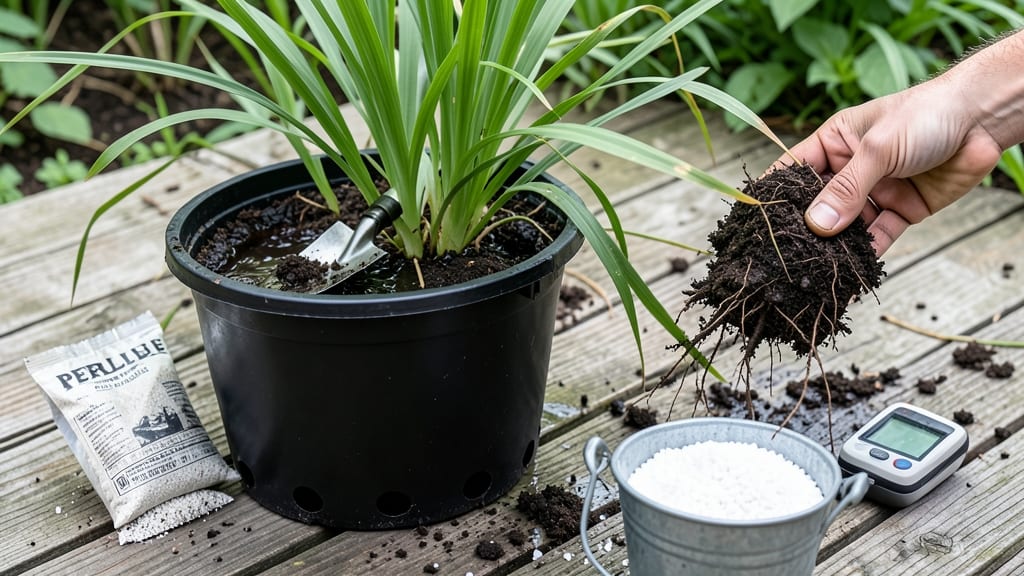
Your soggy garden soil is suffocating plant roots—soil amendments for drainage can turn that into a fast-draining, root-friendly foundation in hours. 🌱 I’ve rescued struggling plants by blending coarse sand, perlite, and compost to create a mix that lets water flow while holding just enough moisture. The difference?
Plants that thrive instead of wilt. Most people grab sand first, but that can compact over time—perlite or pumice adds lasting air pockets without clumping. A 50-50 mix of existing soil and amendments works for most gardens, though heavy clay might need 70% amendments to see real change.
Test your soil first: if water pools on top after 30 minutes, you’ve got a drainage crisis. By the end, your amended beds will hold plants upright with stronger roots and fewer fungal issues.
The texture shifts from sticky clay to a light, crumbly medium—like planting in a cloud instead of mud. And yes, this works for containers too, where drainage matters most. Start with a small section to test your mix.
Overwatering after amending is the #1 mistake—let the soil settle for a week before treating it like usual. Your plants will thank you with lush, healthy growth all season.
📚 In This Guide
- What you need
- Instructions
- Tips and common mistakes
- Wrapping up and next steps
What you need
- ● Coarse sand: 20-30% of your soil mix (e.g., builder’s sand or concrete sand—avoid fine sand). Quantity: ~1-2 cubic yards for a 10’x10’ area (6-12 inches deep).
- ● Perlite or vermiculite: Adds aeration and moisture retention. Quantity: 10-20% of the mix (e.g., 1 bag per 2 cubic feet of soil).
- ● Organic compost: Improves structure and fertility. Quantity: 30-40% of the mix (e.g., 2-3 bags per cubic yard).
- ○ Gravel or small pebbles: (Optional but highly recommended for heavy clay) for a drainage layer. Quantity: 1-2 inches at the bottom of trenches or beds.
- ● Garden fork or spade: For turning soil and mixing amendments.
- ● Wheelbarrow or large container: To haul materials (minimum 2 cubic feet capacity).
- ● Rake: For leveling and smoothing the amended soil.
- ● Gloves & knee pads: Because comfort (and clean hands) matter! 😉
- ○ pH test kit (optional): To check soil acidity before amending (ideal range: 6.0-7.0 for most plants).
- ● Test your soil’s drainage: Dig a 12-inch hole, fill it with water, and time how long it takes to drain. If it’s still wet after 6 hours, you need amendments!
- ● Choose the right location: Amend areas with visible water pooling or plants struggling with root rot.
- ● Work on dry soil: Amending wet soil compacts amendments, reducing effectiveness. Aim for a dry-ish day.
Step-by-step guide to creating a fast-draining soil blend
Here’s how I mix a custom blend that prevents waterlogged roots and keeps plants thriving.
🌱 Step 1: Gather Your Base Materials
Start with 50% high-quality potting soil—this provides essential nutrients while keeping the blend workable. I use a sterile, peat-based mix to avoid introducing weeds or pathogens. The remaining 50% will be amendments to improve drainage, so measure everything carefully to maintain the perfect balance.
For 4 cubic feet of finished blend, you’ll need 2 cubic feet of potting soil (about 10-12 gallons). Spread it in a wheelbarrow or large container where you can easily mix everything together. If your soil is already heavy clay, reduce the potting soil to 40% and increase the amendments to 60% for faster results.
💧 Step 2: Add Coarse Amendments for Drainage
Next, incorporate 30% perlite or pumice—these create air pockets that prevent compaction. For 4 cubic feet, that’s roughly 1.2 cubic feet (about 6 quarts). Sift it into the mix gently to avoid clumping. If you’re working with sandy soil, you can reduce this to 25% and add 5% extra coarse sand for texture.
Now add 10% horticultural sand or coarse builder’s sand—this prevents the blend from becoming too fine. For 4 cubic feet, that’s about 0.4 cubic feet (2 quarts). Mix thoroughly with a garden fork or shovel, breaking up any clumps. The goal is a uniform, crumbly texture—like damp coffee grounds but with visible grit.
✂️ Step 3: Boost Organic Matter for Structure
Stir in 10% compost or well-rotted leaf mold to hold moisture without suffocating roots. For 4 cubic feet, that’s about 0.4 cubic feet (2 quarts). Avoid fresh manure or uncomposted materials—they can compact over time and reduce drainage. If your soil is already rich in organics, skip this step or reduce to 5%.
For extra insurance, add 5% worm castings (about 0.2 cubic feet or 1 quart). This improves microbial activity while maintaining the fast-draining properties. Fluff the mix again with a fork to distribute everything evenly. You’ll notice the blend feels light and aerated—almost like a cross between wet sand and fluffy mulch.
☀️ Step 4: Test and Adjust for Optimal Drainage
Fill a small container (like a 4-inch pot) with your blend and pour water until it’s saturated. After 10-15 minutes, the water should drain completely, leaving the mix moist but not soggy. If it holds water like a sponge, add more perlite or sand (up to 5% extra). If it drains too quickly, mix in 5% extra compost to retain a little more moisture.
For container plants, this blend will keep roots happy and oxygenated while preventing root rot. For in-ground use, mix it into the top 6 inches of soil where most roots grow. Replenish the top layer annually with fresh amendments to maintain the structure.
Tips & tricks for perfect fast-draining soil blend
Took me years of trial-and-error to perfect this blend—here's what actually makes the difference.
The Texture Test: After mixing your amendments, run a handful of the blend between your fingers. It should feel like damp sandpaper—not too gritty, not too smooth. If it sticks together, you need more perlite or sand. If it feels powdery, add a bit more compost or potting soil. This simple check saves you from waterlogged roots down the line.
Perlite vs. Pumice: I use perlite because it's lightweight and creates more air pockets, but pumice works too. The key difference? Perlite expands when heated, creating tiny bubbles that improve drainage. If you're working with heavy clay soil, pumice's rough texture can help break up compaction even better. Just remember, both need to be sifted in gently to avoid clumps.
Optional: Add Vermiculite: For extra moisture retention without sacrificing drainage, mix in 5% vermiculite along with your perlite. It holds water like a sponge but releases it gradually, which is perfect for plants that need consistent moisture like herbs or leafy greens. This is completely optional but makes a noticeable difference for thirsty plants.
Storage Wisdom: Store your finished blend in a dry, covered container for up to 6 months. If you notice it starting to dry out or clump, simply fluff it with a fork and add a little water until it reaches that perfect damp-but-not-wet consistency. I keep mine in 5-gallon buckets with lids to maintain freshness between uses.
Pro Tips for Soil Amendments For Drainage
- Took me years of trial-and-error to perfect this blend—here's what actually makes the difference.
- The Texture Test: After mixing your amendments, run a handful of the blend between your fingers.
- Perlite vs.
Frequently asked questions
Got questions about improving soil drainage?
Here are some of the most common concerns—and their answers—to help you get it right the first time.
What’s the fastest way to improve drainage in heavy clay soil?
For immediate results, mix in coarse sand (like perlite or horticultural sand) or gypsum (10 lbs per 100 sq ft). Over time, organic amendments like composted bark or pine fines will break down clay’s compacted structure. Test soil first—aim for a sandy loam texture (equal parts sand, silt, clay).
Can I use regular playground sand for drainage?
No—avoid it!
Playground sand is too fine and can worsen drainage by clogging pores. Instead, use coarse builder’s sand (30-50 mesh) or perlite/vermiculite for a fluffy, airy mix. Pro tip: Rinse sand before use to remove dust or debris that could compact over time.
How long does it take for soil amendments to work?
Most amendments show noticeable improvements in 4–6 weeks, but organic options (like compost) take 3–6 months to fully break down and improve structure. For fast fixes, pair amendments with deep tilling (12+ inches) or French drains for heavy clay. Patience pays off—test soil moisture monthly to track progress!
What if my plants still struggle after amending?
Check these troubleshooting steps:
- Poor mixing: Amendments must reach 12+ inches deep—top-dressing won’t cut it.
- Root rot risk: If plants wilt after rain, you may have over-amended with sand (creates air pockets). Balance with organic matter (e.g., coconut coir).
- Compaction: Aerate annually with a core aerator or spike sandals.
Are there eco-friendly alternatives to synthetic amendments?
Absolutely!
Try these natural options:
- Leaf mold (decomposed leaves) – improves water retention and drainage.
- Biochar – enhances porosity while locking in nutrients.
- Wood chips (shredded) – breaks down slowly, adding organic structure.
- Worm castings – boosts microbial activity for healthier soil.
Wrapping up and next steps
Improving soil drainage doesn’t have to be complicated—with the right soil amendments for drainage, you can create a thriving environment for your plants’ roots. Whether you’re tackling clay-heavy soil or just want to boost aeration, blending organic matter, sand, and perlite can make a world of difference. 🌱
Now that you’re armed with the knowledge, roll up your sleeves and get testing! Start small with a garden bed or a few pots, monitor the results, and adjust as needed. Happy gardening—your plants (and future harvests) will thank you!