
Propagation
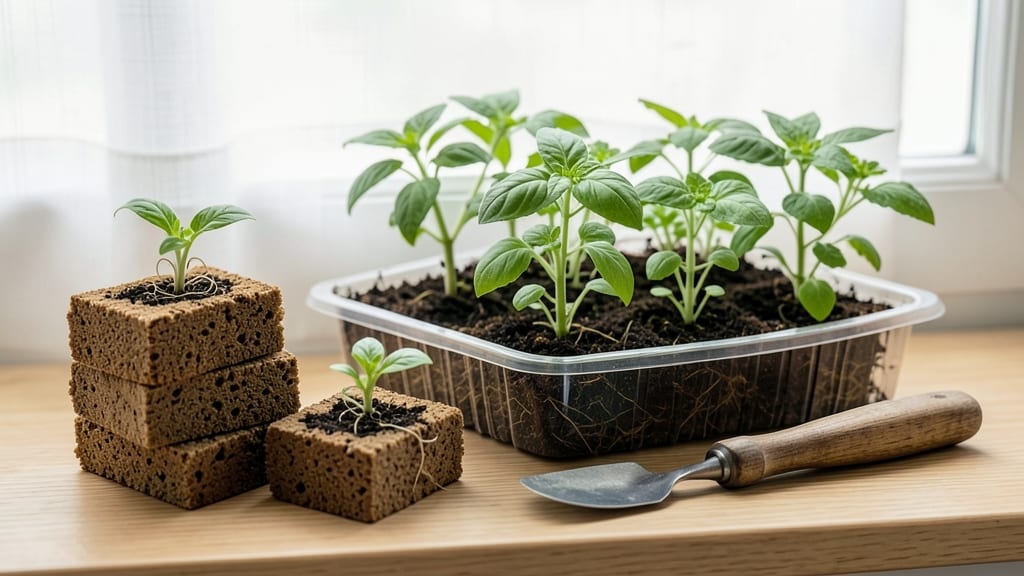
Starting seeds in soil blocks cuts germination time by nearly half compared to traditional pots. 🌱 I spent years struggling with transplant shock and tangled roots until I discovered these little cubes of magic—no more fussing with peat pots or fragile flats.
The process is simpler than it looks: you need a block maker, coco coir or soil mix, and a tray. No special skills required, just patience. Within 3-5 days, you’ll see sprouts poking through, and the roots grow straight and strong, ready for the ground.
What you end up with is seedlings that transplant like pros—no root circles, no shock. They handle the move to soil or pots better than anything from a nursery flat, and you avoid the mess of peat pots breaking apart. Perfect for beginners or anyone tired of seed-starting headaches.
Here’s how to get started without the guesswork!
📚 In This Guide
- What you need
- Instructions
- Tips and common mistakes
- Wrapping up and next steps
What you need
- ○ Soil block mix: Pre-made soil blocks (e.g., BioDome or Jiffy-7) or ingredients to make your own (see optional section). Aim for 50–100 blocks depending on your seed quantity.
- ● Seedling trays or flats: Shallow trays with drainage holes (e.g., 10"x20" plastic flats for ~72 blocks).
- ● Watering can or spray bottle: With a fine mist nozzle to avoid oversaturating blocks.
- ● Seeds: High-quality, fresh seeds (check germination rates!). 1–2 seeds per block is ideal.
- ● Humidity dome or plastic wrap: To retain moisture during germination (e.g., a clear plastic lid or humidity tent kit).
- ● Grow lights or sunny windowsill: A LED grow light (12–16 hours/day) or a south-facing window with 6+ hours of sunlight.
- ● Soil block maker: DIY kits (e.g., wooden or metal molds) if crafting your own blocks.
- ● Compost or coconut coir: For custom soil mixes (blend with 1 part compost to 3 parts coir).
- ● Labeling tags: To track seed varieties (use toothpicks + masking tape for a budget-friendly hack!).
- ● Heating mat: For cold climates (70–75°F speeds up germination).
- ● Fertilizer (low-dose): Organic options like fish emulsion or worm castings (dilute to half-strength).
- ● Tweezers: For delicate seed placement (especially tiny seeds like carrots or basil).
Step-by-Step instructions for starting seeds in soil blocks
Here’s how to get your seedlings off to a flying start with minimal fuss.
🌱 Step 1: Prepare Your Soil Blocks
Soil blocks are pre-compressed cubes of organic material, usually made from coconut coir, peat moss, and compost. They’re lightweight, biodegradable, and eliminate the need for pots or transplant shock. Start by soaking the blocks in warm water for 10-15 minutes until they’re fully saturated and expand to about 2-3 inches in diameter. You’ll know they’re ready when they feel firm but still soft to the touch.
Place the soaked blocks on a tray or flat surface, spacing them about 1 inch apart. If they’re too wet, they’ll collapse when you handle them. If they’re too dry, they’ll crumble when you try to plant. Aim for a texture like a damp sponge—firm enough to hold shape but still pliable. I like to work with them right after soaking while they’re still cool to the touch.
🌱 Step 2: Plant Your Seeds
Use a toothpick or your finger to make a small hole in the center of each block, about ¼ inch deep. This is where you’ll place your seeds. For tiny seeds like lettuce or carrots, I gently press them into the hole with the toothpick—no need to bury them deeper. Larger seeds like beans or peas can go a bit deeper, around ½ inch, but never more than their diameter.
Cover the seeds lightly with a pinch of the block material or a tiny sprinkle of additional soil mix if you’re using it. Press down gently to ensure good contact with the moist block. The goal is to keep the seed in place without burying it too deep or exposing it to drying air. If you’re planting multiple seeds in one block (like herbs), space them ½ inch apart to avoid overcrowding later.
💧 Step 3: Provide Moisture and Warmth for Germination
Place the planted blocks in a seedling tray or on a damp paper towel to retain humidity. Cover the tray with a clear plastic dome or wrap it loosely with plastic wrap to create a mini greenhouse effect. This keeps the blocks moist and warm, which speeds up germination. Soil blocks work best in a warm environment—aim for 70-75°F for most seeds.
Check the blocks daily for moisture. The surface should stay damp but not soggy. If you see condensation on the plastic, you’re doing it right. Avoid lifting the cover to peek too often—every time you do, you lose heat and humidity. Instead, tilt the tray slightly to check from the side. Most seeds will sprout in 5-10 days, depending on the variety.
☀️ Step 4: Introduce Light and Air Circulation
Once your seedlings have their first true leaves (not the initial seed leaves), it’s time to remove the plastic cover. This prevents damping-off, a fungal disease that attacks tender seedlings. Start by uncovering the tray for 1-2 hours daily, gradually increasing the time over 3-4 days until the seedlings are fully acclimated to the air.
Move the tray to a bright location with 12-14 hours of light daily. A south-facing window or a grow light works best. If your seedlings start leaning toward the light, they’re not getting enough. Adjust their position so they’re within 4-6 inches of the light source. You’ll notice strong seedlings have thick stems and deep green leaves—if they look pale or leggy, they need more light or less time under the grow light.
✂️ Step 5: Harden Off and Transplant
About 2 weeks before your last frost date, begin hardening off your seedlings. Start by placing them outside in a sheltered spot for 1-2 hours the first day, gradually increasing their time outside over 7-10 days. This helps them adjust to wind, sun, and temperature fluctuations. Choose a spot that’s shaded during the hottest part of the day to avoid stressing the young plants.
When transplanting, simply place the block directly into the garden or container—no need to remove it. The block will break down naturally, providing nutrients to the roots. Space plants according to their mature size, and water gently to settle the soil around them. You’ll know they’re thriving if they continue growing without wilting or yellowing leaves. Soil blocks make transplanting effortless, so you can focus on watching your plants grow strong!
Tips & tricks for perfect soil block seed starting
Here's what nobody tells you about making soil blocks work perfectly for your seedlings.
Soaking Strategy: The 10-15 minute soaking time is crucial—don't rush it! Use warm (not hot) water to speed up saturation without overheating the blocks. I like to soak them in a shallow tray with just enough water to cover the bottom, then let them expand naturally. If they feel mushy after soaking, pat them gently between paper towels to remove excess moisture before planting. This prevents collapse when handling.
Planting Precision: For Step 2, the depth matters more than you'd think. Tiny seeds like lettuce need that ¼ inch depth—any deeper and they won't have enough energy to push through. For larger seeds, I make the hole with my finger first, then use a toothpick to create a clean channel. Press the seed in gently but firmly—think "light hug" rather than "gentle tap." This ensures good soil contact for even moisture distribution.
Germination Environment: That 70-75°F range is ideal for most seeds, but if your home runs cooler, consider using a seedling heat mat under the tray. The key is maintaining consistent warmth—fluctuations can delay germination. I've found that placing the tray on top of my fridge (not inside) creates a perfect warm spot without overheating. And remember, condensation on the plastic cover is your friend—it means the humidity is just right.
Light Transition: When you're ready to remove the plastic cover in Step 4, do it gradually. Start with just 1-2 hours of exposure the first day, then increase by 30 minutes each subsequent day. This hardens off your seedlings just like the outdoor process. Watch for the first true leaves—these are the second set that appear after the initial seed leaves. Once they emerge, your seedlings are ready for more light exposure and air circulation.
Pro Tips for Soil Blocks Seed Starting
- Here's what nobody tells you about making soil blocks work perfectly for your seedlings.
- Soaking Strategy: The 10-15 minute soaking time is crucial—don't rush it! Use warm (not hot) water to speed up satura...
- Planting Precision: For Step 2, the depth matters more than you'd think. Tiny seeds like lettuce need that ¼ inch dep...
Frequently asked questions
What are the biggest benefits of using soil blocks over traditional seed-starting methods?
Soil blocks reduce transplant shock , eliminate the need for messy pots, and promote stronger root growth. They also minimize waste since blocks break down naturally when planted. Plus, they’re perfect for small spaces—no overcrowding or tangled roots!
How long does it take for seeds to germinate in soil blocks?
Germination time varies by seed type, but soil blocks often speed it up slightly due to better aeration and moisture control. Most seeds sprout within 5–14 days, similar to traditional methods. Check your seed packet for specifics—just keep blocks consistently moist (not soggy!) until sprouts appear.
Can I make soil blocks without a block maker? DIY alternatives?
Use a cookie cutter, ice cube tray, or even a stiff cardboard box cut into squares. Press moist soil firmly into the mold, then let it dry slightly before removing. For larger blocks, a wooden frame works too—just pack the soil tightly.
My soil blocks are cracking or falling apart—what went wrong?
Cracking usually means the mix was too dry or lacked cohesion. Try adding 1–2 tbsp of coconut coir or compost per block for binding. Overwatering can also weaken them—let blocks dry slightly between waterings. If they crumble, remix your soil with more clay or perlite for structure.
Do soil blocks work for all types of plants, or are some better suited?
Soil blocks are great for most veggies, herbs, and flowers (tomatoes, peppers, basil, etc.), but delicate seedlings like orchids or succulents may need extra support. Avoid heavy feeders (e.g., corn) unless you’re using a nutrient-rich mix. Experiment with fast growers first!
Wrapping up and next steps
Starting seeds in soil blocks is a game-changer for gardeners—it’s cleaner, more efficient, and kinder to your seedlings! 🌱 With minimal mess and faster germination, this method makes seed starting a breeze while promoting healthier roots.
Ready to try it? Grab your materials, follow the steps, and watch your garden grow from the very first block!
Your next step? Experiment with different plants or even share your success with fellow gardeners. Happy planting! 🌿