
How To
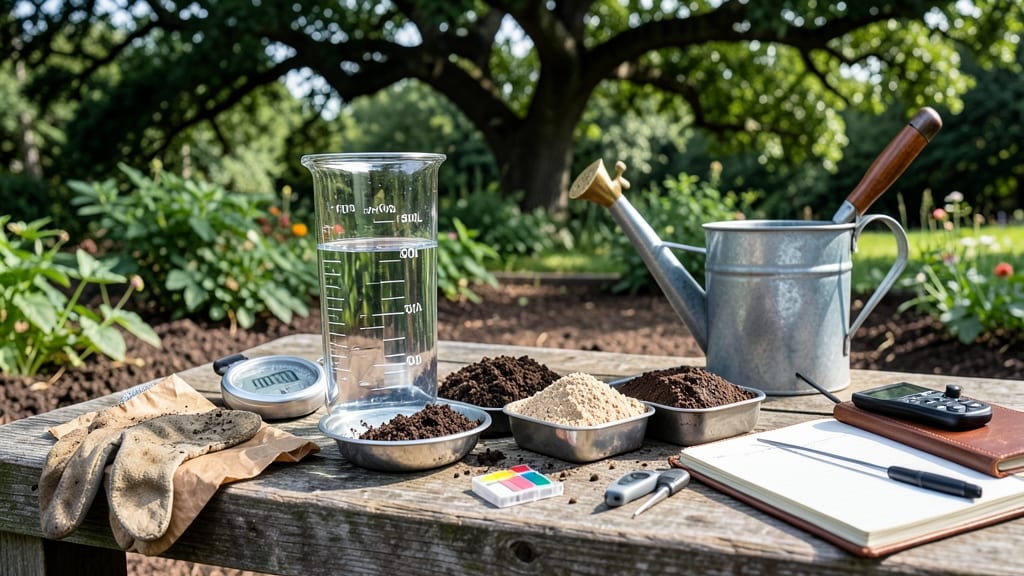
Your soil might be drowning your plants—this 3-step drainage test reveals the truth in under 10 minutes. 🌱 I’ve saved countless struggling plants by diagnosing soggy soil before roots rot, and the method is simpler than you’d think. No fancy tools, just a jar and your garden’s current soil.
Grab a clean quart-sized jar, fill it halfway with garden soil, then add water until it’s 1 inch from the top. Watch closely: if water drains completely in under 30 minutes, your soil is well-draining.
If it takes hours or leaves standing water, you’ve got a serious drainage issue. This test works for containers, raised beds, or in-ground soil.
Slow drainage means roots suffocate, leading to yellow leaves, mold, and stunted growth. Fix it by mixing in coarse sand, perlite, or compost—each improves aeration differently. For heavy clay, aim for 20% sand; for compacted soil, 30% compost does the trick.
Your plants will reward you with stronger roots and fewer wilting episodes.
Pro tip: Test multiple spots in your garden—soil varies even in small areas. Once you’ve amended problem zones, retest in 2-3 weeks to confirm improvements. Proper drainage isn’t just about saving plants; it’s the foundation for a thriving, low-maintenance garden that works with nature, not against it.
📚 In This Guide
- What you need
- Instructions
- Tips and common mistakes
- Wrapping up and next steps
What you need
- ● Soil sample: Collect about 1–2 cups of undisturbed soil from the area you’re testing (avoid surface debris).
- ● Clear container: A quart-sized mason jar, plastic cup, or transparent glass (at least 8 oz capacity).
- ● Water: Room-temperature tap water (1–2 cups, depending on container size).
- ● Measuring tool: Ruler or tape measure (for tracking water absorption).
- ○ Optional: A soil moisture meter (for digital precision).
- ● Timer: Phone or stopwatch (to monitor drainage time).
- ● Spoon or trowel: For scooping soil smoothly.
- ● Paper towels or cloth: To clean spills and wipe containers.
- ● Perforated tray or saucer: To catch runoff during testing.
- ● Labeling markers: To track multiple soil samples (if testing different areas).
- ● Notebook: For recording observations (drainage speed, texture changes, etc.).
- ● Gloves: If your soil is particularly gritty or contains sharp particles.
How to test and fix soil drainage in 3 simple steps
Overwatered soil can kill plants overnight—here's how to check drainage and restore balance fast.
💧 Step 1: Perform the Pour-and-Wait Test
Dig a hole 6 inches deep in your garden bed or container. Pour 2 gallons of water into the hole and let it drain completely. Time how long it takes for the water to fully disappear from the hole—this is your drainage rate. Healthy soil should drain within 2-4 hours; if it takes longer, your soil is too compacted or lacks organic matter.
Watch for water pooling on the surface or collecting at the bottom of containers. This indicates poor drainage, which prevents roots from getting oxygen. If water stands for more than 30 minutes, you'll need to amend the soil immediately to prevent root rot. I like to do this test in multiple spots—soil drainage can vary even within the same garden bed.
✂️ Step 2: Amend the Soil Based on Test Results
For slow-draining soil, mix in 2-3 inches of coarse sand or perlite into the top 12 inches of soil. This creates air pockets that help water move through faster. I prefer perlite because it's lightweight and won't compact over time like sand. Work the amendment into the soil with a garden fork or trowel, breaking up any dense clumps.
If your soil drains too quickly (water disappears in under 1 hour), add 2-3 inches of compost to improve water retention. This helps soil hold moisture while still allowing excess water to escape. You'll notice the difference immediately—plants will wilt less between waterings, and you'll see fewer puddles after rain. Avoid heavy clay amendments if your soil drains too fast; they'll make the problem worse.
🌱 Step 3: Verify Drainage and Adjust Watering Practices
After amending, perform the pour-and-wait test again to confirm improvements. Healthy soil should now drain within your target 2-4 hour window. Dig a small hole near your amended area and pour 2 gallons of water again. If water disappears at a steady rate without pooling, your soil is now properly balanced.
Adjust your watering schedule based on the new drainage rate. Water deeply but less frequently—aim for 1 inch of water per week (including rainfall) for most plants. You'll know you're doing it right when the top 1-2 inches of soil feel dry before the next watering. Overwatering is the #1 killer of container plants, so don't rush to water just because the surface looks dry.
Tips & tricks for perfect soil drainage testing
Here's what nobody tells you about getting accurate drainage results—these tricks save time and frustration.
Precision Timing: Use a digital timer for the 2-4 hour test rather than guessing. I've seen people overwater simply because they misjudged the time—set that timer and walk away. For containers, check the bottom for pooling every 10 minutes after the 30-minute mark. If water's still there, you've got a drainage problem that needs fixing immediately.
Test Location Strategy: Test in multiple spots—especially near foundation walls or low-lying areas where water naturally collects. I once thought my entire garden had good drainage until I tested near the patio and found water pooling for over 2 hours in that one spot. This revealed a hidden compaction zone I'd missed during initial planting.
Amendment Application: When adding 2-3 inches of perlite or compost, work it into the top 12 inches using a garden fork—not just sprinkling on top. This creates proper air pockets throughout the root zone. For containers, mix amendments directly into the potting mix before planting to ensure even distribution from the start.
Visual Cues for Verification: After amending, look for these signs of improved drainage: water should disappear at a steady rate without sudden gulps (which indicate channels) or complete stops (which indicate blockages). The soil surface should dry between your fingers within 2-3 hours after watering, not stay soggy for days.
Pro Tips for Soil Drainage Test
- Here's what nobody tells you about getting accurate drainage results—these tricks save time and frustration.
- Precision Timing: Use a digital timer for the 2-4 hour test rather than guessing.
- Test Location Strategy: Test in multiple spots—especially near foundation walls or low-lying areas where water naturally collects.
Frequently asked questions
Got questions about testing and improving your soil’s drainage? You’re not alone! Here are some of the most common concerns—and their straightforward answers—to help you get it right the first time.
How do I know if my soil has poor drainage?
Look for these red flags: water pooling on the surface after rain, soggy soil that stays wet for days, or plants wilting despite frequent watering. A simple test is to dig a 6-inch hole, fill it with water, and time how long it takes to drain—if it’s slower than 4 hours, your soil likely drains poorly.
How often should I test my soil’s drainage?
Test drainage once a year in spring or fall for established gardens, or after major soil changes (like adding compost or topsoil). If you’re troubleshooting plant health issues, test immediately. For new landscapes, check drainage before planting to avoid costly mistakes.
Are there cheaper alternatives to professional drainage tests?
Yes! DIY options like the percolation test (digging a hole and measuring water absorption) or a jar test (filling a jar with soil and water, then observing drainage speed) work well. For precision, a soil texture analysis kit (around $20) can reveal clay-heavy soils that slow drainage.
What if my soil still drains poorly after adding amendments?
If drainage hasn’t improved, check for compaction (use a garden fork to aerate) or clogged drainage layers (like a buried plastic sheet). For severe cases, consider raising beds or installing underground drainage pipes. Patience is key—amendments like sand or perlite take time to work.
Can I test drainage in containers or raised beds?
For containers, fill a hole in the potting mix with water and measure drainage time. In raised beds, dig a 6-inch test hole in the center. Just ensure the container has drainage holes, and raised beds use a 3:1 ratio of soil to organic matter (like compost) to boost drainage.
Wrapping up and next steps
Understanding your soil’s drainage is the first step to creating a thriving garden or lawn. 🌱 With the right soil drainage test and a few simple fixes—like amending clay soil or improving sandy soil—you can transform soggy ground into fertile, well-draining earth.
Don’t let overwatering hold you back; take action today!
Ready to revitalize your soil? Start by testing a small section, then gradually apply your amendments. Your plants will thank you!