
Propagation
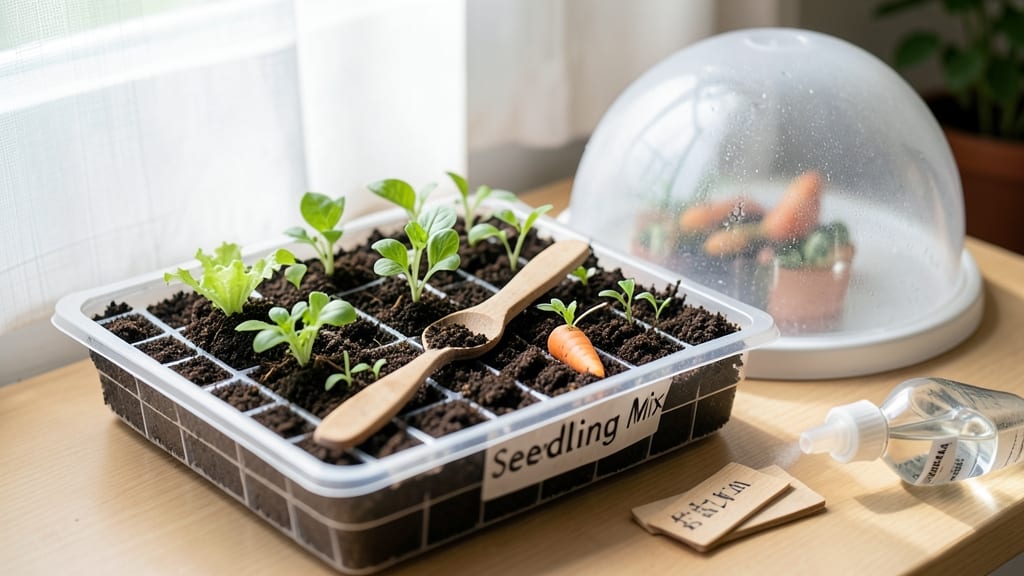
The right soil for planting seeds isn't just dirt—it's the difference between seedlings popping up in days and weeks of waiting. 🌱 I've learned that a light, airy mix with perfect drainage and nutrients is what makes seeds germinate fast and strong, not the heavy garden soil most people grab first.
This isn't about expensive blends—just the right balance of 50% peat or coco coir, 30% perlite or vermiculite, and 20% compost creates the ideal fluffy texture. Too much clay or garden soil suffocates tiny roots, while this mix lets them spread easily.
Most seed packets even recommend starting with a seed-starting mix, but you can make your own for half the cost. You'll see sprouts emerge 3-5 days faster than in regular soil, and seedlings grow straighter with fewer leggy stems.
The texture stays loose even when wet, so you avoid the dreaded "damp sand" that kills germination. Just add a sprinkle of compost for extra nutrients, and you're set. Works for tomatoes, herbs, and even finicky flowers. Here's how to set it up right—no guesswork involved.
📚 In This Guide
- What you need
- Instructions
- Tips and common mistakes
- Wrapping up and next steps
What you need
- ● Peat moss or coconut coir: 50% of the mix (4 parts). Choose sterilized peat moss or organic coconut coir for moisture retention.
- ● Perlite or vermiculite: 25% of the mix (2 parts). Perlite adds air pockets; vermiculite retains moisture. Pick one based on your seeds’ needs!
- ● Compost or worm castings: 25% of the mix (2 parts). Boosts nutrients without compacting the soil.
- ● Seeds: High-quality, fresh seeds (check expiration dates!).
- ● Containers: Seed trays, small pots, or even egg cartons with drainage holes.
- ● Water: Room-temperature, dechlorinated water (let tap water sit 24 hours or use filtered water).
- ● Mixing tray or bucket (clean, food-grade).
- ● Gloves (to keep hands clean).
- ○ Fine-mesh sifter (optional, for fluffy texture).
- ● Spray bottle (for gentle watering).
- ○ pH test kit (optional, to check soil acidity—ideal range: 6.0–7.0).
- ○ Seedling heat mat (optional, for warm-season seeds like tomatoes or peppers).
Step-by-step guide to creating the perfect seed-starting soil mix
Here's how to whip up a fluffy, airy mix that speeds germination and gives seedlings a strong start.
🌱 Step 1: Combine Base Materials for Ideal Texture
Start with 50% premium seed-starting mix—this is your foundation. I like to use a mix specifically formulated for seeds because it's sterile and lightweight. Add 30% perlite to create air pockets that prevent compaction and encourage root development. The perlite also helps with drainage, which is critical for preventing seed rot.
Next, incorporate 20% vermiculite—this holds moisture while still allowing airflow. You'll see the difference immediately as the mix becomes light and fluffy rather than dense. Mix these components thoroughly by hand or with a small garden trowel until the texture is uniform. The goal is to eliminate any clumps so seeds can make direct contact with the growing medium.
💧 Step 2: Add Nutrients and Moisture for Germination Readiness
Sprinkle in 1 tablespoon of balanced organic fertilizer (5-5-5 or similar) per 2 gallons of mix—just enough to give seedlings a gentle nutrient boost without overfeeding. I like to use a water-soluble fertilizer here because it dissolves easily and won't create hot spots that can burn tender roots.
Now, gradually add warm water until the mix reaches a consistency like a damp sponge—it should hold together when squeezed but not drip. You'll know it's perfect when you run your fingers through it and feel resistance without any moisture beading on the surface. Let the mix sit for 10-15 minutes to ensure even moisture distribution before planting.
✂️ Step 3: Fluff and Test for Optimal Planting Conditions
Use your hands or a small fork to gently fluff the mix one last time, breaking up any remaining clumps. The texture should resemble cake batter—light enough to crumble easily but with enough structure to support seeds. I like to press a small handful into my palm; if it holds shape but doesn't feel compacted, it's ready.
Test the moisture level by squeezing a handful—water should appear at the edges when you release pressure, but no droplets should form. This ensures seeds won't dry out too quickly or sit in soggy conditions. The mix should also feel warm to the touch (around 70-75°F), which speeds germination. If it's cooler, place the container in a warm spot for 30 minutes before planting.
🌿 Step 4: Layer and Prepare for Seeding
Fill your seed trays or containers ¾ full with the prepared mix, tapping gently on the sides to eliminate air pockets. Leave about ½ inch of space at the top for seeds and moisture. For larger containers, create a ¼-inch deep depression in the center where you'll plant seeds—this prevents them from being buried too deeply.
Smooth the surface with your fingers or a small board, then lightly mist with water if the top feels dry. The mix should look evenly moist without appearing wet. This is your final check before planting: press down lightly—if the surface springs back slightly, it's perfect. If it stays indented, add a tiny bit more moisture and fluff again.
⏰ Step 5: Maintain Ideal Conditions for Germination
Cover the tray with a clear plastic dome or plastic wrap to retain warmth and humidity, which are critical for fast germination. Place it in a warm location (around 75°F)—a seedling heat mat works wonders here. Check daily for condensation on the dome; if it's foggy inside, remove the cover for 10 minutes to prevent fungal growth.
Keep the soil surface evenly moist by misting lightly every 1-2 days—never let it dry out completely. You'll see the first signs of germination in 5-10 days, depending on the seed type. Once sprouts appear, remove the dome immediately to prevent damping-off disease. The fluffy mix will now support strong root development and faster growth.
Tips & tricks for perfect seed-starting soil mix
A few simple adjustments can transform your seed-starting mix from good to exceptional. Here's what I've learned after years of trial and error.
Texture Matters: When mixing the 50% seed-starting mix with 30% perlite and 20% vermiculite, don't rush this step. Use a small garden trowel to break up any stubborn clumps—especially around the perlite. The goal is to create a texture that resembles crumbled cake batter. This ensures seeds make direct contact with the growing medium while maintaining proper aeration. I've found that using a fork instead of hands gives me more control over eliminating clumps completely.
Precision with Moisture: The 10-15 minute resting period after adding warm water is non-negotiable. This allows moisture to distribute evenly throughout the mix. During this time, I like to give it a gentle stir with a clean hand to help break up any surface tension. The perfect consistency should feel like a damp sponge—when you squeeze it, water should appear at the edges but no droplets should form. This balance prevents both over-saturation and premature drying.
Temperature Check: If your mix feels cooler than 70-75°F after preparation, don't panic. Simply place the container in a warm spot for the full 30 minutes specified. I've used everything from sunny windowsills to seedling heat mats. The key is maintaining consistent warmth—fluctuations can stress seeds before they even sprout. You can test temperature by pressing your hand against the mix; it should feel comfortably warm, like a cozy room temperature.
Optional Nutrient Boost: While the 1 tablespoon of balanced fertilizer per 2 gallons is perfect for most seeds, you can customize further. For leafy greens, I often add an extra ½ teaspoon of nitrogen-rich fertilizer. For flowering plants, a phosphorus boost works better. Just remember to mix these additions thoroughly after the initial 10-15 minute resting period to ensure even distribution throughout the fluffy mix.
Pro Tips for Soil For Planting Seeds
- A few simple adjustments can transform your seed-starting mix from good to exceptional.
- Texture Matters: When mixing the 50% seed-starting mix with 30% perlite and 20% vermiculite, don't rush this step.
- Precision with Moisture: The 10-15 minute resting period after adding warm water is non-negotiable.
Frequently asked questions
Got questions about the perfect soil for planting seeds? You’re not alone! Here are some of the most common queries—and their answers—to help you grow with confidence.
What’s the best soil mix for fast seed germination?
A lightweight, airy blend like 50% peat moss or coco coir, 30% perlite or vermiculite, and 20% compost or worm castings works wonders. This combo drains well while holding enough moisture to encourage quick sprouting. Avoid dense garden soil—it can suffocate tender seedlings!
How long should I wait before seeds sprout?
Germination time varies! Fast growers (like lettuce or radishes) may pop up in 3–7 days, while slower seeds (tomatoes, beans) can take 7–21 days. Check your seed packet for specifics, and keep the soil warm (70–85°F) and moist (but not soggy) to speed things along.
Can I reuse potting soil for seeds?
Not ideal! Old potting soil can harbor fungi, bacteria, or pests that stunt seedlings. If you must reuse it, sterilize it first by baking at 200°F for 30 minutes or mixing in fresh compost. For best results, start fresh with a seed-starting mix every time.
Why are my seeds rotting instead of sprouting?
Overwatering or poor drainage is usually the culprit. Ensure your container has drainage holes and use a spray bottle to mist (not drown) the soil. If the mix feels compacted, fluff it with a fork or add more perlite. Fungal issues? Sprinkle cinnamon or hydrogen peroxide (1 part to 4 parts water) on the soil to prevent rot.
What’s a cheap alternative to store-bought seed-starting soil?
Mix 1 part coconut coir or shredded newspaper (as a base) with 1 part perlite or sand and 1 part compost. For a budget-friendly boost, blend in used coffee grounds (they add nitrogen) or egg shells (crushed) for calcium. Just avoid heavy garden soil—it’s too dense for tiny roots!
Wrapping up and next steps
Choosing the right soil for planting seeds—especially a light, airy mix—can make all the difference in your gardening journey! 🌱 Whether you're growing delicate seedlings or hardy sprouts, the key is balance: drainage, aeration, and nutrients work together to unlock faster germination and stronger roots.
With the right prep, you’re not just planting seeds—you’re nurturing potential.
Now that you’re armed with the know-how, roll up your sleeves and get growing! Start small with a few seeds, experiment with your mix, and watch your green thumb flourish. Happy planting—your future garden is waiting! 🌿