
How To
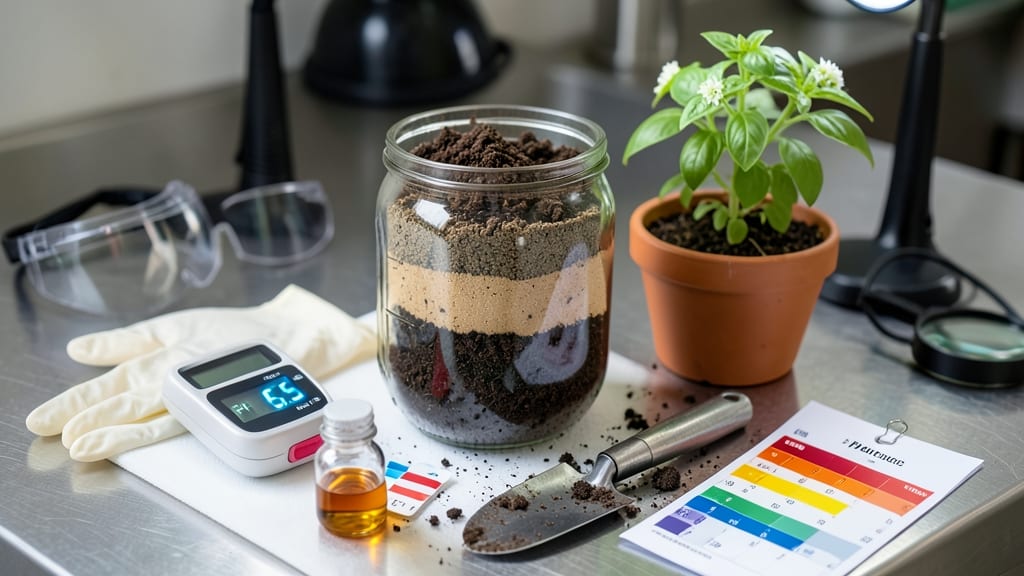
A soil toxicity test reveals hidden problems like salt buildup or heavy metals that stifle growth before you even see symptoms. My plants were struggling—and it might not be what you think. I’ve tested my own garden soil after years of mystery wilting, and the results changed everything.
You don’t need a lab to start: basic DIY kits check for pH, salinity, and common contaminants in under 10 minutes. My favorite method uses a simple test strip and a small soil sample—no fancy equipment, just a spoon and a clear container.
The key is collecting soil from multiple spots to get an accurate picture of your whole garden.
Once you know what’s wrong, fixing it is straightforward. Too much salt? Flush with water. Heavy metals? Amend with compost or organic matter. The results give you a clear roadmap to healthier soil—and plants that finally thrive instead of fight.
This method works for vegetable gardens, flower beds, and even potted plants. Whether you’re troubleshooting a new plot or reviving an old one, a quick test saves time, money, and a whole lot of frustration. Let’s get your soil back in balance.
📚 In This Guide
- What you need
- Instructions
- Tips and common mistakes
- Wrapping up and next steps
What you need
- ● Soil sample: 1–2 cups of fresh soil (avoid surface debris; dig 2–3 inches deep for accurate results).
- ● Distilled water: 1 cup (tap water may contain contaminants that skew results).
- ● pH test strips or digital pH meter: 1 pack (range: 0–14; aim for 6.0–7.0 for most plants).
- ○ Heavy metal test kit (optional but recommended): Lead, arsenic, cadmium, and mercury test strips (1–2 per metal type).
- ● OR a blank">DIY soil test kit (e.g., Luster Leaf or MySoil).
- ● Small mixing bowl or container: 1 (glass or food-grade plastic, 8–12 oz).
- ● Stirring stick: 1 (wooden or disposable plastic).
- ● Timer: 1 (phone or kitchen timer).
- ● Disposable gloves: 1 pair (nitrile for heavy metal testing).
- ● Fine-mesh strainer or coffee filter: 1 (to separate soil particles from liquid).
- ● Plastic squeeze bottle: 1 (for rinsing test strips).
- ● Notebook & pen: 1 (to log pH and metal readings).
- ● Reference guide: 1 (e.g., blank">EPA soil toxicity levels for comparison).
- ○ UV flashlight (optional): 1 (to check for fluorescent contaminants like pesticides).
Step-by-Step instructions for testing soil toxicity at home
Here's how to quickly check your soil for harmful levels of salts, heavy metals, and pH imbalance—no lab required.
🧪 Step 1: Collect and Prepare Your Soil Samples
Grab a clean trowel and take 5-10 small soil samples from different spots in your garden bed, about 4-6 inches deep. Mix them together in a bucket to create a composite sample—this gives you an accurate average reading. Avoid areas with fresh mulch or compost, as these can skew results. Use a sterile plastic container (like a clean yogurt cup) to store your sample, and label it with the plant type or garden section.
If you're testing raised beds or containers, take samples from multiple spots in the same pot or bed. For lawn soil, collect samples from areas where grass looks unhealthy or discolored. The key is to get a representative mix—don't just test one spot where you suspect a problem. Once you've mixed your sample, let it air-dry for 24 hours before testing. This removes excess moisture that could interfere with readings.
💧 Step 2: Perform the pH Test Using a Simple Kit
Fill a small container with 1 tablespoon of your dried soil sample and add 2 tablespoons of distilled water. Stir well until the mixture looks like a thick paste. Dip a pH test strip (from your soil test kit) into the mixture, making sure it's fully saturated. After 30 seconds, compare the color to the chart provided with your kit.
A healthy garden soil pH typically falls between 6.0 and 7.0. If your reading is below 5.5 or above 7.5, your soil may be too acidic or alkaline for most plants. For example, blueberries thrive in acidic soil (pH 4.5-5.2), while vegetables like tomatoes prefer slightly acidic to neutral (pH 6.0-7.0). If your pH is off, you'll need to amend the soil with lime (to raise pH) or sulfur (to lower pH) before planting.
🧪 Step 3: Check for Salt Buildup Using the Electrical Conductivity Method
Fill a clean glass with ½ cup of distilled water and stir in 1 tablespoon of your dried soil. Let the mixture sit for 10 minutes, then use a soil conductivity meter (or a simple DIY setup with a multimeter) to measure the electrical conductivity. If you don't have a meter, you can still spot high salt levels by observing the water—if it looks cloudy or has a white residue after mixing, your soil likely has excess salts.
Healthy garden soil usually has a conductivity reading between 1.0 and 3.0 dS/m (decisiemens per meter). If your reading is above 4.0 dS/m, your soil may have accumulated too many salts, which can stunt plant growth. To fix this, flush the soil with clean water or add organic matter like compost to improve drainage and reduce salt concentration. Avoid using chemical fertilizers if salt buildup is an issue—they can worsen the problem.
⚗️ Step 4: Test for Heavy Metals Using a Home Test Kit
Follow the instructions on your heavy metal test kit (usually involving mixing soil with a provided solution and waiting 5-10 minutes for a color change). Most kits test for lead, cadmium, arsenic, and mercury, which are common contaminants in urban or industrial soils. If you suspect contamination from old paint, batteries, or pesticides, prioritize testing these areas first.
Compare your results to the safety thresholds provided in the kit. For example, lead levels above 300 ppm in garden soil can be harmful to plants and humans. If your soil tests positive for dangerous metals, avoid growing food crops in that area. Instead, use it for non-edible plants like ornamentals or ground covers. If contamination is severe, consider removing the top 6 inches of soil and replacing it with clean, tested soil.
📝 Step 5: Record Results and Plan Amendments
Write down your pH, salt, and heavy metal readings in a notebook or digital document. Note the date and location of your samples, as soil conditions can change over time. If you're testing multiple garden beds, keep track of each one separately—different areas may have different issues. For example, a vegetable bed might test high in salts, while a flower bed could have acidic pH.
Based on your results, plan soil amendments. For low pH, mix in pelletized lime at a rate of 5-10 pounds per 100 square feet. For high pH, add elemental sulfur at 2-4 pounds per 100 square feet. If salts are the issue, double-dig the soil and mix in compost or peat moss to improve structure and reduce buildup. Always retest after amending to ensure your changes were effective.
Tips & tricks for accurate soil toxicity testing
These practical insights will help you get reliable results from your at-home soil analysis—without the guesswork.
Sample Collection Strategy: In Step 1, when taking your 5-10 soil samples, focus on areas where plants struggle most—these spots often reveal the most accurate toxicity levels. I've found that mixing samples from both healthy and unhealthy zones gives a more complete picture of your soil's overall condition. For containers, take samples from the center and edges since nutrients often distribute unevenly. Remember, the 24-hour drying period is crucial—moisture can dilute test results, so don't rush this step even if you're eager to see your findings.
pH Test Precision: The 30-second wait time in Step 2 might feel short, but it's perfect for accurate pH readings. After dipping your test strip, immediately compare it to the chart while it's still wet—colors fade quickly once exposed to air. For more consistent results, I recommend using a fresh test strip for each sample rather than reusing one. If you're testing multiple garden beds, keep a small notebook nearby to record each pH reading immediately after testing—memory fades fast when dealing with multiple color comparisons!
Salt Detection Without a Meter: When checking for salt buildup in Step 3, pay close attention to the water's appearance after the 10-minute settling period. Cloudiness or white residue definitely indicates salt problems, but even subtle changes like slightly murky water can signal early-stage salt accumulation. For a quick visual test, pour the settled water into a white plate—contaminants will show up more clearly against the bright background. This method works surprisingly well when you don't have a conductivity meter on hand.
Heavy Metal Test Accuracy: The 5-10 minute waiting period in Step 4 can feel like forever, but this exact timing ensures accurate color development for heavy metal detection. I've learned to set a timer during this step to avoid over-waiting, which can lead to false positives. If you're testing areas with known contamination (like near old paint or industrial sites), consider testing those spots separately first—they often show the highest metal concentrations and give you a baseline for comparison.
Pro Tips for Soil Toxicity Test
- These practical insights will help you get reliable results from your at-home soil analysis—without the guesswork.
- Sample Collection Strategy: In Step 1, when taking your 5-10 soil samples, focus on areas where plants struggle most—these spots often reveal the most accurate toxicity levels.
- pH Test Precision: The 30-second wait time in Step 2 might feel short, but it's perfect for accurate pH readings.
Frequently asked questions
Got questions about testing your soil for toxicity at home?
Here are answers to the most common concerns—so you can get accurate, fast results without the guesswork.
How accurate are at-home soil toxicity tests compared to lab tests?
At-home tests are highly reliable for detecting common contaminants like lead, arsenic, and heavy metals—just as lab tests would. While labs offer broader testing, home kits use the same principles (colorimetric or electrochemical reactions) and are FDA-approved for consumer use. For peace of mind, cross-check with a lab if growing edibles or in high-risk areas.
Why does my test take longer than 10 minutes?
Most kits promise 10-minute results, but delays often happen if:
- Moisture issues: Dry soil needs pre-moistening (follow kit instructions!).
- Reaction time: Some tests require gentle shaking or waiting for color changes.
- Interference: Organic matter (like compost) can skew results—rinse samples if needed.
Pro tip: Set a timer and avoid distractions—even 1 extra minute can affect readings!
Are there cheaper alternatives to commercial soil toxicity test kits?
Yes! DIY options include:
- pH strips: Detect acidity/alkalinity (affects metal solubility). Cost: $5–$10.
- DIY lead test: Use a vinegar + baking soda solution (for visual checks, not quantitative).
- Community labs: Some universities or extension offices offer low-cost testing.
Warning: These won’t replace certified kits for heavy metals or pesticides. Prioritize safety for kids/pets!
What do I do if my soil tests positive for toxins?
Don’t panic! Start with these steps:
- Containment: Avoid digging or disturbing the soil until remediation.
- Professional help: Contact local environmental agencies (e.g., EPA) for guidance.
- Remediation: Options include soil removal, chelation (for metals), or planting hyperaccumulator plants (like sunflowers for lead).
For gardens, raise beds with clean soil or grow in containers until the area is safe.
Can I reuse the same soil sample for multiple tests?
Generally, no—once a sample is mixed with reagents (like in a test strip or liquid kit), it’s contaminated and unreliable for retesting. Save extra soil in a clean, dry container if you plan to test multiple contaminants. Pro tip: Label samples with dates and locations to avoid mix-ups!
Wrapping up and next steps
Testing your soil for toxicity doesn’t have to be complicated or time-consuming! With just a few simple steps and basic materials, you can get quick, reliable results in under 10 minutes—helping you make informed decisions for healthier plants and safer gardening.
Whether you’re a seasoned gardener or just starting out, this at-home method empowers you to take control of your soil’s health effortlessly.
Ready to take the next step? Grab your supplies, follow the guide, and transform your garden into a thriving, toxin-free haven! 🌱✨