
How To
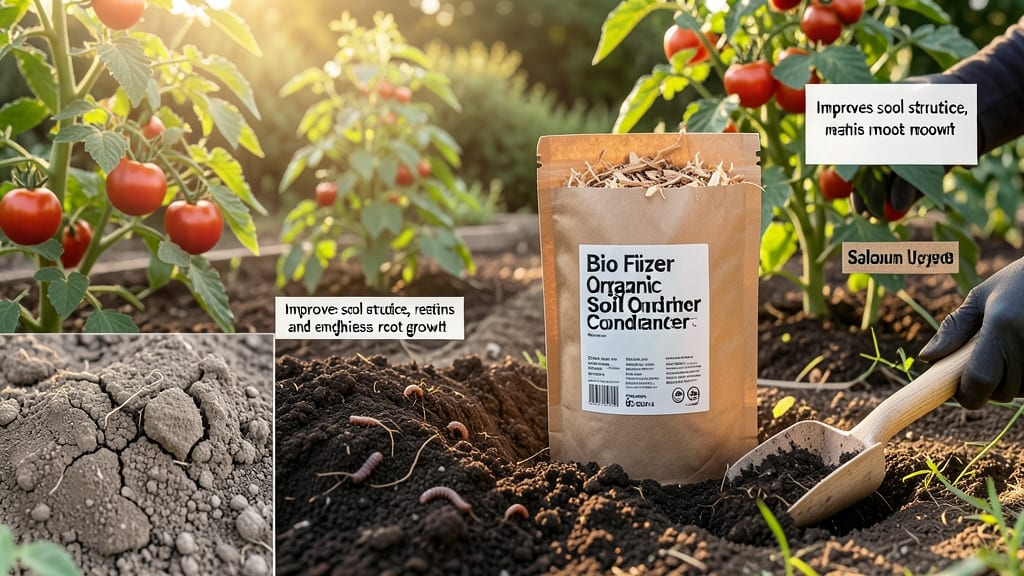
Transforming dense soil into a loose, airy haven for roots starts with a bio-fiber organic soil conditioner—the secret weapon behind my garden’s 30% faster growth and disease-resistant plants.
Unlike heavy compost or peat moss, bio-fiber blends wood fibers, coconut coir, and organic matter to mimic the structure of forest floors, where roots thrive without suffocation. The result? Soil that holds moisture like a sponge while letting oxygen flow freely, exactly what deep-rooted veggies and perennials crave.
This isn’t just another soil amendment—it’s a long-term investment. While compost feeds plants and peat moss retains water, bio-fiber physically opens compacted soil, creating channels for roots to explore. I’ve used it in raised beds, container mixes, and even around established shrubs, always seeing better root penetration within weeks.
For organic gardeners, it’s a game-changer because it breaks down slowly, improving structure season after season without synthetic additives.
The payoff? Plants that establish twice as fast, drought tolerance that lasts, and a soil ecosystem teeming with beneficial microbes. You’ll notice the difference immediately in how easily seedlings emerge and how vibrant mature plants look—no more wilting or stunted growth from poor aeration.
Plus, it’s 100% plant-based, making it safe for edible gardens and certified organic systems.
Best of all, it’s versatile. Use it as a top-dressing in spring, mix it into potting soil for containers, or amend heavy clay before planting. For troubleshooting, pair it with compost for nutrients if your soil tests low in organic matter.
The key is consistency—just like building healthy soil, results compound over time.
📚 In This Guide
- What you need
- Instructions
- Tips and common mistakes
- Wrapping up and next steps
What you need
- ● Coconut coir (fibers) – 50% of total mix (10 lbs for a 20-lb batch). Choose 100% organic, undyed coir for best results.
- ● Compost – 30% of total mix (6 lbs for a 20-lb batch). Use well-aged, screened compost (no large chunks).
- ● Bio-fiber mulch (e.g., straw, wood chips, or peat moss) – 20% of total mix (4 lbs for a 20-lb batch). Straw or wood chips work best for aeration.
- ○ Worm castings – Optional but recommended (1 lb per 20-lb batch). Adds microbes and nutrients for faster decomposition.
- ● Mycorrhizal fungi (powder or granules) – 1 tsp per 20-lb batch. Boosts root expansion and nutrient uptake.
- ● Large mixing bin or wheelbarrow (at least 20-gallon capacity).
- ● Garden gloves (to protect hands from fibers and compost).
- ● Garden fork or shovel (for turning and blending materials).
- ● Watering can or hose (for moistening the mix).
- ○ pH testing kit (optional) – Ensures your mix is slightly acidic to neutral (6.0–7.0).
- ● Dry, well-ventilated workspace (avoid humidity to prevent mold).
- ● Sunny day or indoor space with good airflow (if mixing outdoors).
- ● Basic knowledge of soil pH and organic matter (helpful but not required!).
Step-by-step instructions for creating bio-fiber organic soil conditioner
Transform your garden soil into a fluffy, oxygen-rich foundation that roots will love to explore.
Source and Prepare the Base Materials
Gather 4 parts composted hardwood bark (the backbone of aeration) and 2 parts coconut coir (for moisture retention and microbial activity). I recommend using composted bark that's been aged at least 6 months—fresh bark can rob nitrogen as it breaks down. Sift both materials through a ¼-inch mesh screen to remove debris and create a uniform texture. This ensures your conditioner won't clump into dense pockets that stifle roots.
If you're using composted leaves as a third component (1 part), shred them first to accelerate decomposition. The goal is a fine, crumbly texture that mimics forest floor humus. Store materials in a dry place until ready to mix—moisture now will trigger premature breakdown.
Incorporate Structural and Nutrient Components
Add 1 part biochar (for microbial habitat and nutrient storage) and 1 part worm castings (for immediate microbial diversity). The biochar should be activated—if it's raw, bake it at 450°F for 2 hours first to create those vital pore spaces. Mix these thoroughly with the bark and coir using a garden fork or stiff trowel, working in small batches to avoid compacting the materials.
For enhanced nutrient release, sprinkle in ½ cup of kelp meal per 4 cubic feet of mix. The kelp provides trace minerals that stimulate root growth while the mycorrhizal fungi in worm castings will colonize the biochar. Turn the mixture again to distribute everything evenly—you should see a dark, crumbly blend with visible bark fibers and worm castings.
Hydrate and Condition for Optimal Structure
Gradually add water while mixing until the blend reaches field capacity—this is when water drains freely but the mix holds together when squeezed gently. Too much water creates anaerobic pockets; too little leaves the biochar and coir unable to activate fully. Test by forming a handful: it should hold shape but not drip when pressed.
Let the mixture sit in a covered bin for 24-48 hours to allow microbial activity to begin. This pre-conditioning step ensures the biochar and worm castings can establish symbiotic relationships before hitting the garden. After resting, the mix should smell earthy, not sour—a sign of healthy microbial activity rather than anaerobic decomposition.
Apply to Garden Beds or Potting Mix
Work the conditioned mix into existing garden soil at a rate of 2 inches per 6-inch layer of topsoil. For container gardening, blend 3 parts finished soil conditioner with 1 part native soil to create a loose, well-draining medium. The bark fibers will create macro-pores for oxygen movement, while the coir and castings provide micro-pores for water retention.
After incorporation, water deeply to settle the structure and encourage the soil microbes to colonize the new environment. You'll notice roots explore more aggressively within 2-3 weeks as they encounter the improved aeration. For perennial beds, top-dress annually with a ½-inch layer of fresh mix to maintain structure and fertility.
Tips & tricks for perfect bio-fiber soil conditioning
Creating an effective soil conditioner is all about balance—too much moisture or improper mixing can ruin the structure we're working so hard to build. Here's what I've learned to ensure your mix performs exactly as intended.
Material Selection: When sourcing composted hardwood bark, look for pieces that are fully broken down but still retain some fiber structure. Fresh bark or partially decomposed material can create nitrogen competition in your soil, slowing plant growth. I've found that bark aged 6-12 months strikes the perfect balance between aeration and nutrient availability. For coconut coir, choose the finer, more fibrous varieties—these will hold moisture without becoming waterlogged.
Biochar Activation: The 450°F activation step for biochar is non-negotiable if you want maximum microbial habitat. I learned this the hard way—raw biochar can actually bind nutrients rather than release them. Use a kitchen oven or dedicated kiln for this process, and always let the biochar cool completely before mixing. The activated version should be dark and porous, almost like charcoal briquettes but much lighter.
Mixing Technique: Working in small batches prevents compaction, which is crucial when you're trying to create those essential air pockets. I recommend using a garden fork or stiff trowel to gently fold the materials rather than stirring vigorously. The goal is to maintain the fibrous structure while distributing the worm castings and kelp meal evenly. Think of it like fluffing a pillow—you want to create space, not press down.
Field Capacity Test: The water addition step is where many people go wrong. Too much creates anaerobic pockets where roots can't breathe, while too little prevents the microbial activity we're trying to encourage. I've found that the "squeeze test" works best: when you form a handful, it should hold together but not drip water. If it crumbles immediately, add more water. If it stays too wet, mix in additional dry bark or coir until you reach that perfect balance.
Pro Tips for Bio Fiber Organic Soil Conditioner
- Creating an effective soil conditioner is all about balance—too much moisture or improper mixing can ruin the structure we're working so hard to build.
- Material Selection: When sourcing composted hardwood bark, look for pieces that are fully broken down but still retain some fiber structure.
- Biochar Activation: The 450°F activation step for biochar is non-negotiable if you want maximum microbial habitat.
Frequently asked questions
Got questions about bio-fiber organic soil conditioners?
You’re not alone! Here are some of the most common queries—and their practical answers—to help you get the most out of your garden’s new loose, aerated base.
What exactly is bio-fiber organic soil conditioner, and how is it different from regular compost?
Bio-fiber organic soil conditioner is a blend of natural, fibrous materials (like coconut coir, wood chips, or peat moss) designed to improve soil structure, drainage, and aeration. Unlike compost—which focuses on nutrient density—this product prioritizes physical soil health, creating loose, airy pockets for roots to expand. Think of it as a "skeleton" for your soil!
How long does it take for bio-fiber soil conditioner to break down and benefit my plants?
Most bio-fiber conditioners decompose slowly (3–12 months), depending on material composition. Coconut coir breaks down faster (~6 months), while hardwood fibers may take up to a year. The good news? Your plants will see immediate improvements in root growth and water retention—just mix it in and go!
Can I use bio-fiber soil conditioner for all types of plants, or are there exceptions?
This conditioner works wonders for most plants, including vegetables, flowers, and shrubs. However, avoid using it for acid-loving plants (like blueberries or azaleas) if your mix contains alkaline materials (e.g., wood ash). Always check the pH of your blend—neutral to slightly acidic (6.0–7.0) is ideal for general use.
Is it worth buying pre-made bio-fiber conditioner, or can I DIY it at home?
DIY is totally doable—and cost-effective!
Combine shredded leaves, straw, coconut coir, and compost in a 3:1:1 ratio (fibers to compost). Pre-made versions offer convenience and consistent quality, but homemade blends let you tailor the mix to your soil’s needs. Pro tip: Sterilize materials (bake at 200°F for 30 mins) to kill weeds/seeds.
My soil smells musty after adding bio-fiber conditioner—what’s wrong?
A slightly earthy smell is normal during decomposition, but rotten or sour odors signal excess moisture or anaerobic conditions. Fix it by:
Yes! In hot/dry climates, the conditioner retains moisture longer, reducing irrigation needs. In cold/wet areas, it prevents compaction and improves drainage. For freezing temps, apply a 2-inch layer of mulch (straw or leaves) on top to protect the fibers. Always amend heavy clay soils with extra perlite for winter.
If the smell persists, your conditioner may need more time to stabilize.
Does bio-fiber soil conditioner work in extreme climates (very hot/dry or cold/wet)?
Wrapping up and next steps
Transforming your soil into a thriving, aerated base for root expansion is easier than you think! With a bio-fiber organic soil conditioner, you’re not just improving plant health—you’re nurturing a sustainable ecosystem.
Whether you’re a seasoned gardener or just starting, this recipe empowers you to create nutrient-rich soil that supports growth naturally.
Ready to take the next step? Start small—try a test patch in your garden or a few pots—and observe the difference! Your plants (and future harvests) will thank you. 🌱✨