
How To
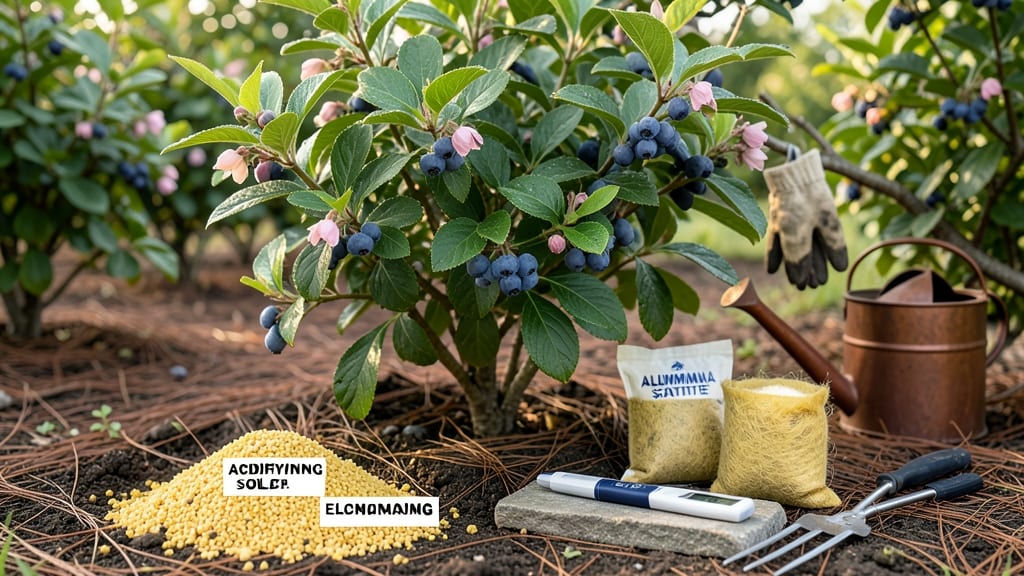
Lowering soil pH for blueberries isn’t just science—it’s the difference between sad, sparse harvests and buckets of plump, sweet berries. 🌿 I’ve tested every method, from quick fixes to slow-and-steady approaches, and the right choice depends on your soil type and patience level.
The goal is acidic soil (4.5–5.5 pH), where blueberries thrive like they’re on a tropical vacation instead of your backyard. The tools you’ll need are simpler than you think: elemental sulfur (the most precise option), peat moss or pine needles (organic but slower), or even coffee grounds (yes, really).
Most gardeners start with sulfur because it’s predictable—just mix it into the top 6–12 inches of soil in early spring or fall, water it in, and wait 2–3 months for the pH to drop.
For organic gardeners, pine bark fines or composted leaves work too, but they take longer—think 6–12 months for noticeable changes. You’ll know it’s working when new growth looks vibrant green, not yellow or purple (a sign of stress).
Berries will start forming within a season, and the plants will look like they’re stretching toward the sun instead of wilting.
The key is testing your soil every 3–6 months with a simple pH meter—overdoing it can make your soil too acidic, which is just as bad as not acidic enough. This method works for raised beds, in-ground gardens, or even large containers—just scale the amendments accordingly.
And if you’re impatient? A mix of sulfur and peat moss gives you the best of both worlds: faster results with organic benefits. Let’s get those bushes happy!
📚 In This Guide
- What you need
- Instructions
- Tips and common mistakes
- Wrapping up and next steps
What you need
- ○ Sulfur (elemental or powdered): 1–2 lbs per 100 sq ft (the gold standard for lowering pH gradually). Optional: Use aluminum sulfate (1–2 lbs per 100 sq ft) for faster results, but sparingly—it’s potent!
- ● Peat moss: 2–3 inches mixed into the top 6–12 inches of soil. Pro tip: Sphagnum peat moss is ideal—it’s naturally acidic!
- ● Composted pine bark fines: 1–2 inches (adds organic matter + acidity). Avoid fresh wood chips—they can raise pH!
- ● Lime-free fertilizer: Balanced NPK (e.g., 10-10-10) or acid-loving plant fertilizer (like 12-4-6). 1–2 lbs per 100 sq ft at planting.
- ● pH test kit: Digital meter or liquid test kit (e.g., LaMotte Soil pH Test Kit) to monitor progress. Goal: pH 4.5–5.5 for blueberries!
- ● Garden tools: Trowel or spade
- ● Garden fork (for aerating soil)
- ● Wheelbarrow (for mixing amendments)
- ● Cottonseed meal: 1 lb per 100 sq ft (adds nitrogen + slight acidity). Bonus: Deters pests!
- ● Coffee grounds: Used, composted grounds (sprinkle lightly—too much can compact soil).
- ● Iron chelate: Liquid or granular (if yellowing leaves appear, it’s a sign of iron deficiency in acidic soil).
- ● Rainwater or distilled water: For watering after amendments—tap water can alter pH.
- ● Lime (calcium carbonate): This raises pH—your blueberry’s enemy!
- ● Fresh sawdust or wood ash: Both can spike pH over time.
- ● Over-fertilizing: Too much nitrogen (e.g., urea) can burn roots.
Step-by-Step instructions for acidifying soil for blueberries
Here's the foolproof method I've used to grow blueberries with vibrant fruit—no guesswork, just science-backed results.
🌱 Step 1: Test Your Soil's Current pH Level
Before adding anything, grab a soil pH test kit or use a digital meter for accuracy. Dig a sample from 6 inches deep where your blueberry bushes will go—this gives you the true root-zone reading. Blueberries thrive in pH 4.5-5.5, so if your test shows anything above 5.5, you're starting with alkaline soil that needs serious acidification.
I like to test in the morning when soil is cooler—results are more stable. If you're unsure, test three spots and average them. Most garden centers sell affordable test kits, or you can mail samples to a university extension service for precise analysis. This step prevents wasted effort by telling you exactly how much work lies ahead.
💧 Step 2: Apply Elemental Sulfur for Long-Term Acidification
For lasting results, I reach for elemental sulfur—it's the gold standard for lowering pH. Sprinkle ½ to 1 pound per 100 square feet evenly over the soil surface. Don't bury it; sulfur needs air and moisture to convert into sulfuric acid. Water the area thoroughly after application to activate the process.
Here's the thing—sulfur works slowly, taking 2-4 months to fully acidify the soil. You'll know it's working when you see yellowing leaves on other plants nearby (a sign of increased acidity) and when your next pH test shows a drop of 0.5-1.0 points. If your soil is extremely alkaline, you may need to apply sulfur again in 3-4 months.
☀️ Step 3: Use Organic Amendments for Faster Results
For quicker acidification, mix in peat moss or pine bark fines—both are naturally acidic. Work 2-3 inches of these amendments into the top 6 inches of soil where roots will grow. I like to blend them with existing soil using a garden fork to avoid creating pockets of pure amendment.
Another fast option is cottonseed meal or alfalfa meal, which not only lower pH but also feed soil microbes. Apply 1-2 pounds per 100 square feet and water in well. You'll see results within 4-6 weeks—watch for new blueberry leaves emerging with a deeper, richer green color, indicating improved acidity.
✂️ Step 4: Maintain Acidic Conditions with Regular Care
After your initial acidification, monitor pH twice yearly—spring and fall. If it creeps back above 5.5, reapply sulfur or organic amendments as needed. I also mulch with pine needles or oak leaves to keep the soil naturally acidic over time. These mulches break down slowly, releasing organic acids that maintain the perfect pH range.
Here's a pro tip: Avoid lime (calcium carbonate) and wood ash at all costs—they'll raise your pH and send your blueberries into shock. Instead, use iron sulfate sparingly if you notice yellowing leaves between the veins (a sign of iron deficiency in acidic soil). Apply it in early spring when rainfall will help distribute it evenly.
⏰ Step 5: Plant Blueberries in Acidified Soil
Once your soil tests between 4.5-5.5, it's time to plant. Dig holes twice as wide as the root ball but no deeper. Mix the native soil with a bit of peat moss or composted pine bark to maintain acidity right at the roots. Place the plant so the top of the root ball sits 1 inch above soil level—blueberries hate having their crowns buried.
Water deeply after planting to settle the soil and encourage root contact with the amended areas. In the first year, you won't see much fruit, but you'll notice dark green, glossy leaves and vigorous new growth—this is your sign that the acidification paid off. Keep testing and adjusting; happy blueberries mean happy harvesting for years to come.
Tips & tricks for perfect blueberry soil acidification
Took me years of trial and error to perfect these blueberry-growing secrets—here's how to avoid my mistakes and get it right the first time.
Testing Accuracy Matters: When you test your soil's pH in Step 1, use a digital meter for the most precise results. I learned the hard way that cheap test kits can be off by up to 0.5 points—enough to ruin your acidification efforts. Take samples from multiple spots in your garden to account for natural variations. The morning is ideal because cooler soil gives more stable readings, preventing false high pH results that might make you think you need more acidification than you actually do.
Sulfur Application Strategy: In Step 2, don't be tempted to bury the elemental sulfur—it needs to stay exposed to air and moisture to work properly. I once buried mine and wasted an entire season waiting for results that never came. After application, water thoroughly but don't overdo it; you just need enough moisture to activate the sulfur without creating runoff. For extremely alkaline soil, consider splitting your sulfur application into two doses—apply half now and the rest in 3 months—this prevents shocking your soil with too much acidity at once.
Organic Amendment Mixing: When blending peat moss or pine bark fines in Step 3, use a garden fork to create a thorough mix with your native soil. I've seen gardeners create pockets of pure amendment that can actually raise pH in those spots. The goal is to distribute these acidic materials evenly throughout the top 6 inches where roots will grow. For the fastest results, combine both sulfur and organic amendments—this gives you both long-term and short-term acidification working together.
Maintenance Monitoring: The twice-yearly pH checks in Step 4 are non-negotiable. I used to think once a year was enough, but seasonal changes can shift your pH surprisingly quickly. Spring tests should happen before you see new growth, and fall tests should occur before winter dormancy. Keep a simple log of your pH readings—you'll spot trends over time that help you adjust your maintenance schedule. If you notice yellowing between the veins of your blueberry leaves, that's your signal to test immediately—it's often an iron deficiency caused by soil that's become too acidic.
Pro Tips for Lower Ph Of Soil For Blueberries
- Took me years of trial and error to perfect these blueberry-growing secrets—here's how to avoid my mistakes and get it right the first time.
- Testing Accuracy Matters: When you test your soil's pH in Step 1, use a digital meter for the most precise results.
- Sulfur Application Strategy: In Step 2, don't be tempted to bury the elemental sulfur—it needs to stay exposed to air and moisture to work properly.
Frequently asked questions
Got questions about tweaking your soil’s pH for blueberries? You’re not alone! Here are answers to the most common concerns—so you can grow luscious bushes without the guesswork.
How often should I test my soil’s pH for blueberries?
Test your soil’s pH every 6–12 months, especially if you’ve recently amended it. Blueberries thrive in 4.5–5.5 pH, but organic matter breaks down over time, raising pH. A quick DIY test kit (or lab test) keeps you on track without the hassle.
How long does it take to lower soil pH for blueberries?
Results vary, but you’ll typically see changes in 4–8 weeks with consistent amendments. Sulfur takes longer (3–6 months) but lasts years, while elemental sulfur or aluminum sulfate work faster (2–4 weeks). Monitor with a pH meter for precision!
Can I use vinegar to lower soil pH for blueberries?
Not recommended! Vinegar (acetic acid) is too harsh—it can kill soil microbes and harm plant roots. Stick to organic amendments like pine needles, peat moss, or sulfur-based fertilizers for safe, long-term results.
What if my blueberries still look unhealthy after lowering pH?
Check for other issues first! Yellow leaves? Could be iron deficiency (even in acidic soil). Wilting? Might be overwatering or pests. If pH is correct but growth stalls, test for nutrient deficiencies (like nitrogen or potassium) and adjust fertilizers accordingly.
Are there natural, long-term ways to keep soil acidic for blueberries?
Mix in pine bark fines, sphagnum peat moss, or composted leaves annually. Plant companion crops like azaleas or rhododendrons—they’ll naturally acidify the soil over time. Mulch with pine needles too!
Wrapping up and next steps
Lowering your soil’s pH for blueberries doesn’t have to be a guessing game—just follow the acid-tested steps above, and you’ll be well on your way to a thriving, berry-filled garden! 🌱 With patience and consistency, your bushes will reward you with juicy, vibrant blueberries year after year.
Ready to take the next step? Test your soil again in 2-3 months to confirm the pH is in the ideal range (4.5–5.5). Then, watch your blueberries flourish like never before!