
How To
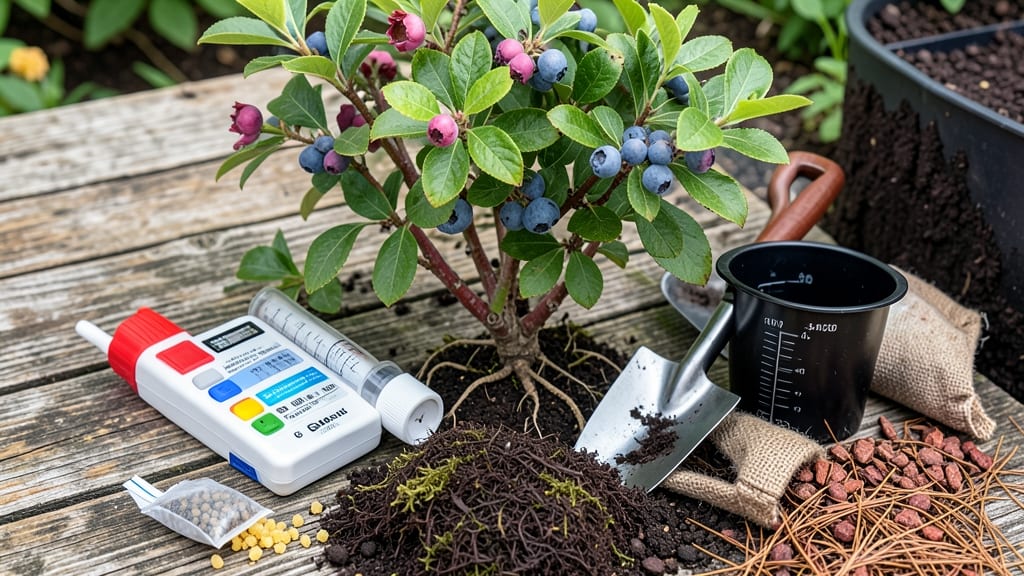
How to make potting soil more acidic is the secret to thriving acid-loving plants like azaleas and blueberries. 🌿 The right mix of organic amendments can transform your soil from garden-center neutral to the perfect acidic home for picky plants. I've tested everything from pine needles to sulfur—here's what actually works without burning roots or breaking the bank.
Most gardeners reach for peat moss first, and for good reason: it's the gold standard for organic acidifiers. A handful per gallon of soil drops pH reliably, but the real game-changer is pine needles—free, abundant, and packed with natural acids.
For faster results, elemental sulfur does the job, though it takes patience (weeks, not days) to fully acidify.
You'll see happier plants within weeks: deeper green foliage, more abundant blooms, and fewer yellowing leaves. Azaleas will burst with color, blueberries produce fruit, and even fussy gardenias will thrive. The key is testing your soil first—knowing your starting pH means you won't overdo it and risk stunting growth.
This method works for container gardens, hanging baskets, and even indoor plants that crave acid. The same principles apply whether you're growing in 4-inch pots or 5-gallon buckets. Let's get your soil dialed in for the plants that demand it.
📚 In This Guide
- What you need
- Instructions
- Tips and common mistakes
- Wrapping up and next steps
What you need
- ● Peat moss (sphagnum or horticultural grade) – 1–2 cups per 5 gallons of potting soil. Look for low-pH peat moss (typically 3.8–4.5 pH).
- ● Pine needles (fresh or dried) – ½–1 cup per 5 gallons. Avoid treated or chemically processed needles.
- ● Potting soil (existing or new) – 5+ gallons (adjust based on your project size).
- ● Distilled water or rainwater – 1–2 cups (to moisten soil and help acidify).
- ○ pH testing kit (digital or liquid) – Optional but recommended for accuracy.
- ● Garden gloves – To protect your hands from soil and sharp pine needles.
- ● Large mixing container or wheelbarrow – For blending soil amendments.
- ● Garden fork or trowel – To aerate and mix thoroughly.
- ● Spray bottle (for liquid amendments) – If using diluted vinegar or sulfur solutions.
- ○ Aluminum sulfate or sulfur powder – ½–1 cup per 5 gallons (optional) for faster acidification.
Step-by-Step guide to lowering potting soil pH
Here’s my go-to method for creating the perfect acidic environment for acid-loving plants.
🌱 Step 1: Test Your Soil’s Current pH Level
Before making changes, grab a soil pH test kit and check your current mix. Most potting soils start around 6.0-7.0, which is too neutral for acid-loving plants like blueberries, azaleas, or gardenias. Aim for a target of 4.5-5.5 for these plants. If your soil tests above 6.0, it’s time to acidify.
I like to test in the morning when the soil is coolest—results are more accurate. Dip the test probe into a small sample of moist soil, wait 30 seconds, and compare the color to the kit’s chart. If it’s closer to 7.0, you’ll need to adjust significantly. Write down your starting pH to track progress later.
🪴 Step 2: Mix in Peat Moss for Long-Term Acidification
Peat moss is the backbone of acidic soil mixes because it naturally lowers pH over time. For a 5-gallon container, blend 2 cups of peat moss into the existing soil. Work it in thoroughly—this isn’t just a surface adjustment. Peat moss releases organic acids as it breaks down, gradually dropping the pH by 0.5-1.0 points over a few weeks.
Don’t skimp on mixing—uneven distribution means some roots will still struggle in higher-pH pockets. I like to use a small trowel to stir the soil until it looks uniformly dark and fluffy. If your soil feels dry, lightly mist it before adding peat moss to help it integrate smoothly.
🌿 Step 3: Add Pine Needles for Immediate pH Drop
Fresh or dried pine needles are a powerhouse for quick acidification. Chop 1 cup of pine needles (fresh or dried) into small pieces and sprinkle them evenly over the soil surface. Pine needles contain tannins, which dissolve into the soil and lower pH almost immediately. For faster results, soak the needles in warm water for 24 hours before mixing—the tannins leach out more efficiently.
Work the pine needles into the top 2-3 inches of soil. You’ll notice a slightly pine-scented aroma—that’s normal and confirms the tannins are active. Avoid overdoing it; too many needles can make the soil too dense. For a 5-gallon container, 1 cup is plenty. Water the soil lightly after adding them to help the tannins distribute.
⏰ Step 4: Apply Sulfur for Precise pH Adjustment
If your soil still isn’t acidic enough after 2-3 weeks, add elemental sulfur for a controlled drop. For a 5-gallon container, sprinkle 1 tablespoon of sulfur over the soil and mix it in gently. Sulfur reacts with soil microbes to produce sulfuric acid, lowering pH gradually. It’s precise but takes 2-4 weeks to fully take effect, so plan ahead if you’re planting soon.
Water the soil thoroughly after adding sulfur—this activates the reaction. Avoid overwatering, though; sulfur works best in moist but not soggy soil. I like to test the pH again after 10 days to monitor progress. If the pH drops too fast, reduce future sulfur amounts by half.
💧 Step 5: Maintain Acidic Conditions with Regular Care
Acidic soil isn’t a one-time fix—it requires ongoing attention. Water your plants with rainwater or distilled water whenever possible, as tap water often contains minerals that raise pH. If you must use tap water, let it sit in a bucket for 24 hours before watering to allow some minerals to settle.
Every 3-4 months, retest the soil pH and repeat the peat moss or pine needle treatment if needed. I also add a slow-release acidic fertilizer (like one formulated for azaleas) every 6 months to keep the pH stable. Watch your plants closely—yellowing leaves on acid-loving plants often signal soil that’s become too alkaline again.
Tips & tricks for perfect acidic potting soil
Here's what nobody tells you about getting your soil just right for acid-loving plants.
Testing Timing: That 30-second wait when testing pH in Step 1 is crucial—rushing it gives inaccurate readings. I've learned this the hard way after getting false results because I checked too quickly. For consistency, always test in the morning when soil temperatures are cooler, as heat can affect pH readings. Keep your test kit in a cool, dry place to maintain accuracy over time.
Peat Moss Integration: When mixing in the 2 cups of peat moss for your 5-gallon container, think of it like making a smoothie—you want complete, even distribution. I like to create small wells in the soil first, then add the peat moss before gently folding it in with a trowel. This prevents clumping and ensures every root zone gets the acidifying benefits. The uniform dark color is your visual cue for success.
Pine Needle Prep: Don't underestimate that 24-hour soak for pine needles! The warm water extraction process releases significantly more tannins than dry needles alone. I use a clean plastic container for soaking, then strain the liquid through a fine mesh bag directly into the soil. This concentrated tannin solution works faster than dry needles and gives you that immediate pH drop we want in Step 3.
Sulfur Application: The 10-day check after adding sulfur in Step 4 is your safety net. I've seen sulfur work too aggressively when soil was too moist, dropping pH below 4.0 overnight. To prevent this, keep your soil consistently moist but never soggy after application. A good rule of thumb is to water just enough to maintain moisture without puddling—think damp sponge, not wet towel.
Pro Tips for Make Potting Soil More Acidic
- Here's what nobody tells you about getting your soil just right for acid-loving plants.
- Testing Timing: That 30-second wait when testing pH in Step 1 is crucial—rushing it gives inaccurate readings. I've l...
- Peat Moss Integration: When mixing in the 2 cups of peat moss for your 5-gallon container, think of it like making a ...
Frequently asked questions
Got questions about lowering your potting soil’s pH? You’re not alone!
Here are answers to the most common concerns—so you can grow acid-loving plants with confidence.
How do I test if my soil is acidic enough?
Use a soil pH test kit (digital or liquid) for accuracy. Most acid-loving plants (like azaleas, blueberries, or hydrangeas) thrive at pH 4.5–6.0. Test before and after amending your soil to track changes. Pro tip: DIY tests (like vinegar/baking soda) are quick but less precise—use them for rough estimates only.
How long does it take for potting soil to become more acidic?
Changes happen gradually! With peat moss or pine needles, expect noticeable shifts in 2–4 weeks if watered regularly. For faster results, mix in sulfur (takes 1–2 weeks) or coffee grounds (works in 1–3 weeks). Patience is key: Retest monthly until you hit your target pH.
Can I over-acidify my potting soil? What happens then?
Yes—soil that’s too acidic (below pH 4.0) can harm plants by locking out essential nutrients like phosphorus, calcium, and magnesium. Symptoms include yellowing leaves, stunted growth, or root rot. To fix it, add lime (calcium carbonate) or wood ash (sparingly!) and retest. Balance is everything!
Are there natural alternatives to peat moss for acidifying soil?
Try these eco-friendly swaps:
- Pine needles: Decompose slowly (great for long-term acidity).
- Coffee grounds: Add 1–2 cups per gallon of soil (rich in nitrogen too!).
- Composted leaves: Break down to lower pH over time.
- Aluminum sulfate: Fast-acting (follow package rates).
My plants look unhealthy after adding acidic amendments. What went wrong?
Possible culprits:
- You overdid it—dilute the soil with fresh potting mix and water thoroughly.
- Your plant isn’t acid-loving (e.g., tomatoes prefer neutral soil).
- Poor drainage from compacted soil—add perlite or vermiculite.
Wrapping up and next steps
Transforming your potting soil into an acidic haven for acid-loving plants doesn’t have to be complicated—just follow the natural, plant-friendly methods we’ve shared! Whether you’re using peat moss, pine needles, or a splash of vinegar or sulfur, you’re giving your greens the perfect growing conditions. 🌱
Now that you’re armed with the know-how, grab your gloves and get planting! Start with a small batch to test the pH, observe your plants’ response, and adjust as needed. Happy gardening—your acid-loving plants will thank you! 🌿