
Tools
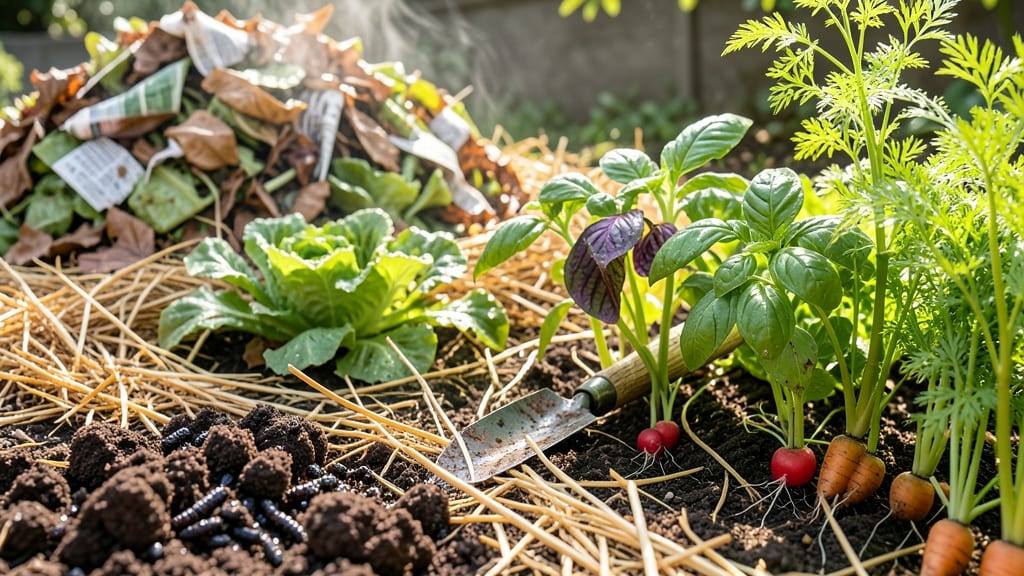
Your acid-loving plants deserve soil that works as hard as they do. 🌱 The right organic soil mix transforms garden beds from lifeless dirt to a thriving ecosystem where blueberries, azaleas, and hydrangeas grow lush and productive.
I learned the hard way that store-bought bags labeled "organic" often lack the acidity and structure these plants need—so I built my own blend from scratch.
Start with 40% compost for nutrients, 30% peat moss or coconut coir to hold moisture and lower pH, and 30% perlite or coarse sand for drainage. Test your soil first (pH 4.5-5.5 is ideal for acid-lovers), then adjust with sulfur or pine fines if needed.
The payoff? Plants that push out vibrant green leaves, heavy blooms, and fruit with zero yellowing or stunted growth. This isn't just about feeding plants—it's about creating a self-sustaining environment where worms, microbes, and roots all thrive together.
Once you see your blueberries the size of golf balls and hydrangeas with blooms bigger than your hand, you'll never go back to generic garden soil. The secret? Consistent care—top-dress with compost annually and mulch with pine needles to maintain that perfect acid balance.
Works for containers too—just scale down the ingredients. Here's how to troubleshoot common issues like compaction or nutrient deficiencies without breaking the bank or your back.
📚 In This Guide
- What you need
- Instructions
- Tips and common mistakes
- Wrapping up and next steps
What you need
- ● Compost: 50% of the mix (at least 2-3 cubic feet per 4’x4’ bed). Look for well-aged, dark, crumbly compost with a pH of 6.0-7.0.
- ● Peat moss or coconut coir: 25% of the mix (1-1.5 cubic feet per bed). Opt for sphagnum peat moss for moisture retention or coconut coir for a more sustainable option.
- ● Perlite or vermiculite: 10% of the mix (½ cubic foot per bed). These amendments improve aeration and drainage—perlite for extra lightness, vermiculite for moisture retention.
- ● Sulfur or aluminum sulfate: 1-2 tablespoons per cubic foot of mix. This lowers pH for acid-loving plants like blueberries, azaleas, or hydrangeas (aim for a pH of 4.5-6.0).
- ○ Garden lime (optional for fine-tuning): Small amounts (½ teaspoon per cubic foot) if your soil tests too acidic.
- ● Garden fork or spade: For turning and mixing soil (rent or borrow if needed).
- ● Wheelbarrow or large bin: To blend materials easily (at least 2-3 cubic feet capacity).
- ● pH testing kit: Digital or liquid test strips to monitor soil acidity before and after amending.
- ● Gloves and protective eyewear: Peat moss and sulfur can be dusty!
- ● Watering can or hose: For moistening the mix before planting.
- ○ Optional: Soil sieve (to remove debris) or a tarp (to protect your workspace).
Step-by-Step guide to building acid-balanced organic garden loam
Here’s how I create the perfect foundation for acid-loving plants—rich, well-draining, and packed with organic matter.
🌱 Step 1: Test and Amend Your Base Soil
Start by testing your existing soil’s pH. Acid-loving plants like blueberries, azaleas, and rhododendrons thrive at pH 4.5-5.5. If your soil tests higher, mix in 1-2 inches of peat moss or composted pine bark per square foot to lower the pH naturally. I avoid lime or wood ash—they raise pH and can lock out essential nutrients.
Work the amendment into the top 6-8 inches of soil using a garden fork. Break up clumps and remove any rocks or debris. The goal is a loose, crumbly texture that allows roots to penetrate easily. If your soil is heavy clay, add coarse sand to improve drainage without altering pH.
🌿 Step 2: Layer Organic Materials for Depth and Fertility
Spread 2-3 inches of composted leaf mold over the amended soil. This adds humus, improves water retention, and feeds beneficial microbes. Next, top with 1 inch of worm castings—they’re packed with nitrogen and trace minerals that acid-loving plants crave. I sift these in lightly so they don’t clump.
For texture, mix in 1 part perlite or coarse vermiculite per 4 parts soil. This prevents compaction and ensures air pockets for root growth. Avoid fine sand—it can raise pH over time. Water the bed lightly after layering to help materials settle and integrate.
💧 Step 3: Blend and Condition the Soil
Use a broadfork or tiller to blend the layers into a uniform, loamy texture. Stop when the soil looks dark, crumbly, and holds its shape without sticking to your hands. If it feels too dry, add 1-2 inches of aged compost and mix again. The blend should resemble rich forest soil—dark, friable, and slightly moist.
Test moisture by squeezing a handful. It should hold together but not drip water. If it crumbles easily, it’s too dry; if it stays wet, add sand or perlite to improve drainage. This step is critical—poor drainage is the fastest way to suffocate roots in acid soil.
☀️ Step 4: Mulch to Preserve Moisture and Acid Balance
Top the bed with 3-4 inches of pine needles or shredded hardwood mulch. These materials slowly acidify the soil as they decompose, maintaining the ideal pH range. Avoid cedar mulch—it can be too acidic and may inhibit growth over time. Space mulch 2 inches away from plant stems to prevent rot.
Water deeply after mulching to settle everything in place. Check moisture weekly by probing 2 inches deep with a finger. Acid-loving plants prefer consistently moist but not soggy soil. If the surface dries quickly, add a 1-inch layer of compost to boost organic matter and water-holding capacity.
⏰ Step 5: Monitor and Adjust Over Time
After planting, test soil pH again in 3-4 months. Acid-loving plants show stress if pH drifts—yellowing leaves or stunted growth mean it’s time to re-amend. If needed, add sulfur or aluminum sulfate sparingly (follow package rates) and water thoroughly to activate the change.
Rotate crops annually to prevent nutrient depletion. I plant nitrogen-fixers like clover in fall to replenish soil naturally. Avoid over-fertilizing—acid-loving plants prefer lean, organic-rich soil over synthetic boosts. With this setup, your garden beds will stay productive for years.
Tips & tricks for perfect acid-balanced garden soil
Creating the ideal foundation for acid-loving plants takes more than just mixing ingredients—it's about understanding how each component works together. Here are the key insights I've learned after years of perfecting this method.
pH Precision: When testing your soil's pH in Step 1, use a reliable digital meter rather than strips for accurate readings. The ideal range of 4.5-5.5 is critical—even slight deviations can stress your plants. I've seen blueberry bushes fail completely when pH crept above 6.0, despite having all other conditions perfect. For existing beds with high pH, consider using elemental sulfur instead of peat moss for faster results, though it requires more careful application.
Layering Technique: In Step 2, the order of your amendments matters more than you might think. Always place the composted leaf mold first—this creates the base humus layer that holds moisture. The worm castings should go on top because their high nitrogen content helps activate microbial activity at the surface where roots will grow. I've found that mixing these layers too thoroughly can actually reduce their effectiveness by breaking down the beneficial microbial communities too quickly.
Texture Troubleshooting: If your soil feels too compacted after blending in Step 3, don't just add more perlite—first check your moisture level. Overly dry soil will compact more easily, and adding dry amendments without proper hydration creates hard clumps. I recommend working in small sections (about 2'×2') and keeping a watering can handy to maintain that slightly moist, crumbly texture. This approach prevents the need for excessive amendments later.
Mulch Selection: For Step 4, pine needles are my top recommendation because they decompose slowly while maintaining acidity, but hardwood mulch works beautifully too. The key is consistency—mix them together if available. I've noticed that cedar mulch, while popular, can actually inhibit some acid-loving plants by releasing too much acidity too quickly. Always keep that 2-inch clearance from stems to prevent rot and maintain proper airflow.
Pro Tips for Organic Soil For Garden Beds
- Creating the ideal foundation for acid-loving plants takes more than just mixing ingredients—it's about understanding how each component works together.
- pH Precision: When testing your soil's pH in Step 1, use a reliable digital meter rather than strips for accurate readings.
- Layering Technique: In Step 2, the order of your amendments matters more than you might think.
Frequently asked questions
Got questions about creating the perfect organic soil mix for your garden beds?
You’re not alone! Here are answers to the most common concerns—from timing to troubleshooting—to help you grow like a pro.
How long does it take for homemade organic soil to break down and become usable?
With the right mix of compost, aged manure, and bulking agents (like peat moss or coconut coir), your organic soil will stabilize in 4–6 weeks. However, it’s best to prep the bed 2–3 months ahead of planting to ensure full decomposition and nutrient availability. Test your soil’s texture—if it crumbles easily when squeezed, it’s ready!
Can I use organic soil immediately after mixing, or should I wait?
While you can plant in freshly mixed organic soil, waiting 2–4 weeks lets microbes break down materials and improves structure. For acid-loving plants (like blueberries or azaleas), this step is critical—rushing may lead to uneven pH or poor drainage. Pro tip: Cover the bed with mulch during this time to retain moisture and speed up the process!
What’s a good alternative if I don’t have compost or aged manure?
No compost? No problem! Use these organic-rich substitutes:
- Leaf mold (shredded leaves composted for 6+ months)
- Worm castings (nutrient-dense and gentle on roots)
- Grass clippings (mixed with nitrogen-rich materials like coffee grounds)
- Store-bought organic potting mix (blend with perlite for looseness)
My plants look unhealthy—could my organic soil be the issue?
Check these red flags and fixes:
Yellow leaves? Overwatering or poor drainage → Add coarse sand or perlite to improve aeration.
Slow growth? Low nutrients → Top-dress with compost tea or bone meal.
Foul smell? Anaerobic (rotting) soil → Fluff the bed and add dry, carbon-rich materials (like straw).
For acid-lovers, test pH with a kit—aim for 4.5–5.5. Adjust with sulfur (to lower pH) or lime (to raise it) as needed.Does organic soil work in all climates, or are there regional adjustments?
Organic soil is versatile, but climate matters:
- Hot/dry areas: Add more compost (holds moisture) and less peat (dries quickly).
- Cool/wet climates: Boost drainage with pine bark fines or vermiculite.
- Cold regions: Mix in straw or shredded leaves for insulation.
Wrapping up and next steps
Creating the perfect organic soil for garden beds—especially acid-balanced loam—is a game-changer for your acid-loving plants! 🌱 With the right mix of compost, peat moss, and a touch of sulfur, you’ve set the stage for a thriving, vibrant garden.
The key? Patience and consistency—your plants will reward you with lush growth and bountiful harvests.
Ready to take the next step? Start small—test your soil’s pH, experiment with amendments, and watch your garden transform. Happy gardening! 🌿