
Orchid Care
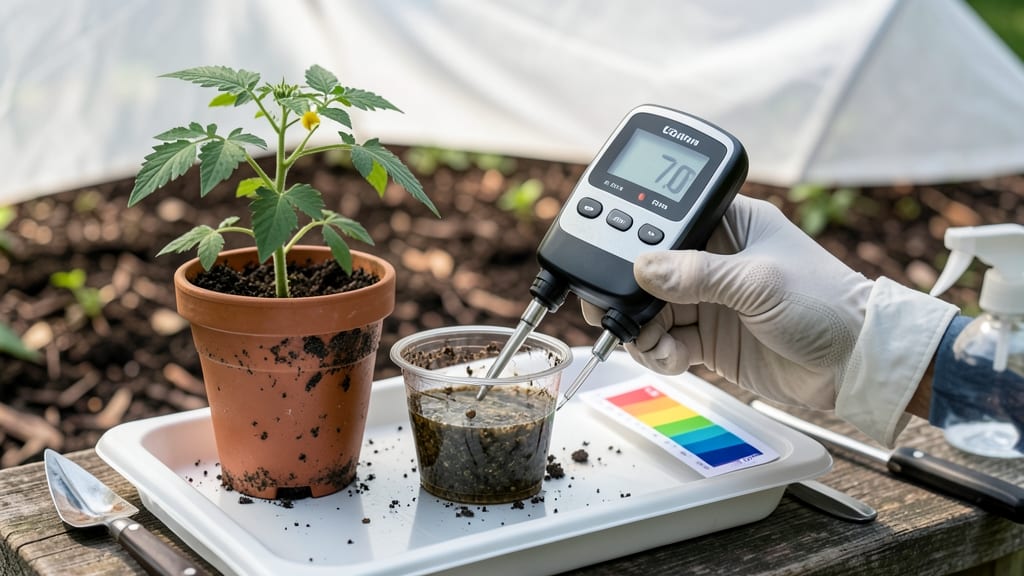
A pH tester for soil and water saved my orchids from yellowing leaves and stunted growth last spring. 🌱 These delicate plants need precise pH balance—too acidic or alkaline, and they struggle to absorb nutrients, even with perfect light and water.
The right tester gives you the exact numbers to make adjustments before problems start. Most testers work in minutes: dip strips in water or press into soil, then compare colors to a chart.
My digital meter reads pH in seconds, but even the cheap strips show if your mix is off. Orchids thrive between 5.5 and 6.5—outside that range, and you’ll see slow growth or leaf spots. The key is testing regularly, not just when you notice issues.
Once you know your pH, fixing it is straightforward. For too acidic soil (below 5.5), add crushed limestone; for too alkaline (above 6.5), work in sulfur or peat moss. I keep a log of my readings—it’s the only way to catch gradual shifts before they hurt my plants.
This method works for any moisture-loving plant, from ferns to calatheas. Grab a tester today and give your orchids the perfect growing conditions they deserve!
📚 In This Guide
- What you need
- Instructions
- Tips and common mistakes
- Wrapping up and next steps
What you need
- ● pH Tester: A digital pH meter (0-14 range, ±0.1 accuracy) or pH test strips (for quick checks). For orchids, a waterproof, orchid-safe tester is ideal.
- ● Distilled or Deionized Water: 500 mL (to calibrate and rinse the tester). Tap water can skew results!
- ● Calibration Buffer Solutions: pH 4.0 and pH 7.0 (for digital meters). Orchid soil often falls in the 5.5–6.5 range, so these buffers ensure precision.
- ● Sample Containers: 2–3 small, clean glass or plastic containers (for soil/water samples). Avoid metal!
- ● Scoop or Trowel: A sterile, non-metallic tool to collect soil samples.
- ● Stirring Rod or Spoon: For mixing soil with water (if testing soil pH).
- ● Notebook & Pen: To log pH readings and adjust care plans.
- ● pH Adjustment Supplies: Lime (calcium carbonate) or sulfur (to raise/lower soil pH).
- ● Citric acid or vinegar (diluted) for water adjustments.
- ● pH Test Kit for Soil: A combo kit with strips + meter for flexibility.
- ● pH Log Template: A printable chart to track trends over time.
How to use a pH tester for orchid care
Precision pH checks keep orchids thriving—here's how to read your tester like a pro.
🔍 Step 1: Choose the Right Tester for Your Needs
For orchids, you'll want either a digital pH meter (most accurate) or pH test strips (quick and portable). Digital meters give precise readings down to 0.1 pH units, while strips offer a 1.0 pH range—perfect for weekly checks. I recommend a meter with automatic temperature compensation to avoid false readings from cool water.
Orchids prefer acidic soil (pH 5.5-6.5) and slightly acidic water (pH 5.5-6.0). If your tester doesn’t come with calibration solutions, grab a pH 7.0 buffer solution—you’ll need it to ensure accuracy before each use. Never skip calibration, or your readings will drift over time.
💧 Step 2: Test Your Water First
Fill a clean container with room-temperature water (cold water can skew readings). For digital meters, submerge the probe 1-2 inches deep and wait 30-60 seconds until the reading stabilizes. With test strips, dip them for 2-3 seconds, then compare the color to the chart within 15 seconds—delaying causes fading.
If your water tests below pH 5.5, add a pinch of lime (calcium carbonate) to raise it slightly. For above pH 6.0, use distilled vinegar (1 tsp per gallon) sparingly—orchids are sensitive to sudden pH swings. I always test my tap water first; city water often runs pH 7.5-8.0, which stresses orchids over time.
🌱 Step 3: Test Your Orchid Medium
For potted orchids, remove a small sample of the top 1-2 inches of bark or sphagnum mix. Moisten it with distilled water (tap water’s minerals interfere) until damp but not soggy. Insert the meter probe 1 inch deep or press a test strip into the mix. Wait 1-2 minutes for the reading to stabilize—orchid media holds moisture differently than soil.
If your medium tests above pH 6.5, flush it with rainwater or distilled water to leach out excess minerals. For below pH 5.0, mix in a tiny amount of orchid-specific fertilizer (like 20-20-20) to buffer the acidity. I keep a log of my orchid’s pH—fluctuations wider than 0.5 pH points can cause yellowing leaves or stunted growth.
✂️ Step 4: Adjust and Monitor Regularly
After testing, adjust your water or medium gradually. For example, if your bark mix is pH 7.0, don’t dump it—amend it slowly by replacing 25% of the mix with fresh, acidic medium each repotting. Orchids adapt poorly to sudden changes, and their roots are especially sensitive.
Test your water monthly and medium every 3 months (or after repotting). I set a reminder on my phone—skipping checks leads to root rot (high pH) or nutrient lockout (low pH). Keep your tester clean: rinse the probe with distilled water after each use and store it in a dry place to prevent corrosion.
📝 Step 5: Record and Troubleshoot
Write down your readings in a notebook or app. Note the orchid’s variety (some, like Phalaenopsis, tolerate wider pH ranges than Cattleyas), the time of year, and any symptoms (like brown tips or slow growth). If your orchid’s leaves turn purple, it’s a classic sign of low pH and phosphorus deficiency—time to check your fertilizer’s pH too.
If you’re still seeing issues after adjusting pH, consider sterilizing your tools. Old pots or contaminated media can introduce fungal imbalances that mask pH problems. I boil my tweezers and scissors in 10% bleach solution between orchids to keep everything clean.
Tips & tricks for perfect pH testing with orchids
These precision-focused tips will help you avoid common mistakes and get accurate readings every time.
Calibration is Non-Negotiable: Always calibrate your digital pH meter using a pH 7.0 buffer solution before each use, even if it worked perfectly last time. I learned this the hard way after my meter drifted from 7.0 to 6.8 over two weeks—small errors compound when caring for orchids. Store your calibration solution in a cool, dark place to maintain its accuracy.
Room Temperature Matters: Test water at room temperature (70-75°F)—cold water can throw off readings by up to 0.3 pH points. I keep a dedicated container of room-temperature water on hand for quick tests. For medium testing, use distilled water to moisten samples, as tap water minerals interfere with accuracy. Never use hot water, which can damage test strips or alter digital meter readings.
Timing is Everything: When using test strips, dip them for exactly 2-3 seconds and compare to the color chart within 15 seconds. The 1-2 minutes wait time for digital meters is crucial—rushing leads to unstable readings. I set a timer on my phone to avoid guessing. For medium testing, wait the full 1-2 minutes before recording; orchid bark holds moisture differently than regular soil.
Gradual Adjustments Work Best: Never make sudden pH changes to your orchid's environment. If your medium tests pH 7.0, replace only 25% of the mix with fresh acidic medium during repotting. Orchid roots are sensitive to abrupt shifts—think of it like adjusting the temperature in your home by just a few degrees at a time. I've seen orchids reject sudden changes by dropping buds or yellowing leaves.
Pro Tips for Ph Tester For Soil And Water
- These precision-focused tips will help you avoid common mistakes and get accurate readings every time.
- Calibration is Non-Negotiable: Always calibrate your digital pH meter using a pH 7.0 buffer solution before each use, even if it worked perfectly last time.
- Room Temperature Matters: Test water at room temperature (70-75°F)—cold water can throw off readings by up to 0.3 pH points.
Frequently asked questions
Got questions about using a pH tester for soil and water in your orchid care routine?
Here are some of the most common ones—plus quick, actionable answers to keep your plants happy and healthy!
How often should I test the pH of my orchid soil and water?
For orchids, aim to test water every 2–4 weeks (especially if using tap water) and soil every 3–6 months. Orchids thrive in slightly acidic soil (pH 5.5–6.5), but fluctuations can stress roots. If you notice yellowing leaves or stunted growth, test sooner—it’s a red flag!
How long does a pH test strip take to give accurate results?
Most pH test strips for soil and water provide results in 10–30 seconds. For soil, moisten the strip with a water sample (or press it into damp soil), then compare the color to the chart within 30 seconds. For water, dip and read immediately—delaying can lead to fading colors and inaccurate readings.
Can I use a pH tester for soil on water, or do I need separate tools?
While some dual-purpose testers work for both, they’re not always precise. For water, liquid testers or digital meters are ideal (they measure pH 0–14). For soil, strips or probes calibrated for organic matter are better. Pro tip: If budget allows, invest in a separate water pH tester—orchids are sensitive to even slight pH swings in their hydration!
What should I do if my pH tester keeps giving inconsistent readings?
Inconsistent results often stem from contamination or improper storage. Rinse strips with distilled water between uses, store them in a sealed container, and avoid humidity. For probes, calibrate monthly with pH 4.0 and 7.0 buffers. If issues persist, try a new tester—cheap strips degrade faster.
Does the pH of my tap water affect my orchid’s soil pH long-term?
Yes! Hard water (high in minerals) can raise soil pH over time, while acidic rainwater lowers it. To counteract tap water’s impact, flush soil monthly with distilled or rainwater (pH ~5.5–6.5). For extreme cases, use a pH adjuster (like sulfur to lower pH or lime to raise it) sparingly—orchid roots are delicate!
Wrapping up and next steps
Mastering your orchid’s environment starts with precision—and a reliable pH tester for soil and water is your secret weapon! 🌱 Whether you’re tweaking your hydroponic mix or adjusting tap water, small pH shifts can make a huge difference in blooms and vigor.
Now that you’re equipped with the know-how, take action: grab a tester, test your current setup, and fine-tune for that perfect balance. Your orchids will thank you with lush growth and stunning flowers!
🚀 Next Steps:
- Start testing today—consistency is key!
- Keep a log of pH levels to track progress.
- Experiment with adjustments (like rainwater or pH buffers) for optimal results.