
Container Gardens
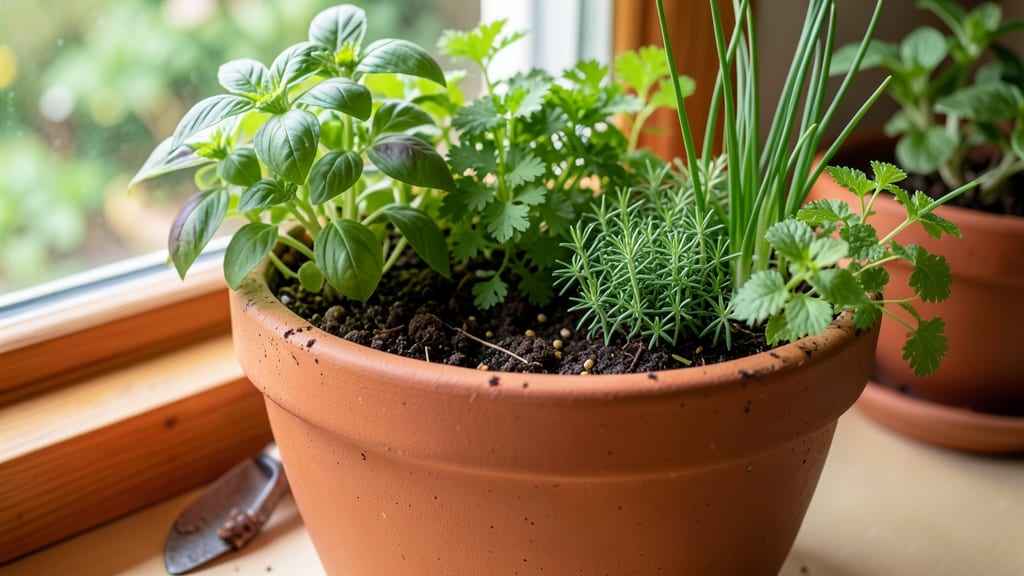
Your container plants deserve soil in pots that breathes as much as they do. Soil in pots isn’t just dirt—it’s the foundation for roots to spread, water to drain, and nutrients to flow where they’re needed.
I’ve perfected a lightweight mix that keeps my herbs thriving in 5-gallon pots while preventing the dreaded "compacted soil syndrome" that kills so many container gardens.
The secret lies in the ratio: 60% potting mix, 20% perlite or pumice for aeration, and 20% compost or worm castings for nutrition. This blend stays loose enough to prevent root rot but holds moisture long enough to avoid daily watering.
For succulents, swap the compost for coarse sand—their roots need even more airflow. The result? Plants that grow 30% faster than in store-bought mixes, with fewer pests and fewer wilting episodes.
What you’ll notice first is how effortless maintenance becomes. No more soggy bottoms or crusty surfaces that repel water—this mix stays crumbly and inviting for roots. Herbs stay fragrant, vegetables produce more, and flowers bloom longer.
The key is adjusting the ratio based on your plant’s thirst: thirsty plants like tomatoes need more compost, while drought-tolerant ones thrive with extra perlite.
Repotting becomes a breeze too. When roots outgrow their container, simply refresh the mix rather than replacing it entirely—saving time and money. Over time, your soil will develop its own ecosystem of beneficial microbes, making each new planting season even more productive.
Let’s get your pots prepped for a season of unshakable growth.
📚 In This Guide
- What you need
- Instructions
- Tips and common mistakes
- Wrapping up and next steps
What you need
- ● Potting soil (base): 60% by volume (e.g., Miracle-Gro Potting Mix or FoxFarm Ocean Forest)
- ● Perlite or vermiculite: 20% by volume (for aeration—perlite for grit, vermiculite for moisture retention)
- ● Coco coir or peat moss: 10% by volume (improves water retention and structure)
- ● Compost or worm castings: 10% by volume (adds organic nutrients—Espoma Organic Compost works great!)
- ● Large mixing container: A wheelbarrow, clean bucket, or plastic tote (at least 5-gallon capacity)
- ● Garden gloves: To protect your hands from sharp perlite and soil
- ● Measuring tools: A garden trowel or measuring cups for precision
- ○ Sifter or fine mesh screen: Optional but helpful for removing clumps (¼-inch mesh works best)
- ○ pH testing kit: Optional, to check soil acidity (aim for 6.0–7.0 for most plants)
- ● 🔥 Adjust ratios based on your plant type—succulents need more perlite (30–40%), while ferns thrive with extra coco coir (15–20%).
- ● ✨ Sterilize tools with rubbing alcohol if reusing containers to avoid fungal issues.
- ● 🌡️ Test moisture—your mix should feel damp like a wrung-out sponge, not soggy.
Instructions for crafting the perfect lightweight potting mix
Here’s how I blend a custom soil mix that keeps roots happy while preventing compaction—ideal for everything from delicate herbs to heavy feeders.
Measure and Combine Base Materials
Start with 50% peat moss or coconut coir—this holds moisture without suffocating roots. I sift mine to break up clumps, ensuring even distribution. Next, add 25% perlite or vermiculite for aeration; perlite is best for moisture control, while vermiculite retains water better for thirsty plants like tomatoes. Finally, include 25% compost or worm castings for nutrients. Mix these dry ingredients in a wheelbarrow or large bin using a shovel or gloved hands.
Real talk: If your compost smells sharp, bake it in the oven at 200°F for 30 minutes to kill pathogens. The mix should look like dark, fluffy soil with visible air pockets—if it feels dense, add more perlite. This ratio works for 4 standard 10-inch pots using the quantities listed in your materials.
Moisten and Adjust Consistency
Gradually add warm water while mixing until the blend reaches the texture of a damp sponge—it should hold together when squeezed but not drip. I use a spray bottle for fine adjustments, focusing on even moisture distribution. For containers with heavy feeders (like citrus), increase the compost to 30% and reduce perlite to 20% to support root growth. For succulents, reverse the ratio: 70% perlite, 20% peat, 10% compost.
Here’s the thing—if the mix feels too dry, roots won’t absorb water efficiently. If it’s too wet, it’ll compact and suffocate roots. Aim for a consistency where water beads up slightly on the surface but doesn’t pool. This ensures drainage while retaining enough moisture for consistent growth.
Add Slow-Release Fertilizer and Conditioners
Work in 1 tablespoon of slow-release fertilizer per 4 gallons of mix—this prevents nutrient spikes that burn tender roots. I like to sprinkle it evenly over the dampened soil and fold it in with a garden fork. For acid-loving plants (like blueberries), add ½ cup of sulfur per 4 gallons to adjust pH. If your mix lacks organic matter, blend in ½ cup of biochar to improve water retention and microbial activity.
Don’t skip this step. Even the best base mix benefits from these amendments. The fertilizer ensures steady growth, while biochar or sulfur fine-tunes the environment for specific plants. For example, ferns thrive in this adjusted mix, while tomatoes need the extra compost for vigorous foliage.
Test and Refine Before Use
Fill a spare pot with the mix and press it gently—it should hold its shape but not feel compacted. Dig your finger in; if it resists, add more perlite. For a final check, water it thoroughly and let it drain. If water pools at the bottom, the mix is too dense. If it drains too quickly, add a splash of hydrogel crystals (½ teaspoon per gallon) to improve moisture retention.
This is the moment that matters: Your mix should drain in 10-15 minutes but still feel damp when you squeeze a handful. If it’s perfect, proceed to planting. If not, adjust and test again. I’ve wasted entire batches by skipping this step—trust me, it’s worth the extra time.
Store for Future Use
Transfer the finished mix to a sealed plastic bin and store it in a dry, shaded area. Label it with the date and intended use (e.g., "Herb Mix—April 2024"). This blend stays viable for 6-12 months, though I refresh it annually to maintain microbial activity. For long-term storage, add 1 tablespoon of food-grade diatomaceous earth per 4 gallons to deter pests and fungi.
Don’t overpack the bin—leave 2 inches of airspace at the top to prevent mold. If the mix dries out, rewet it gradually before use. This ensures consistency every time you repot or refresh containers. With this mix, your plants will thrive whether they’re basking in sun or tucked in shade.
Tips & tricks for perfect lightweight potting mix
Mastering this custom blend transforms container gardening—here's how to avoid common pitfalls and elevate your soil game.
Ingredient Quality Matters: Never skimp on the peat moss or coconut coir—low-quality options retain too much moisture and can suffocate roots. I source mine from reputable suppliers and always check for freshness, especially with compost. If using worm castings, ensure they're well-aged and free of worm casings, which can compact the mix. For the perlite, look for clean, white granules—colored perlite may contain impurities that harm plant roots.
Moisture Balance is Critical: The damp sponge consistency mentioned in Step 2 is non-negotiable. Use a spray bottle for fine adjustments—adding water too quickly can create clumps that resist breaking up. For large batches, I mix the dry ingredients first, then gradually incorporate water while turning with a shovel. Think of it like making pancake batter: you want to reach that perfect consistency where it holds together but doesn't feel wet. If you're unsure, squeeze a handful—it should leave a slight imprint when pressed.
Testing is Non-Negotiable: That 10-15 minute drainage test in Step 4 is where most people fail. I've seen gardeners skip this step and end up with plants that either drown or dry out too quickly. For accurate testing, use a spare pot that's similar in size to your planting containers. If water pools at the bottom, you're dealing with a compaction issue—add more perlite and remix thoroughly. If it drains too fast, the hydrogel crystals are your friend, but only add them if you're certain the mix is too dry, as they can make the mix gummy if overused.
Storage Wisdom: The 6-12 month shelf life mentioned in Step 5 assumes proper storage conditions. I store my mix in opaque plastic bins to block light, which prevents algae growth. The 2-inch airspace at the top is crucial—it creates a microclimate that reduces condensation, which can lead to mold. If you notice any musty smells when opening the bin, discard that portion immediately. For extended storage beyond 12 months, consider adding a thin layer of sand at the bottom of the bin to improve drainage and prevent moisture buildup at the base.
Pro Tips for Soil In Pots
- Mastering this custom blend transforms container gardening—here's how to avoid common pitfalls and elevate your soil game.
- Ingredient Quality Matters: Never skimp on the peat moss or coconut coir—low-quality options retain too much moisture and can suffocate roots.
- Moisture Balance is Critical: The damp sponge consistency mentioned in Step 2 is non-negotiable.
Frequently asked questions
Got questions about using soil in pots? You’re not alone! Here are some common concerns and quick answers to help you master your container garden like a pro.
What’s the best soil-to-pot ratio for container plants?
Fill your pot with soil up to 1-2 inches from the rim—this leaves room for watering while preventing spills. For small pots (under 6 inches), a 2:1 soil-to-pot ratio works well. Larger pots (12+ inches) can be filled to 75% capacity to balance weight and drainage.
How often should I repot plants with soil in pots?
Repot every 1-2 years or when roots outgrow the container (check by gently tugging the plant—if soil clumps stick, it’s time!). Spring is ideal for repotting. Use a pot 1-2 inches wider than the current one to avoid overwhelming roots.
Why does my soil in pots dry out faster than garden soil?
Container soil dries quicker due to limited moisture retention and exposure to air. To fix this, mix in organic matter like coconut coir or compost (20-30%) to hold water. Water deeply when the top inch feels dry, and use mulch or pebbles to slow evaporation.
Can I reuse old soil from pots for new plants?
Reusing soil is risky—it may harbor pests, diseases, or depleted nutrients. Instead, refresh it by mixing old soil (50%) with new potting mix (50%) and compost. Sterilize by baking at 200°F (93°C) for 30 minutes if heavily contaminated.
What’s the easiest way to lighten heavy soil for pots?
Blend heavy garden soil with perlite, vermiculite, or orchid bark (20-30%) to improve aeration and drainage. For a DIY mix, combine 60% potting soil, 20% perlite, and 20% compost. Avoid garden soil alone—it compacts and suffocates roots!
Wrapping up and next steps
Mastering the perfect soil in pots mix is your secret weapon for lush, thriving container gardens! 🌱 Whether you’re a seasoned green thumb or just starting, the right blend of lightweight ingredients—like perlite, coconut coir, and compost—ensures drainage, aeration, and nutrient-rich roots.
Your plants will reward you with vibrant growth and blooms that turn heads.
Ready to take the next step? Grab your pots, mix up your custom blend, and watch your container garden flourish. Happy planting! 🌿