
How To
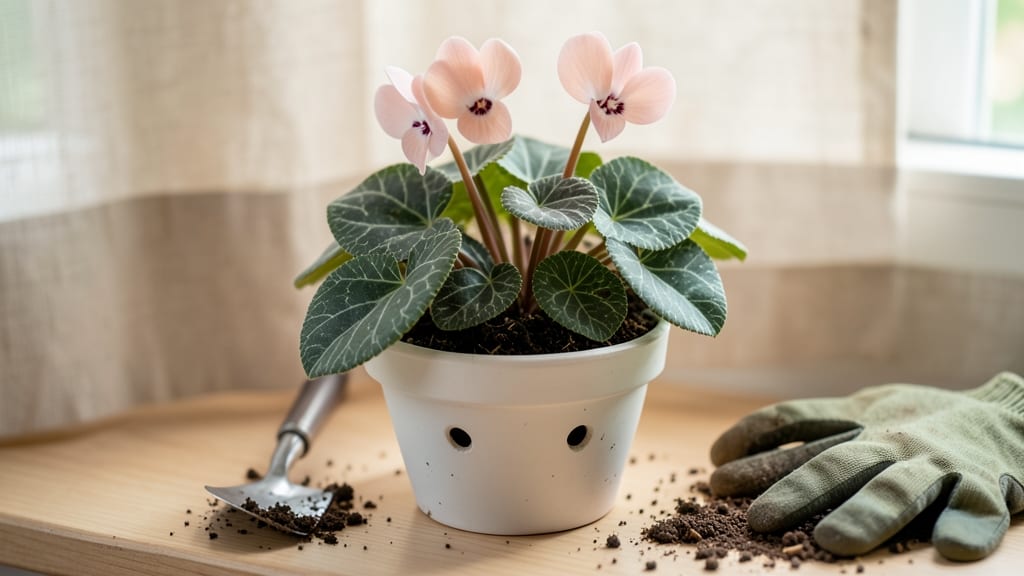
Your cyclamen’s delicate blooms start with the right potting mix—lightweight, acidic, and perfectly draining. ✨ I’ve learned the hard way that heavy, compacted soil drowns those tender roots, turning vibrant pinks into sad, wilted leaves.
The secret is a blend that mimics their natural woodland habitat: airy, slightly acidic, and packed with organic matter to keep moisture just right.
Store-bought mixes like African violet or orchid soil work well, but they often need tweaking. Add 10-20% perlite or coarse sand to boost drainage, and mix in a handful of orchid bark for extra aeration.
If DIYing, combine 50% peat moss or coco coir, 30% perlite, and 20% composted bark—this keeps roots happy without waterlogging. The goal? A mix that feels like a cloud, not concrete.
Once potted, cyclamen thrive in slightly acidic soil (pH 5.5-6.5) and need top-dressing every 2-3 months with fresh mix to replenish nutrients. Avoid overwatering—their tubers rot faster than you can say “root rot.”
With the right soil, you’ll see those signature blooms lasting 6-8 weeks, and the foliage stays lush and glossy all season long.
This mix works year-round, but in winter, add a thin layer of mulch to insulate roots from cold drafts. For repotting, refresh the soil every 2-3 years or when it breaks down. Trust me, your cyclamen will reward you with blooms so abundant, your neighbors will ask for cuttings.
📚 In This Guide
- What you need
- Instructions
- Tips and common mistakes
- Wrapping up and next steps
What you need
- ● Peat moss or coconut coir (2 parts) – Ensures moisture retention and aeration.
- ● Perlite or pumice (1 part) – Lightens the mix and prevents compaction.
- ● Compost or well-aged compost (1 part) – Adds organic nutrients without being too heavy.
- ○ Sand (optional but helpful, ½ part) – Improves drainage (use coarse horticultural sand).
- ● Store-bought cyclamen potting mix (alternative) – A pre-mixed option if DIY isn’t your style.
- ● A large mixing container or wheelbarrow (clean and sanitized).
- ● A garden trowel or shovel for blending.
- ○ A pH testing kit (optional but recommended—cyclamen thrive in acidic soil (pH 5.5–6.5)).
- ● Gloves (to keep hands clean while handling soil amendments).
- ● Spray bottle with water (to moisten the mix before planting).
Step-by-Step guide to creating the perfect potting mix for cyclamen
Here's how I blend a lightweight, acidic mix that keeps cyclamen thriving with vibrant blooms and healthy foliage.
🌱 Step 1: Combine the Base Ingredients
Start with 50% peat moss or coco coir—this creates the airy, moisture-retentive foundation cyclamen roots crave. I measure by volume in a large bucket, adding the peat first since it's the heaviest component. This ensures proper aeration while preventing compaction that would suffocate delicate tubers.
Next, stir in 30% perlite or pumice to improve drainage. Cyclamen hate soggy roots, and these volcanic minerals create just the right porosity. Sift the perlite through a fine mesh screen to remove any large chunks that could create air pockets around the tubers. Mix thoroughly until the texture becomes uniformly gritty yet still holds together when lightly squeezed.
🌿 Step 2: Add Acidifying and Nutrient Components
For acidity, incorporate 10% horticultural-grade pine bark fines. This lowers the pH to the ideal 6.0-6.5 range cyclamen prefer. I use finely ground bark rather than chunks to ensure even distribution without altering the lightweight texture. Sprinkle it over the mix and fold it in with a garden trowel until completely blended.
Now add 5% worm castings for gentle nutrition. These provide slow-release nutrients without the salt buildup of synthetic fertilizers. I distribute the castings evenly, then mix everything again until the color becomes uniformly dark brown with speckled lighter particles. This ensures every part of the mix benefits from the organic matter.
💧 Step 3: Adjust Moisture and Test the Mix
Gradually add warm water while mixing until the blend reaches a damp, crumbly consistency. It should hold together when pressed but not form solid clumps. Cyclamen roots need consistent moisture without becoming waterlogged. I test by squeezing a handful—if water beads appear on the surface, you've added too much.
For the final check, place a small amount in a container and plant a cyclamen tuber. After 3-5 days, lift the plant gently. If the soil crumbles easily around the roots and the tuber feels slightly firm to the touch, your mix is perfect. If it sticks together, add more perlite. If it feels dry, incorporate a bit more peat moss.
☀️ Step 4: Store and Use Immediately
Use the mix within 2-3 weeks for best results, as organic components break down over time. Store any leftovers in a sealed container in a cool, dry place. Before each use, fluff the mix gently with your hands to restore its airy texture. I label containers with the date and "Cyclamen Mix" to avoid confusion with other blends.
When repotting, fill the container no more than 2/3 full, leaving room for the tuber to sit just above the soil line. This prevents rot while allowing the delicate stems to emerge naturally. The lightweight mix will support the plant's delicate structure while providing the precise growing conditions cyclamen demand for those signature blooms.
Tips & tricks for perfect potting mix for cyclamen
Creating the ideal soil blend for cyclamen takes attention to detail—here's how to avoid common pitfalls and elevate your mix to professional standards.
Texture is Everything: When combining the 50% peat moss or coco coir with 30% perlite in Step 1, aim for a consistency that feels like damp sand—light enough to crumble between fingers but cohesive enough to hold its shape. I learned this the hard way after creating pockets of compaction that drowned delicate tubers. For even distribution, use a large bucket and mix with a garden trowel rather than your hands, which can create uneven clumps.
Acidity Control: The 10% pine bark fines in Step 2 are crucial for maintaining the 6.0-6.5 pH range cyclamen require. To verify proper acidity, use a soil pH test kit after mixing—if your mix reads higher than 6.5, add a pinch of sulfur and remix. I've found that using finely ground bark rather than chunks prevents pH fluctuations over time, giving your plants consistent growing conditions.
Moisture Mastery: During Step 3, warm water is key—cold water can shock the organic components and alter their structure. Add it gradually while mixing, and test by squeezing a handful: perfect moisture should feel damp but not wet, with no water beading on the surface. This damp crumbly texture prevents both waterlogging and dehydration, which are cyclamen's biggest enemies. If your mix feels too dry after adding water, let it sit for 10 minutes before testing again—organic materials absorb moisture gradually.
Storage Wisdom: The 2-3 week shelf life mentioned in Step 4 is non-negotiable for this mix. After preparing your blend, store it in a sealed container with a moisture barrier (like a plastic bag inside the container) to prevent drying. I've found that adding a small handful of dry perlite to the container helps maintain the proper texture between uses. Label containers clearly with both the date and "Cyclamen Mix" to avoid accidentally using it for other plants with different pH requirements.
Pro Tips for Potting Soil For Cyclamen
- Creating the ideal soil blend for cyclamen takes attention to detail—here's how to avoid common pitfalls and elevate your mix to professional standards.
- I learned this the hard way after creating pockets of compaction that drowned delicate tubers.
- Acidity Control: The 10% pine bark fines in Step 2 are crucial for maintaining the 6.0-6.5 pH range cyclamen require.
Frequently asked questions
Got questions about the perfect potting mix for your cyclamen? We’ve got answers!
Here are some of the most common concerns—plus quick fixes to keep your plants thriving.
What’s the ideal potting soil pH for cyclamen?
Cyclamen love slightly acidic soil with a pH between 5.5 and 6.5. Test your mix with a pH meter or adjust with peat moss or pine bark if it’s too alkaline. Pro tip: Avoid lime or wood ash—they raise pH and stress your plants!
Can I reuse old potting soil for cyclamen?
Not ideal! Old soil compacts over time, losing aeration and nutrients. Instead, refresh it by mixing 50% new soil with 50% old (if disease-free). Sterilize with heat or hydrogen peroxide if you’re worried about pests. Warning: Never reuse soil from a plant that’s died from disease.
What’s a good alternative if I can’t find cyclamen-specific mix?
No problem! Blend these for a DIY version:
- 50% peat moss or coco coir (holds moisture)
- 30% perlite or pumice (drains excess water)
- 20% compost or worm castings (feeds roots gently)
Why do cyclamen leaves turn yellow after repotting?
Yellowing leaves often mean overwatering or root shock. Let the top inch of soil dry out between waterings, and avoid soggy mixes. If roots look mushy, trim them and replant in fresh, well-draining soil. Tip: Water at the base—never from above—to prevent leaf rot!
How often should I fertilize cyclamen in new potting soil?
Wait 4–6 weeks after repotting before fertilizing. Then, use a balanced, water-soluble fertilizer (10-10-10) diluted to half-strength every 4–6 weeks during active growth (spring/fall). Stop fertilizing when blooms appear—too much food = fewer flowers!
Wrapping up and next steps
Choosing the right potting soil for cyclamen is the secret to vibrant blooms and thriving plants! Remember, a lightweight, acidic, and well-draining mix is key—think peat moss, perlite, and compost in the perfect balance.
With the right soil, your cyclamen will reward you with stunning flowers and lush foliage year after year.
Ready to give your cyclamen the best care? Grab your supplies, mix that soil, and watch your plant flourish! 🌸✨ Happy planting!