
How To
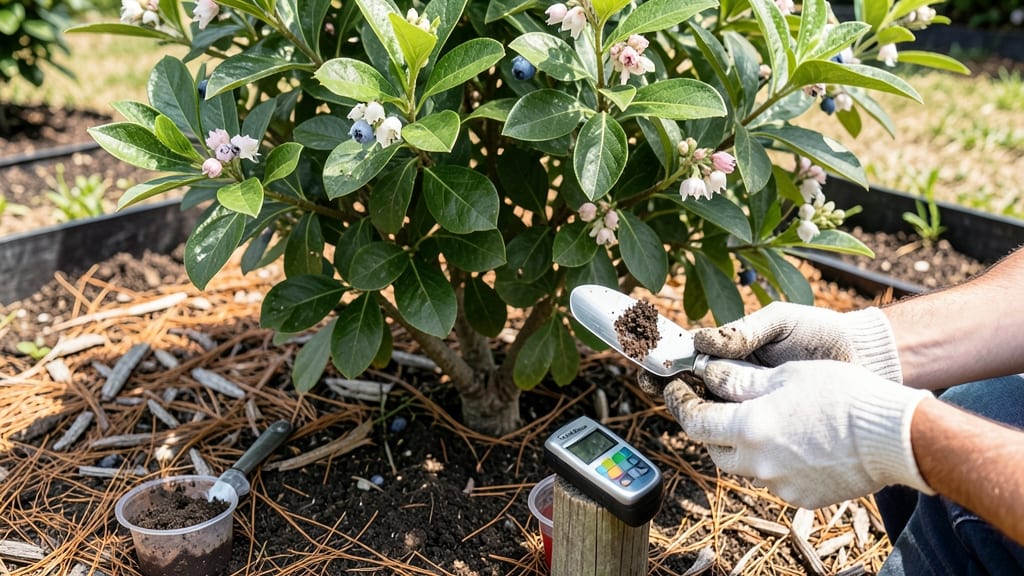
Your blueberries won’t thrive unless you know your soil’s acidic secrets—and a soil test reveals exactly what they need. 🌱 I’ve watched my blueberry bushes go from sad, sparse branches to bursting with fruit just by adjusting pH and nutrients based on test results.
The difference is night and day, and it starts with understanding what your soil is really offering (or not). Blueberries demand acidic soil (pH 4.5–5.5), but most garden soil is too alkaline.
A simple test—whether at home or through a lab—tells you if you need to add sulfur, peat moss, or compost to lower pH. Without this step, your plants waste energy struggling, and you end up with tiny berries or none at all. The good news?
Fixing it is easier than you think, and the payoff is juicy, abundant harvests every season. Once you’ve got your results, the next move is amending the soil.
Organic matter like pine needles or compost improves drainage and holds moisture, while sulfur (the fastest pH adjuster) gets the job done in weeks. Synthetic amendments work too, but organic options build long-term soil health—meaning fewer adjustments down the road.
Think of it as giving your blueberries the perfect foundation to grow strong roots and fat berries. Don’t skip the mulch layer—it keeps soil acidic, retains moisture, and blocks weeds. I’ve seen gardeners double their yield just by switching to the right mulch (like pine bark or sawdust).
The key is consistency: test once a year, amend as needed, and watch your bushes reward you with neighborhood-envy berries. Ready to get started?
📚 In This Guide
- What you need
- Instructions
- Tips and common mistakes
- Wrapping up and next steps
What you need
- ● Soil test kit: A home blueberry-specific kit (e.g., blank">LaMotte Soil Test Kit or blank">Luster Leaf 1600 Soil Test Kit) or a lab submission kit (check local agricultural extensions for mail-in options).
- ● Clean sampling tools: Trowel or soil auger (for digging 6-inch-deep samples).
- ● Disposable gloves (to avoid contamination).
- ● Sample containers: 4–6 clean, airtight jars (e.g., 8 oz mason jars) or labeled plastic bags.
- ○ pH test strips (optional): Quick-check strips (e.g., blank">API pH Test Strips) for preliminary readings.
- ● Notebook & pen: To log sample locations, pH readings, and notes on soil texture.
- ● Blueberry plants: Mature or newly planted (soil testing is best done before planting or spring/fall for established beds).
- ● Sunlight & shade map: Sketch your garden layout to note where samples were taken (blueberries prefer acidic, well-draining soil with pH 4.5–5.5).
- ● Rain delay plan: Avoid testing within 48 hours of rain (wet soil skews results).
- ● 💡 Sample in a grid: Take 5–10 cores per 100 sq. ft. and mix them in your container for an average reading.
- ● 🌡️ Test soil temp: Ideal testing temp is 60–80°F; store samples in a cool, dark place if testing later.
- ● 🎯 Lab vs. home kits: For professional-grade results, submit to a blank">USDA Soil Testing Lab or local co-op extension service.
Step-by-step guide to testing soil for blueberries
Here's how I test soil pH for blueberries—no guesswork, just science to get your plants thriving.
🧪 Step 1: Collect Representative Soil Samples
Grab a clean trowel and dig 4-6 small samples from 4-6 inches deep across your planting area. Space them 10-12 feet apart—this ensures you capture the whole zone where roots will grow. Avoid surface soil or areas with fresh mulch, as these can skew results.
Mix the samples together in a clean bucket. You want about 1 cup of combined soil for accurate testing. If your soil is rocky, remove large debris but leave in the smaller particles—they don’t affect pH readings but help simulate real growing conditions.
📊 Step 2: Choose Your Testing Method
Blueberries demand pH 4.5-5.5, so precision matters. I use home test kits for quick results—they’re affordable and reliable for most gardeners. For absolute accuracy, send samples to a cooperative extension lab, but results take 1-2 weeks. Test kits give you answers in minutes and cost under $20.
If you’re using a kit, follow the instructions exactly. Most require 1 tablespoon of soil mixed with distilled water (tap water can alter pH readings). Stir well, wait 5-10 minutes, then compare the color to the chart. Blueberries? Aim for deep yellow-green on the scale.
🔍 Step 3: Interpret Results and Adjust
If your soil tests above 5.5, blueberries will struggle—leaves turn yellow, growth stalls, and roots rot. To lower pH, mix in sulfur (follow package rates) or peat moss (add 2-3 inches to the topsoil). Work it in 6-8 inches deep and water well. Re-test in 4-6 weeks—sulfur takes time to acidify soil.
If your soil is below 4.5, it’s too acidic. Add lime (use pelletized dolomitic lime for gradual adjustment) or wood ash (sprinkle lightly). Test again in 2-3 weeks. Blueberries hate extremes—aim for that 4.5-5.5 sweet spot where roots thrive and nutrients unlock.
⏰ Step 4: Retest and Monitor Seasonally
Soil pH isn’t static—rain, decomposition, and amendments shift it over time. Retest every spring before planting and fall after harvest. Keep a log: note your starting pH, adjustments, and results. Over time, you’ll spot patterns—like how my clay soil drops 0.3 pH points after heavy rains.
For container-grown blueberries, test annually—potted soil dries faster and loses acidity quicker. Flush containers with distilled water if you suspect salt buildup (a common pH disruptor). And here’s the thing—organic matter helps stabilize pH. Add composted pine needles or leaf mold to buffer fluctuations naturally.
Tips & tricks for perfect soil testing for blueberries
Here's what I learned from years of testing—these tricks save time and prevent costly mistakes with your blueberry soil.
Sampling Strategy: I always take my samples in a zigzag pattern across the planting area, not just in one spot. This ensures you capture soil variations, especially if your yard has different microclimates. For example, if your garden has a sunny side and a shaded side, test both—their pH can differ by up to 0.5 points. The 4-6 samples rule is non-negotiable for accuracy.
Water Matters: Never use tap water for your test—it contains minerals that can skew results. Distilled water is the gold standard, but if you're in a pinch, use rainwater collected in a clean container. I keep a small jug of distilled water on hand specifically for soil tests. The 5-10 minute waiting period after mixing is crucial—don't rush it, or you'll get a false reading.
Adjustment Timing: When you add sulfur to lower pH, don't expect immediate results. I've seen gardeners give up after a week when they should have waited the full 4-6 weeks. Mark your calendar and be patient—the gradual acidification is what works. For lime adjustments to raise pH, the 2-3 week wait is shorter but still important; don't test too soon or you'll think it's not working.
Container Care: For potted blueberries, I test the soil every year because containers dry out faster and lose acidity quicker than in-ground soil. The key is to flush containers with distilled water every few months to prevent salt buildup, which can raise pH unexpectedly. I keep a spray bottle of distilled water handy for quick flushes between testings.
Pro Tips for Soil Test For Blueberries
- Here's what I learned from years of testing—these tricks save time and prevent costly mistakes with your blueberry soil.
- Sampling Strategy: I always take my samples in a zigzag pattern across the planting area, not just in one spot.
- Water Matters: Never use tap water for your test—it contains minerals that can skew results.
Frequently asked questions
Got questions about testing and optimizing your soil for blueberries? You’re not alone! Here are some of the most common queries—plus straightforward answers to help you grow thriving bushes.
How often should I test my soil for blueberries?
Test your soil every 1–2 years if you’re growing blueberries, or immediately if you notice poor growth, yellow leaves, or stunted berries. New plantings or amended soil should be tested within 3–6 months to confirm pH and nutrient levels. Pro tip: Test in early spring before fertilizing for the best results!
What if my soil pH is too high or too low?
Blueberries thrive in acidic soil (pH 4.5–5.5). If your pH is too high (alkaline), add elemental sulfur or peat moss to lower it gradually. For pH that’s too low (below 4.0), mix in lime or wood ash—but do this sparingly, as blueberries are sensitive. Always retest after amendments!
Can I skip a soil test and just use fertilizer?
Not ideal! While fertilizers can boost growth, they won’t fix pH issues or nutrient deficiencies. A soil test reveals exactly what’s missing—like nitrogen, phosphorus, or potassium—and whether your soil lacks organic matter. Think of it as a blueberry “checkup” before treating symptoms.
When is the best time to test soil for blueberries?
Test in early spring (March–April) or fall (September–October), when soil is workable but not frozen. Avoid testing after heavy rain or right after fertilizing, as moisture and chemicals can skew results. Timing tip: Test 2–3 weeks before planting new bushes for peak accuracy!
What if my blueberries aren’t producing, even with the right pH?
Low berry production can stem from nutrient deficiencies (like magnesium or zinc), poor drainage, or lack of sunlight. Test for micronutrients, check your soil’s texture, and ensure bushes get 6–8 hours of sun daily. Older bushes may need rejuvenation—prune in late winter to encourage new growth!
Wrapping up and next steps
Testing your soil’s pH and nutrient levels is the secret weapon for growing thriving blueberry bushes! 🌱 With the right acidic balance (4.5–5.5) and essential nutrients, you’re setting the stage for juicy, abundant harvests. Don’t let guesswork slow you down—knowledge is your best fertilizer.
Ready to take action? Grab your soil test kit, follow the steps, and adjust your garden like a pro. Sweet rewards (and blueberry pies!) are just a test away. 🍇