
Container Gardens
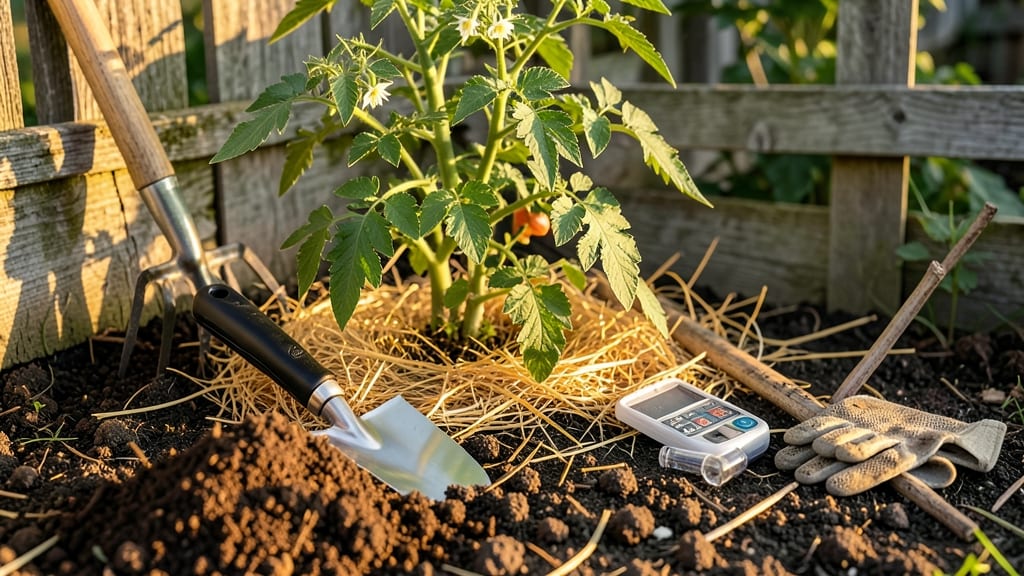
Preparing soil for growing tomatoes starts with soil that feels like a cloud—light, airy, and rich enough to feed hungry plants all season. 🌱 I learned the hard way that heavy clay or sandy soil leaves roots gasping for air, no matter how many seeds you plant. The right mix gives you vibrant green foliage, heavy fruit, and fewer diseases—because healthy roots mean everything. You’ll need a 50/50 blend of existing soil and organic matter (think compost or aged manure), plus a handful of balanced fertilizer (like 10-10-10). The goal is acidic loam—slightly sour (pH 6.0–6.8) with perfect drainage so roots don’t drown. Test your soil first: most garden centers sell cheap kits, and you’ll thank yourself later when your plants don’t wilt mid-summer. Here’s the game-changer: pre-planting care matters just as much as the mix. A week before transplanting, till in 2–3 inches of compost and a cup of lime (if your soil tests too acidic). Water deeply to settle everything, then let it dry slightly—tomatoes hate soggy feet. In warm climates, mulch with straw to keep moisture steady; in cool areas, black plastic warms the soil faster. The payoff? Bursting vines with sun-ripened fruit by July. Skip this step, and you’ll spend the season chasing pests or wilting leaves. Trust me—I’ve done both. Now let’s get your soil ready!
📚 In This Guide
- What you need
- Instructions
- Tips and common mistakes
- Wrapping up and next steps
What you need
- ● High-quality potting mix or garden soil: 2–3 cubic feet per container (or 1–2 bags for in-ground beds). Look for a loamy mix with 50–60% organic matter (e.g., Miracle-Gro Potting Mix or FoxFarm Ocean Forest).
- ● Compost or aged manure: 1–2 cups per container or 2–3 inches spread over in-ground beds. Worm castings (1 cup per container) are a bonus for nutrients!
- ● Perlite or vermiculite: ½–1 cup per container to improve aeration and drainage.
- ○ Peat moss or coconut coir: ½ cup per container (optional but helps retain moisture in sandy soils).
- ● Balanced fertilizer (10-10-10 or 5-5-5): 1–2 tablespoons per container or follow label instructions for in-ground beds.
- ● Lime (pelletized or agricultural): ½ cup per container or 1–2 pounds per 100 sq. ft. of in-ground soil (to adjust pH to 6.0–6.8). Test your soil first!
- ○ Wood ash (optional): ¼ cup per container (for extra potassium and pH adjustment—use sparingly!).
- ● Garden trowel or hand fork
- ● Garden gloves (to protect your hands from prickly soil!)
- ● Soil pH test kit (digital or liquid)
- ● Measuring cups/spoons (for precision mixing)
- ● Wheelbarrow or large bucket (for mixing amendments)
- ● Garden rake (for in-ground beds)
- ● Spade or shovel (for turning soil)
- ● Biochar: ½ cup per container (boosts soil structure and microbial life).
- ● Mycorrhizal fungi: Sprinkle into planting holes to enhance root growth.
- ● Slow-release tomato fertilizer: Mix in at planting for a nutrient boost.
- ● Mulch (straw or shredded leaves): 2–3 inches after planting to retain moisture.
Step-by-Step guide to preparing soil for tomatoes
Here's how to create the ideal acidic loam with flawless drainage—tomatoes thrive in this.
🌱 Step 1: Test and Amend Soil pH for Acidic Balance
Tomatoes prefer slightly acidic soil with a pH between 6.0 and 6.8. Grab a soil test kit—most garden centers sell them for under $10. Dig a 6-inch deep hole and collect soil samples from multiple spots in your planting area. Mix them together for an accurate reading.
If your soil tests higher than 6.8, lower the pH by adding sulfur or peat moss (about 1 pound per 100 square feet). For alkaline soil, work in elemental sulfur and water thoroughly. If the pH is already perfect, skip this step—over-amending can disrupt microbial life. Wait 2-4 weeks after amending before planting to let the soil adjust.
🌿 Step 2: Break Up Compacted Soil and Improve Aeration
Tomatoes hate soggy roots, so loosen the soil to 12 inches deep with a broadfork or tiller. This prevents compaction and encourages deep root growth. If your soil is naturally heavy clay, mix in 2-3 inches of compost or well-rotted manure to improve structure. I like to work in coarse sand (about 1 part sand to 3 parts soil) for extra drainage.
Rake the area smooth afterward—you’ll see a fluffy, crumbly texture that holds shape when squeezed but breaks apart easily. This is the ideal consistency for tomato roots to spread without resistance. Avoid walking on the bed after loosening to prevent re-compaction.
💧 Step 3: Blend Organic Matter for Nutrient-Rich Loam
Tomatoes are heavy feeders, so enrich the soil with 3-4 inches of compost (homemade or store-bought). Spread it evenly over the bed and use a garden fork to mix it into the top 6-8 inches of soil. For extra fertility, add 1 cup of 5-10-10 fertilizer per 10 square feet—this gives tomatoes a balanced boost of nitrogen, phosphorus, and potassium right from the start.
Work the organic matter in until the soil looks dark and crumbly. You’ll notice a rich, earthy smell—this means microbial activity is high, which breaks down nutrients into forms tomatoes can absorb. Avoid fresh manure (it burns roots), and skip chemical fertilizers at this stage unless your soil test shows deficiencies.
☀️ Step 4: Build a Raised Bed or Mound for Drainage
If your natural soil drains poorly, create a 12-inch high mound or raised bed. Pile amended soil into a 3-foot wide ridge, leaving a 2-foot walkway between rows for easy access. This elevation prevents waterlogging while keeping roots warm. For container growing, use large pots with drainage holes filled with a mix of 60% amended soil and 40% perlite.
Tomatoes in raised beds produce 20-30% more fruit because roots stay aerated and warm. Water deeply at the base to encourage roots to grow downward. You’ll see faster germination and stronger seedlings in well-drained, elevated soil compared to flat beds.
⏰ Step 5: Mulch to Retain Moisture and Prevent Disease
Cover the prepared bed with 2-3 inches of straw or shredded leaves to lock in moisture and suppress weeds. Avoid wood chips—they can draw nitrogen from the soil as they decompose. Mulch 2-3 weeks before planting to let it settle and prevent fungal spores from splashing onto tomato leaves.
This layer also keeps soil temperatures stable, which is critical for tomatoes. You’ll notice fewer cracks in the soil surface and fewer signs of wilting during heatwaves. Replenish mulch as it breaks down, and avoid piling it against stems to prevent rot.
Tips & tricks for perfect tomato soil preparation
Creating the ideal growing environment for tomatoes starts with soil that's just right—here's how to avoid common pitfalls and elevate your garden game.
Soil Testing Accuracy: When collecting your 6-inch deep soil samples in Step 1, grab them from at least three different spots in your planting area and mix thoroughly. I've seen gardeners miss hot spots by sampling only one location—this can lead to inconsistent pH readings across your bed. For even more precision, consider sending samples to a lab for professional analysis, especially if you're dealing with unusual soil conditions.
Compost Quality Matters: In Step 3, when adding 3-4 inches of compost, focus on well-aged compost that looks dark and crumbly with no visible chunks. Fresh compost can draw nitrogen from your soil as it breaks down, potentially starving your tomato plants. I always sift my compost through a 1/4-inch mesh screen to remove any large particles that could create air pockets around roots.
Raised Bed Dimensions: For Step 4's 12-inch high mound, I recommend making them 3-4 feet wide rather than the minimum 3 feet. This gives you more planting space and makes maintenance easier—you'll have room to walk between rows without compacting the soil. Just remember to leave that 2-foot walkway for proper access and airflow.
Mulch Timing Strategy: That 2-3 weeks before planting mulch application in Step 5 is crucial for more reasons than you might think. Applying mulch too close to planting can trap excess moisture and create anaerobic conditions that harm young roots. I also like to add a thin layer of compost tea (optional) to the mulch surface—this introduces beneficial microbes that help break down organic matter and suppress pathogens.
Pro Tips for Preparing Soil For Growing Tomatoes
- Creating the ideal growing environment for tomatoes starts with soil that's just right—here's how to avoid common pitfalls and elevate your garden game.
- Soil Testing Accuracy: When collecting your 6-inch deep soil samples in Step 1, grab them from at least three different spots in your planting area and mix thoroughly.
- Compost Quality Matters: In Step 3, when adding 3-4 inches of compost, focus on well-aged compost that looks dark and crumbly with no visible chunks.
Frequently asked questions
Got questions about prepping your soil for tomatoes?
Here are answers to the most common ones—so you can grow juicy, flavorful fruit like a pro!
What’s the best soil pH for tomatoes?
Tomatoes thrive in slightly acidic to neutral soil with a pH between 6.0 and 6.8. Test your soil with a kit or send a sample to your local extension office. If it’s too acidic (<6.0), add lime; if too alkaline (>7.0), mix in sulfur or peat moss. Pro tip: Aim for 6.5—this sweet spot boosts nutrient uptake!
When is the best time to prepare soil for tomatoes?
Start prepping 4–6 weeks before planting (spring or early summer, depending on your climate). For container gardens, amend soil 2–4 weeks ahead to let organic matter break down. In cold regions, warm the soil with black plastic or compost piles 2–3 weeks before transplanting.
Can I grow tomatoes in poor-quality soil?
Yes, but you’ll need to heavily amend it. Mix in compost (50%), coconut coir or peat moss (20%), and perlite/vermiculite (30%) for drainage. Avoid heavy clay or sandy soil without additives—both can stunt growth. Pro tip: Add a handful of worm castings for extra nutrients!
How often should I fertilize after planting?
Feed tomatoes every 2–3 weeks with a balanced fertilizer (10-10-10) or tomato-specific blend once they flower. Switch to a low-nitrogen, high-phosphorus (5-10-10) fertilizer when fruits form. Warning: Over-fertilizing leads to leafy growth but fewer tomatoes—stick to the schedule!
My tomato plants look wilted—is it the soil?
Wilt can mean overwatering, poor drainage, or disease. Check for:
- Mushy stems → Fusarium wilt (remove plant, sterilize soil with solarization).
- Yellow leaves → Overwatering (let soil dry slightly between waterings).
- Cracked soil → Drainage issue (add perlite or raise containers).
If roots look rotten, repot in fresh, amended soil.
Wrapping up and next steps
Preparing your soil for tomatoes is the secret ingredient to a thriving, bountiful harvest! 🌱 By focusing on acidic loam with perfect drainage, you’re setting the stage for healthy roots, robust plants, and juicy, flavorful fruits.
Whether you’re working in containers or garden beds, the effort you put in now will pay off in delicious rewards later.
Now that you’re armed with the right knowledge, it’s time to roll up your sleeves and get growing! Start by testing your soil, amend it thoughtfully, and give your tomatoes the ideal home they deserve. Happy planting—and enjoy those homegrown tomatoes this season! 🍅✨