
Neem Oil
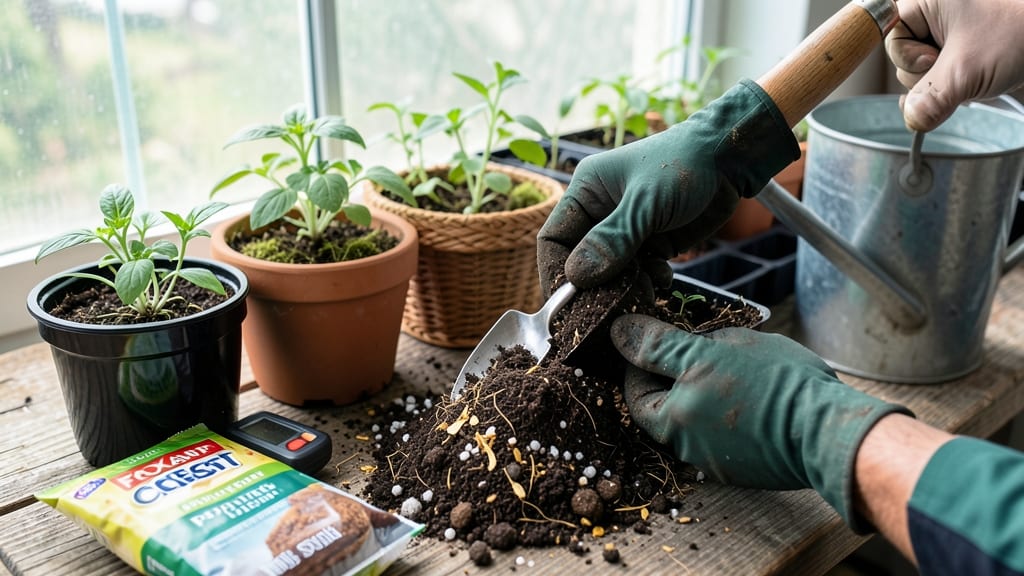
My professional potting soil mix isn't just dirt—it's the secret weapon behind my thriving ferns and stubbornly productive tomatoes. 🌱 Unlike garden soil, this blend stays light, drains fast, and never turns into a waterlogged mess that rots roots.
The magic happens in the air pockets: perlite, vermiculite, and coconut coir create space for roots to breathe while holding just enough moisture. I've tested mixes for everything from herbs (needs fast drainage) to veggies (wants nutrient retention) and even succulents (needs gritty texture).
You'll notice plants growing faster, wilting less, and looking shockingly lush—even in containers that used to fail. The right mix cuts watering by half and prevents that sad, soggy-bottomed look. For DIYers, I'll share my foolproof 3-ingredient blend that outperforms store-bought bags. Let's get your roots happy!
📚 In This Guide
- What you need
- Instructions
- Tips and common mistakes
- Wrapping up and next steps
What you need
- ● 50% Peat Moss or Coco Coir – Holds moisture while allowing airflow (2.5 gallons). Pro tip: Coco coir is a sustainable alternative!
- ● 30% Perlite or Pumice – Boosts aeration and prevents compaction (1.5 gallons). ✨ Perlite is lightweight and ideal for root health.
- ● 20% Compost or Worm Castings – Provides essential nutrients (1 gallon). 💡 Worm castings add gentle, slow-release fertility.
- ● Garden Gloves – Protects hands from sharp perlite and compost.
- ● Large Mixing Bin or Wheelbarrow – Ensures even blending (5-gallon capacity recommended).
- ● Hand Trowel or Shovel – For stirring and layering materials.
- ○ Optional: 10% Horticultural Charcoal – Prevents odors and pests (½ gallon).
- ● Slow-Release Fertilizer (e.g., Osmocote) – Adds long-term nutrition (1 tbsp per 5 gallons).
- ● Mycorrhizal Fungi – Enhances root absorption (1 packet per 5 gallons).
- ● Access to a clean, dry workspace (e.g., garage, patio, or clean tarp).
- ● Basic knowledge of planting needs (e.g., drainage requirements for your specific plants).
- ● Safety first! Wear a mask if handling dusty materials like perlite.
Step-by-Step guide to crafting a professional potting soil mix
Here's how I blend a custom mix that promotes root vitality and prevents compaction.
🌱 Step 1: Measure and Combine Base Components
Start with 50% peat moss or coconut coir—this holds moisture while allowing airflow. I sift it first to remove any debris that could compact later. Next, add 25% perlite for that critical air-pocket structure. The perlite should be fresh, not dusty—old perlite loses its ability to aerate.
For the remaining 25%, I use composted pine bark fines. These provide structure while breaking down slowly to feed roots. Mix these dry components thoroughly in a wheelbarrow or large container. Use a shovel to cut through clumps and ensure even distribution. The texture should resemble crumbly cake batter—light but cohesive.
🌿 Step 2: Incorporate Organic Matter and Nutrients
Add 10% worm castings to the blend for gentle, slow-release nutrients. I sprinkle these evenly and work them in with a garden fork, being careful not to overmix—they'll distribute naturally as you blend. For additional fertility, include 5% composted leaf mold (not fresh leaves, which can mat down).
Here's the thing—this is where many gardeners go wrong. Don't add garden soil. It compacts in containers and disrupts the airy structure you've worked so hard to create. Instead, think of this as a recipe where each ingredient plays a specific role: moisture retention, aeration, and nutrition.
✂️ Step 3: Test and Adjust for Ideal Texture
Fill a small container with your mix and press it gently. It should hold its shape but still allow a finger to push through easily. If it feels too dense, add more perlite or vermiculite until it reaches a loamy, crumbly consistency. Too loose? Mix in additional composted bark or peat.
Run a handful through your fingers—it should feel slightly gritty from the perlite but still soft. This texture ensures roots can explore without suffocating. Real talk: if you've ever seen roots circling in a pot like a snake, that's a sign your mix lacked proper aeration.
💧 Step 4: Moisten and Condition the Mix
Gradually add warm water while mixing until the blend reaches 60-70% moisture capacity—squeeze a handful and let it form a loose ball that doesn't drip. Overwatering now will create anaerobic pockets that harm roots later. I like to let the mix sit overnight in a covered container to let the moisture distribute evenly.
This conditioning step is crucial. It allows the components to settle and the mix to reach its optimal structure before use. You'll know it's ready when a handful feels cool to the touch and holds its shape without being soggy. The goal is a mix that's moist but not wet—think of a well-wrung sponge.
☀️ Step 5: Store and Use Immediately
Transfer the finished mix to airtight containers or bags, leaving about 10% air space at the top to prevent compaction over time. Label each batch with the date and components—this blend stays fresh for 3-4 months if stored properly. For best results, use it within 2 weeks of mixing.
Here's where it gets fun—watch how plants thrive in this custom mix. You'll notice stronger root systems, better drainage, and plants that stay healthier longer. The key is consistency: every pot gets the same high-quality blend, so no plant feels left behind. And if you're mixing for multiple containers, double the recipe—just keep the ratios exact.
Tips & tricks for perfect potting soil mixes
Took me years of trial and error to perfect this blend—here's what actually makes the difference.
Ingredient Selection Matters: When choosing your 50% peat moss or coconut coir, opt for the highest quality you can find. Peat moss should be light and fluffy, not dense or moldy, while coconut coir should have a slightly fibrous texture. For the 25% perlite, buy it fresh from a garden center—old perlite loses its ability to aerate, and you'll end up with compacted soil that suffocates roots. I've ruined three batches using stale perlite before learning this lesson the hard way.
The Texture Test: In Step 3, when you're testing your mix's texture, there's a simple trick I use: press a handful firmly and then release. The perfect mix should hold its shape but still allow your finger to push through with minimal resistance. If it feels like wet sand, you need more perlite or vermiculite. If it crumbles like dry powder, add a bit more composted bark or peat. This test takes seconds but prevents the root circling problem I've seen in so many pots.
Moisture Conditioning: The overnight conditioning step in Step 4 is non-negotiable for best results. This allows the components to settle and reach their optimal structure before use. I've found that mixing in warm water (around 80°F) helps speed up this process slightly, but never exceed the 60-70% moisture capacity. Too much water creates anaerobic pockets that can actually harm roots by preventing oxygen exchange—something I discovered after losing several batches of seedlings.
Storage Wisdom: For the 3-4 months shelf life mentioned in Step 5, I recommend using heavy-duty contractor bags with grommets for storage. These allow for better air circulation than plastic containers while still keeping out moisture. Label each bag with the date and components—this blend works best when used within 2 weeks of mixing, as the organic matter continues to break down over time.
Pro Tips for Professional Potting Soil Mix
- Took me years of trial and error to perfect this blend—here's what actually makes the difference.
- Ingredient Selection Matters: When choosing your 50% peat moss or coconut coir, opt for the highest quality you can f...
- The Texture Test: In Step 3, when you're testing your mix's texture, there's a simple trick I use: press a handful fi...
Frequently asked questions
Got questions about crafting the perfect professional potting soil mix? You’re not alone! Here are some of the most common concerns—and expert answers—to help you grow with confidence.
What’s the best ratio of ingredients for a balanced mix?
A well-rounded mix typically includes 60% organic matter (like coco coir or peat moss), 20% perlite or vermiculite for aeration, and 20% compost or worm castings for nutrients. Adjust ratios based on your plants—succulents need more grit, while heavy feeders (like tomatoes) thrive with extra compost.
How long does a homemade potting mix last before it degrades?
Homemade mixes last 6–12 months if stored dry in a sealed container. Over time, organic matter breaks down, losing structure and nutrients. Refresh by adding 10–20% fresh compost or perlite before reuse. For long-term projects, consider pre-mixed bags with extended shelf life.
Can I reuse old potting soil? If so, how?
Reusing soil is possible but risky due to compaction, salt buildup, or pests. Sift out debris, fluff with perlite, and amend with 25% fresh compost. Sterilize by baking at 200°F (93°C) for 30 minutes to kill pathogens. Best for non-critical plants like herbs or annuals—avoid for veggies or high-value crops.
What’s a quick fix if my mix is too dense or waterlogged?
Add coarse sand, perlite, or orchid bark to improve drainage. For compacted soil, mix in 1 part coconut coir to 1 part existing mix to lighten it. If water sits on top, your mix lacks aeration—amend with chicken grit or pumice for better airflow.
Are there ingredients I should never use in potting soil?
Avoid:
- Garden soil (too heavy, compacts easily)
- Fresh manure (can burn roots—compost first!)
- Synthetic chemicals (like herbicides, which linger)
- Wood chips or sawdust (depletes nitrogen as it decomposes)
Wrapping up and next steps
Choosing the right professional potting soil mix is your first step toward thriving plants and a lush garden! A balanced blend with proper air pockets, drainage, and nutrients ensures strong roots and vibrant growth.
Whether you’re a seasoned gardener or just starting, the right mix makes all the difference—so grab your tools and get planting!
Ready to elevate your gardening game? Experiment with your mix, track your plants’ progress, and fine-tune as needed. Happy growing! 🌱✨