
How To
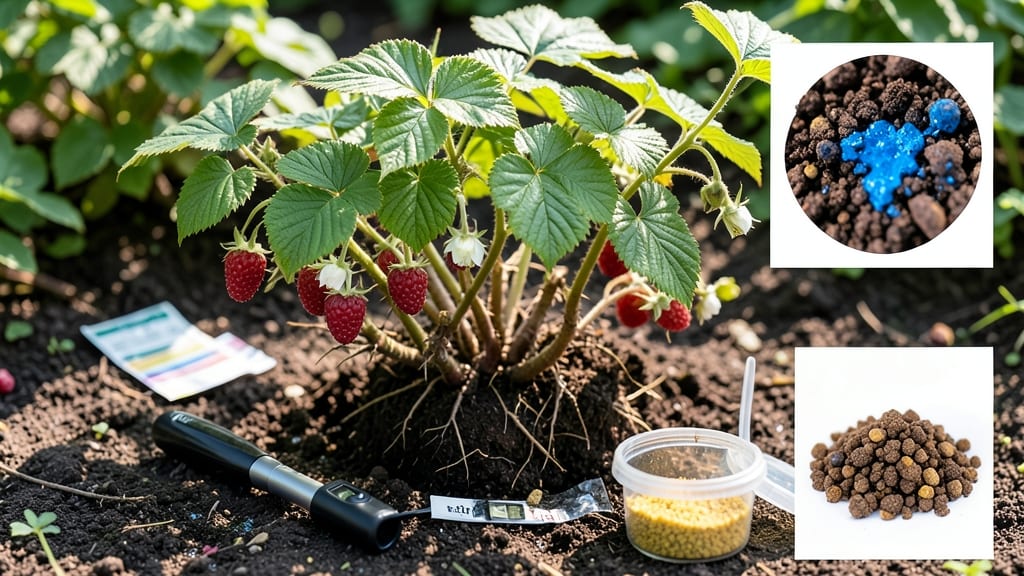
Your raspberries crave the perfect raspberry soil acidity—so acidic it could make a lemon jealous—pH 5.5 to 6.5 is their sweet spot, and getting it wrong means tiny berries or none at all. 🌿 I learned the hard way when my canes produced puny fruit despite perfect sunlight, only to discover the soil was too alkaline.
The fix? Simple, but precise: testing, amending, and monitoring like a scientist in a lab coat (minus the white coat).
Start with a soil pH test kit (digital or liquid) and take samples from multiple spots in your bed. If the pH reads above 6.5, your raspberries are screaming for help—yellowing leaves, stunted growth, and fruit that tastes like cardboard.
The good news? Sulfur, peat moss, or pine needles can lower pH gradually (never rush it—acid shock kills roots faster than you can say "failed harvest").
Once balanced, maintain it with annual sulfur applications in early spring and organic mulch like pine straw. Your plants will reward you with juicy, flavor-packed berries by summer, and the soil stays perfect for years.
The key? Patience—raspberries don’t forgive sudden pH swings, but they’ll thank you with harvests that make your neighbors green with envy.
Regional tweaks matter: Northern gardens may need extra sulfur, while Southern soils often stay naturally acidic. Test every 2-3 years to stay ahead of drift. Trust me, your future raspberry pies will taste like victory.
📚 In This Guide
- What you need
- Instructions
- Tips and common mistakes
- Wrapping up and next steps
What you need
- ● Soil pH testing kit – Digital or liquid test kit (e.g., LaMotte or MySoil) to measure current pH levels.
- ● Garden soil – 5–10 gallons (depending on pot size or garden bed), preferably well-draining.
- ● Sulfur (elemental or powdered) – 1–2 pounds per 100 sq. ft. of soil (for lowering pH).
- ● Lime (agricultural, not garden lime) – 5–10 pounds per 100 sq. ft. (for raising pH, if needed).
- ● Compost or organic matter – 2–3 gallons to improve soil structure and fertility.
- ● Watering can or hose – For even distribution of amendments.
- ● Gloves and safety goggles – To protect your hands and eyes when handling sulfur or lime.
- ● Garden fork or tiller – For mixing amendments into the soil (12–18 inches deep for in-ground beds).
- ● Peat moss or pine bark fines – 1–2 bags to further acidify soil naturally.
- ● Cottonseed meal or coffee grounds – Small amounts (½ cup per plant) to boost acidity over time.
- ● pH buffer solution – For calibrating your testing kit (check kit instructions).
- ● Soil moisture meter – To ensure amendments are applied to slightly moist soil for best results.
Step-by-Step guide to balancing raspberry soil acidity
Here's how I adjust soil pH for raspberries—this method works for both new plantings and established bushes.
🌱 Step 1: Test Your Current Soil pH
Raspberries thrive in soil with a pH between 5.0 and 6.5. Grab a soil testing kit or send a sample to your local extension office for precise results. I like to test in early spring, before new growth begins. Dig a 4-inch deep hole, collect soil from multiple spots around your plants, and mix the samples together.
If your test shows a pH above 6.5, your soil is too alkaline for raspberries. Below 5.0 means it's too acidic. Either way, you'll need adjustments—but the process differs for each case. I've found that many gardeners overlook this step and wonder why their raspberries struggle with yellowing leaves or poor fruit production.
💧 Step 2: Adjust Soil Acidity for Optimal Growth
For alkaline soil (pH > 6.5), incorporate elemental sulfur at a rate of 1 pound per 100 square feet. Work it into the top 6 inches of soil. Sulfur lowers pH slowly—wait 2-3 months before retesting. I like to split applications over two seasons to avoid shocking the plants. Water thoroughly after applying to help the sulfur activate.
For acidic soil (pH < 5.0), add pelletized lime (not garden lime) at 5 pounds per 100 square feet. Lime raises pH gradually, so monitor progress. Mix it into the top 4 inches of soil and water well. If your soil is extremely acidic, consider using wood ash (sparingly) as a quick fix, but test again in 4-6 weeks—ash can overcorrect pH if overused.
☀️ Step 3: Maintain pH Through Organic Amendments
Once your soil reaches the ideal range, keep it there with regular organic matter. I add 2-3 inches of well-rotted compost annually in early spring. Compost naturally buffers pH changes and improves soil structure. For a more targeted approach, mix in pine needles or oak leaves—they slowly acidify the soil as they decompose.
For established raspberry plants, top-dress with peat moss (if available) or sphagnum peat at a rate of 1 inch per plant. This helps maintain acidity without disturbing roots. Avoid fresh sawdust or wood chips—they can rob nitrogen and disrupt soil balance. Always water after amending to help materials integrate evenly.
⏰ Step 4: Monitor and Retest Regularly
Retest soil pH every 6-12 months, especially after heavy rainfall or if you notice new growth issues. Raspberries are sensitive to sudden pH shifts, so gradual adjustments work best. I keep a garden journal to track pH changes and note any corresponding improvements in plant health or fruit production.
If your soil pH starts drifting outside the ideal range again, repeat the adjustment process. Remember, organic methods take time—don't expect overnight results. Patience here pays off with stronger canes, better leaf color, and sweeter berries. The key is consistency: small, regular adjustments keep your raspberries thriving season after season.
Tips & tricks for perfect raspberry soil pH balance
These precision tips will help you avoid common mistakes and get the most out of your raspberry soil adjustments.
Testing Accuracy: For the most reliable results in Step 1, collect soil samples from at least three different spots around your plants. Mix them thoroughly before testing—this accounts for natural soil variations in your garden. I've found that testing in early spring gives you time to make adjustments before the growing season begins, giving your plants the best head start. The key is consistency: always test at the same depth (4 inches) and under similar moisture conditions.
Gradual Adjustments: When applying elemental sulfur or pelletized lime in Step 2, remember that these amendments work slowly. The 2-3 month wait before retesting is crucial—rushing can lead to overcorrection. I split my sulfur applications over two seasons to avoid shocking the plants, especially in alkaline soils. For lime, the 4-inch mixing depth is critical; deeper placement won't affect the root zone where your raspberries need the pH adjustment.
Organic Maintenance: The 2-3 inches of well-rotted compost you add annually in Step 3 does more than just maintain pH—it improves soil structure and provides nutrients. I've noticed that raspberry plants with consistent compost applications develop stronger canes and produce more abundant fruit. When using pine needles or oak leaves, spread them thinly (about 1/4 inch) and water them in well to prevent matting and ensure even decomposition.
Monitoring System: Your 6-12 month retesting schedule in Step 4 is your best defense against pH drift. I keep a simple garden journal where I record each test result, the amendments applied, and any noticeable changes in plant health. This helps me spot patterns—like how my soil tends to become more acidic after heavy autumn rains. The journal also reminds me when it's time for the next round of maintenance amendments.
Pro Tips for Raspberry Soil Acidity
- These precision tips will help you avoid common mistakes and get the most out of your raspberry soil adjustments.
- Testing Accuracy: For the most reliable results in Step 1, collect soil samples from at least three different spots around your plants.
- Gradual Adjustments: When applying elemental sulfur or pelletized lime in Step 2, remember that these amendments work slowly.
Frequently asked questions
What pH range is ideal for raspberries, and why does it matter?
Raspberries thrive in soil with a pH between 5.5 and 6.5. This slightly acidic range ensures they can absorb essential nutrients like phosphorus, iron, and manganese efficiently. Outside this range, plants may struggle with nutrient deficiencies, weak growth, or poor fruit production—even if other conditions seem perfect!
How do I test my soil’s acidity before planting raspberries?
Use a soil pH test kit (digital or liquid) for accuracy. Dig a 6-inch-deep sample from multiple spots in your garden, mix them, and follow the kit’s instructions. Alternatively, send a sample to a local extension office for a professional analysis. Pro tip: Test in early spring or fall for the most reliable results!
My raspberry plants look unhealthy—could soil pH be the issue?
Yes! Signs of wrong pH include yellowing leaves (chlorosis), stunted growth, or poor fruiting. Too acidic (below 5.5)? Add lime to raise pH. Too alkaline (above 6.5)? Use sulfur or peat moss. Adjust gradually—big pH swings can stress plants—and retest after 2–3 months.
Are there natural ways to lower soil pH without chemicals?
Mix in organic matter like pine needles, composted leaves, or coffee grounds (sparingly) to acidify soil naturally. Elemental sulfur is also a slow-release option. For quick fixes, try vinegar or aluminum sulfate, but use them cautiously—they can over-acidify if overapplied.
How often should I check and adjust raspberry soil pH?
Test soil annually in early spring or fall. Adjust pH if it drifts outside the 5.5–6.5 range. After major amendments (like lime or sulfur), wait 2–3 months before retesting. Pro tip: Keep records! Tracking pH changes helps you fine-tune future adjustments for consistent raspberry success.
Wrapping up and next steps
Balancing the soil acidity for your raspberry plants is all about precision and patience—but the rewards are sweet! 🌱 By testing your soil’s pH, amending it with the right materials, and monitoring changes, you’ll create the perfect environment for thriving berries.
Remember, small adjustments make a big difference, so stay consistent and observant.
Ready to take the next step? Start with a soil test this season and experiment with organic amendments like peat moss or sulfur. Your raspberry bushes will thank you with juicy, flavorful fruit—and you’ll gain confidence in your green thumb! 🍓