
Fertilization
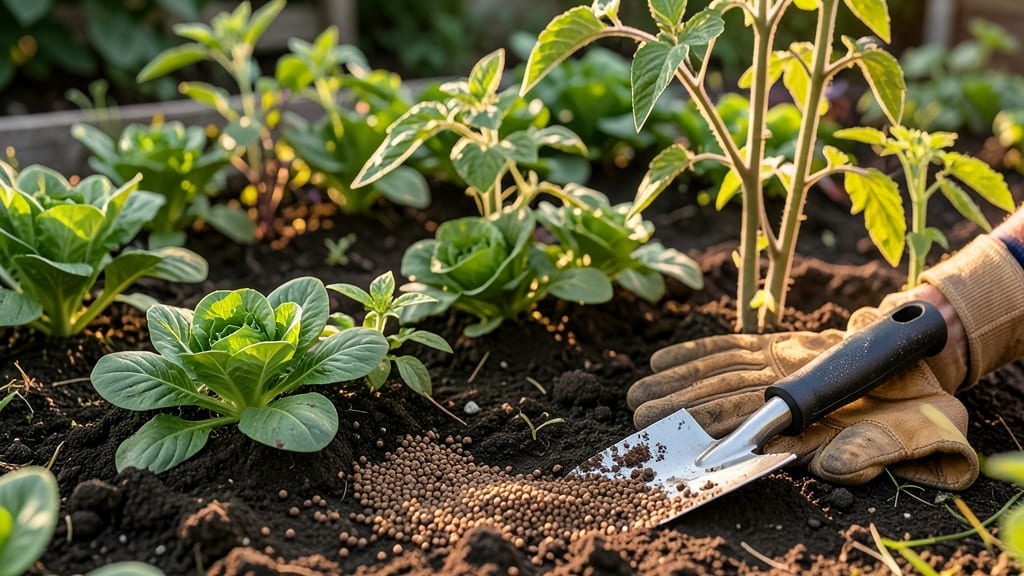
The perfect soil and fertilizer blend transforms struggling blueberries into bushes thick with fruit and azaleas that bloom like fireworks. 🌿 I learned the hard way that these acid-loving plants won't thrive in regular garden soil—they need a pH between 4.5 and 5.5, plus nutrients tailored to their shallow roots.
Start with 50% peat moss or pine bark fines for acidity, then mix in 30% topsoil and 20% compost for structure and nutrients. Skip synthetic fertilizers here—they raise pH over time. Instead, use cottonseed meal (for nitrogen) and bone meal (for phosphorus) sparingly, and always water after applying.
You'll see the difference within 3-4 weeks: leaves deepen to rich green, new growth appears, and next season's blooms set heavily. The key is consistency—test soil pH every spring and adjust with sulfur if it creeps above 5.5.
This blend works for containers too, just scale down proportions. The same principles apply whether you're planting bare-root shrubs or potting up cuttings. Let's get those roots happy!
📚 In This Guide
- What you need
- Instructions
- Tips and common mistakes
- Wrapping up and next steps
What you need
- ● Peat moss or coconut coir: 50% of the mix (2 parts for a 4-part blend). Opt for sphagnum peat moss for best acidity retention.
- ● Garden loam (topsoil): 25% of the mix (1 part). Choose a well-draining, organic-rich loam.
- ● Pine bark fines or fir needles: 25% of the mix (1 part). Enhances aeration and acidity—pine bark is ideal for bulk, while needles add extra acidity.
- ● Elemental sulfur: 1 tbsp per 5 gallons of mix. Adjust based on your soil’s pH (test first!).
- ● Slow-release fertilizer: 1 cup of an acid-loving plant blend (e.g., 10-10-10 or 8-3-9 with micronutrients).
- ○ Lime alternative (optional for pH tweaks): Aluminum sulfate (½ cup per 5 gallons) if your mix needs extra acidity.
- ● Garden cart or wheelbarrow: For mixing large batches (5+ gallons).
- ● Garden gloves: Protect your hands from peat moss and sulfur.
- ● Soil pH tester: Essential for monitoring acidity (aim for 4.5–5.5).
- ● Shovel or trowel: For transferring and amending soil.
- ● Watering can or hose: To moisten the mix during blending.
- ○ Plastic sheeting (optional): Lay down to contain mess when mixing.
- ● Test your existing soil’s pH—blueberries and azaleas thrive in highly acidic conditions!
- ● Work in a dry, shaded area to prevent peat moss from drying out mid-mix.
- ● Wear a dust mask if handling sulfur or bark fines to avoid irritation.
Step-by-Step guide to creating an acidic loam blend for blueberries and azaleas
This custom mix delivers the perfect balance of acidity, drainage, and nutrients for acid-loving plants.
🌱 Step 1: Measure and Combine Base Materials for Structure
Start with 50% peat moss—this provides acidity and moisture retention. I like to use 2 cubic feet per plant for our four plants, so that's 1 cubic foot of peat moss. Add 30% perlite (about ¾ cubic foot) to create air pockets and improve drainage. These two materials form the backbone of your blend.
Mix them thoroughly in a wheelbarrow or large container. You'll notice the peat moss is light and fluffy, while the perlite adds a gritty texture. This combination prevents compaction while keeping roots well-oxygenated. If your peat moss feels damp, let it dry slightly before mixing—excess moisture can suffocate roots.
💧 Step 2: Incorporate Organic Matter for Nutrient Density
Add 20% composted pine bark fines (about ⅓ cubic foot) to introduce slow-release nutrients and maintain acidity. I sift it lightly to remove any large chunks that could disrupt root growth. Next, blend in 1 cup of sphagnum peat per cubic foot of mix—this further lowers the pH to the 4.5-5.5 range these plants thrive in.
Turn the materials with a garden fork or your hands until everything looks uniformly blended. The mix should resemble dark, crumbly soil with visible perlite flecks. Here's the thing—if you're working in layers, mix the pine bark fines and peat moss separately first, then combine with the peat-perlite base. This ensures even distribution.
✂️ Step 3: Adjust pH and Add Acid-Forming Fertilizer
Test the mix's pH using a soil meter. If it reads above 5.5, add ½ cup of elemental sulfur per cubic foot and remix thoroughly. For our four plants, that's 2 cups total. Then, incorporate 1 tablespoon of iron sulfate per cubic foot to prevent chlorosis. I like to sprinkle these dry first, then mix them in with a gloved hand.
Finally, add 1 cup of slow-release acid-loving plant fertilizer (like 10-10-10 with sulfur coating) per cubic foot. This provides balanced nutrition without risking pH spikes. The sulfur and iron will dissolve gradually, maintaining the acid environment. You'll know the mix is ready when it smells earthy but not sour—like fresh forest soil.
☀️ Step 4: Condition the Mix Before Use
Moisten the blend with lukewarm water until it reaches the consistency of a damp sponge—squeeze a handful, and just a few drops should escape. For our four plants, that's about 3 gallons of water. Let it sit for 24-48 hours to allow the sulfur and fertilizer to activate. This step prevents root burn from sudden chemical changes.
After conditioning, test the pH again. It should now read between 4.5-5.5. If it's still too high, add another ¼ cup sulfur per cubic foot and remix. Once satisfied, fluff the mix with a garden fork to restore aeration. Your blend is now ready to use—this is the moment that matters for your acid-loving plants' long-term health.
Tips & tricks for perfect acidic loam blend
Creating the ideal acidic loam blend takes precision—here's how to elevate your mix from good to exceptional.
Layering Technique: In Step 2, when incorporating the composted pine bark fines and sphagnum peat, I've found it works best to create two separate piles first. Mix the pine bark fines with the sphagnum peat thoroughly before combining with the peat-perlite base. This ensures even distribution of both acidity sources throughout the entire volume, preventing pockets where the pH might remain too high. Think of it like creating a uniform acidity blanket for your plants' roots.
pH Testing Precision: During Step 3, when testing the mix's pH, use a digital soil meter for accuracy rather than relying on litmus paper. I've seen litmus paper give inconsistent readings, especially with the sulfur additions. Test at least three different spots in your mix after remixing—pH can vary slightly even in well-blended batches. Remember, we're aiming for that perfect 4.5-5.5 range where blueberries and azaleas truly thrive.
Water Conditioning Secret: The 24-48 hour conditioning period in Step 4 is where the magic happens. Use lukewarm water—cold water can shock the sulfur and fertilizer, while hot water might activate them too quickly. I like to cover the mix with a damp towel during this time to maintain consistent moisture levels. This gradual activation prevents nutrient burn while allowing the sulfur to fully integrate into the blend.
Storage Wisdom: Once your blend is ready, store it in sealed containers or heavy-duty plastic bags. For long-term storage (up to 6 months), keep it in a cool, dry place. If you notice the mix drying out, lightly mist with water and let it sit for 1-2 hours before use. The key is maintaining that perfect damp sponge consistency—never let it become soggy, as this can lead to anaerobic conditions that harm root health.
Pro Tips for Soil And Fertilizer
- Creating the ideal acidic loam blend takes precision—here's how to elevate your mix from good to exceptional.
- Layering Technique: In Step 2, when incorporating the composted pine bark fines and sphagnum peat, I've found it works best to create two separate piles first.
- pH Testing Precision: During Step 3, when testing the mix's pH, use a digital soil meter for accuracy rather than relying on litmus paper.
Frequently asked questions
Got questions about creating the perfect acidic loam blend for blueberries and azaleas?
Here are some of the most common ones—and their straightforward answers to help you garden with confidence!
How often should I fertilize blueberries and azaleas with this acidic loam mix?
For blueberries, apply fertilizer (or compost) in early spring and again after harvest—about every 6–8 weeks during the growing season. Azaleas thrive with one feeding in early spring and a light top-dressing in late fall. Over-fertilizing can harm roots, so less is more!
What if my soil test shows pH is too high (alkaline)? How do I fix it?
Blueberries and azaleas need acidic soil (pH 4.5–5.5). To lower pH, mix in sulfur or peat moss into your loam blend (follow package rates). For quick fixes, use pine needles, coffee grounds, or composted pine bark. Retest soil every 6 months—pH changes take time!
Can I use regular garden soil instead of loam for this mix?
Not ideal! Regular garden soil is often too alkaline and lacks organic matter. Loam’s balanced texture + compost/peat keeps roots happy. Pro tip: If you’re short on loam, blend 50% topsoil + 30% compost + 20% peat, but test pH first. Avoid clay-heavy soils—they compact easily.
When is the best time to amend soil for planting blueberries or azaleas?
Amend soil 6–8 weeks before planting to let microbes break down organic matter. For existing plants, do it in early spring (before buds swell) or late fall. Avoid disturbing roots during active growth—never amend soil in summer heat!
My azaleas look yellow—could it be fertilizer burn or something else?
Yellow leaves often mean over-fertilizing, nutrient deficiency, or pH issues. Check:
Too much nitrogen? Reduce feeding and water deeply.
Iron deficiency (chlorosis)? Add chelated iron or compost.
pH too high? Re-acidify with sulfur or pine fines.
If leaves are crispy or brown, it’s likely drought stress—water at the base, not the foliage.Wrapping up and next steps
Creating the perfect acidic loam blend for blueberries and azaleas is all about balancing science with care—your plants will thank you with vibrant blooms and bountiful harvests! 🌿 By mixing the right soil, organic matter, and fertilizers, you’ve set the stage for thriving acid-loving plants.
Now, it’s time to roll up your sleeves and watch your garden flourish.
Ready to take the next step? Start with a small batch to test your mix, then gradually expand. Keep monitoring pH levels and adjust as needed—your green thumb is growing stronger every day! Happy gardening! 🌱