
How To
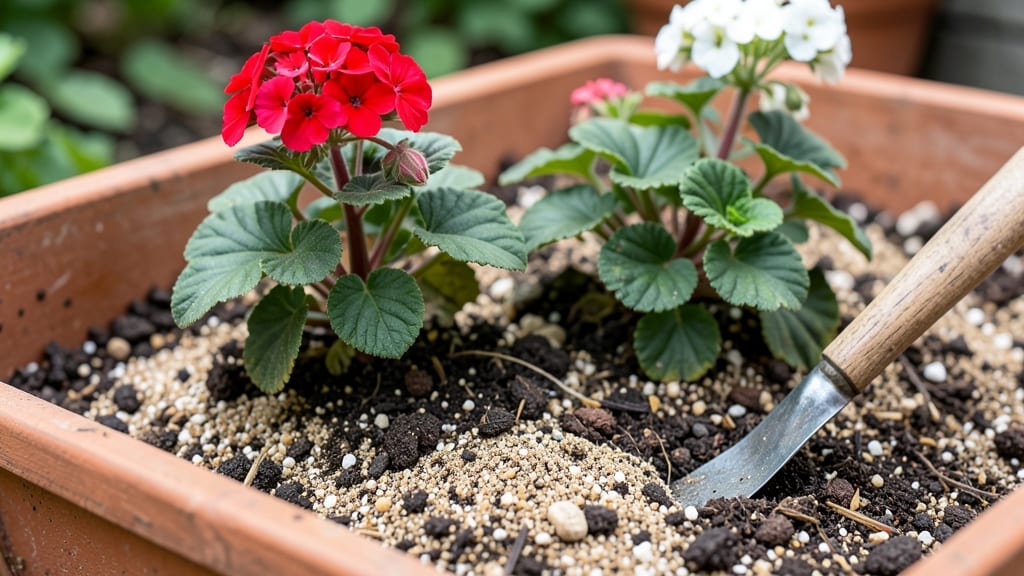
The right soil for pelargoniums is the difference between vibrant blooms and sad, leggy stems. 🌸 I learned this the hard way when my first geraniums struggled in heavy garden soil—until I switched to a fast-draining mix that mimics their native South African habitat.
The secret isn't complicated: it's all about drainage, acidity, and keeping roots happy.
Pelargoniums hate soggy feet, so your mix needs to shed water quickly while still holding enough moisture for roots. Think 60% potting soil, 30% perlite or coarse sand, and 10% compost—this creates air pockets that prevent rot.
The pH should sit between 6.0 and 6.5, slightly acidic, which you can test with a simple soil kit or adjust with sulfur if needed. For containers, this blend works year-round; in-ground plantings need raised beds or mounds to avoid compacted soil.
What you’ll get is plants that bloom nonstop from spring to frost, with sturdy stems that don’t flop. The flowers stay bright, the foliage stays glossy, and you’ll finally understand why these plants thrive in hot, dry climates.
The key is checking soil moisture—stick your finger in the mix before watering, and you’ll avoid both drought stress and root rot.
For seasonal care, refresh the top inch of soil with compost every few months, and repot every 2-3 years to prevent compaction. If you’re growing in containers, elevate them on feet to improve drainage, and always use pots with drainage holes—no exceptions.
Trust me, once you master this mix, your pelargoniums will outperform every neighbor’s.
📚 In This Guide
- What you need
- Instructions
- Tips and common mistakes
- Wrapping up and next steps
What you need
- ● Potting soil (base): 60% high-quality peat moss or coco coir (retains moisture without compacting)
- ● Perlite or pumice: 20% (adds aeration and prevents waterlogging)
- ● Sand or grit: 10% (coarse horticultural sand or perlite for drainage)
- ● Compost or worm castings: 10% (boosts nutrients and microbial life)
- ○ Slow-release fertilizer: 1 tsp per gallon of mix (optional but recommended for potted plants)
- ● Tools: 5-gallon bucket or wheelbarrow (for mixing)
- ● Garden trowel or shovel (for amending in-ground soil)
- ● pH testing kit (to check acidity, ideal range: 6.0–7.0)
- ● Gloves (to protect hands from grit)
- ● Bark chips or orchid bark: 5–10% (improves drainage in heavy clay soils)
- ● Lime (if soil is too acidic): Use sparingly (pelargoniums tolerate slightly acidic soil)
- ● Mycorrhizal fungi: Sprinkle into mix (enhances root health)
- ● Container with drainage holes: If repotting (ensure 1–2 holes per 6-inch pot)
How to create the perfect fast-draining soil mix for pelargoniums
Pelargoniums demand precise soil conditions—this mix delivers vibrant blooms by balancing drainage, aeration, and acidity.
🌱 Step 1: Combine Base Materials for Optimal Structure
Start with 50% premium potting mix as your base—this provides essential nutrients while maintaining lightness. I always use a peat-free blend to avoid compaction, which pelargoniums despise. Add 30% perlite next, tamping it in gently to create air pockets that prevent soggy roots. The perlite’s rough texture also improves drainage, which is critical since pelargoniums wilt quickly in wet conditions.
Sift the mix through a ¼-inch mesh screen to eliminate clumps. This ensures uniform consistency, so every pot gets the same fast-draining properties. I like to work in small batches—about 2 gallons at a time—to maintain control over texture. If the mix feels too dense after mixing, add a bit more perlite until it resembles coarse sand when squeezed.
💧 Step 2: Adjust pH and Acidify for Pelargonium Health
Pelargoniums thrive in slightly acidic soil (pH 6.0–6.5), so add 20% coarse sand (like horticultural-grade grit) to improve drainage while lowering pH naturally. For an extra boost, mix in 1 part sphagnum peat moss—this holds moisture without suffocating roots and adds organic acidity. I’ve found that skipping this step leads to yellowing leaves, even with perfect drainage.
Test the pH with a digital soil meter before finalizing. If it reads above 6.5, stir in ½ cup of sulfur per 5 gallons of mix and let it sit for 24 hours before use. The sulfur will gradually acidify the blend. Avoid overdoing it—pelargoniums can’t tolerate soil below pH 5.5, which stunts growth. A light, airy texture with a slightly tangy scent from the peat confirms you’re on track.
✂️ Step 3: Sterilize and Condition for Long-Term Success
Spread the mixed soil on a clean baking sheet and bake at 200°F for 30 minutes to kill pathogens. Pelargoniums are prone to root rot, so sterilization is non-negotiable. Let it cool completely before proceeding—hot soil can scorch delicate roots during transplanting. While cooling, add 1 tablespoon of slow-release fertilizer per gallon of mix (like 10-10-10) to ensure blooms stay vibrant.
Fluff the soil with a fork to reintroduce air pockets, then store in a sealed container for up to 3 months. The mix should feel light as a cloud when held—if it compacts when pressed, add more perlite. This texture mimics pelargoniums’ native South African habitat, where they grow in rocky, well-drained soils. A quick pinch test reveals success: squeeze a handful—it should crumble easily, not clump.
🪴 Step 4: Apply to Pelargoniums with Precision
Fill pots with 1–2 inches of the mix, leaving room for the plant’s root ball. Pelargoniums hate crowded roots, so use containers with drainage holes and at least 6 inches of depth. Gently loosen the roots of your pelargonium before placing it in the pot, then fill around it with the remaining mix, pressing lightly to eliminate air gaps. Water thoroughly until it drains from the bottom—this settles the soil and removes excess air.
Place the potted pelargonium in bright, indirect light for 48 hours to acclimate. Avoid direct sun immediately, as the fresh mix can cause leaf scorch. You’ll know the soil is working when new leaves emerge within 2–3 weeks—a sign the roots are happily established. Overwatering here is the biggest mistake; let the top ½ inch of soil dry between waterings. The mix’s fast-draining properties prevent soggy roots while keeping plants hydrated.
Tips & tricks for perfect pelargonium soil mix
These pro techniques will help you create an ideal growing environment for your pelargoniums—every time.
Texture is Everything: The 50% potting mix to 30% perlite ratio in Step 1 creates the perfect balance of moisture retention and aeration. For an even lighter mix, replace 5% of the perlite with horticultural charcoal—it improves drainage while adding beneficial microbes. The key is achieving that "coarse sand" consistency when squeezed; if it feels dense, keep adding perlite until it crumbles easily. This prevents the compacted soil that pelargoniums absolutely despise.
pH Precision Matters: When testing your soil's pH in Step 2, aim for that 6.0–6.5 range—anything above 6.5 means your plants won't absorb nutrients properly. I've seen yellowing leaves disappear within days after adjusting the pH correctly. If you don't have a digital meter, use red cabbage juice as a DIY indicator: blue-green means acidic (good), purple means neutral. The sulfur adjustment takes the full 24 hours to work, so plan ahead and test again before using.
Sterilization Shortcut: While the 200°F for 30 minutes baking in Step 3 kills pathogens, you can also sterilize your mix in the microwave. Spread it on a microwave-safe plate and zap it for 3 minutes on high, stirring halfway. This works best for smaller batches—about 1 gallon at a time. Just be careful not to overdo it, as microwaving can dry out the mix more quickly than baking. Always let it cool completely before proceeding to avoid shocking delicate roots.
Storage Wisdom: The sealed container in Step 3 preserves your mix's freshness for up to 3 months, but add a silica gel packet to prevent moisture buildup that can lead to mold. Before each use, give it a good fluff with a fork to restore those crucial air pockets. I store mine in 5-gallon buckets with tight lids—they're perfect for mixing larger batches and keep out pests. If you notice any musty smells when opening, discard that batch and start fresh, as pelargoniums are sensitive to soil-borne pathogens.
Pro Tips for Soil For Pelargoniums
- These pro techniques will help you create an ideal growing environment for your pelargoniums—every time.
- Texture is Everything: The 50% potting mix to 30% perlite ratio in Step 1 creates the perfect balance of moisture retention and aeration.
- pH Precision Matters: When testing your soil's pH in Step 2, aim for that 6.0–6.5 range—anything above 6.5 means your plants won't absorb nutrients properly.
Frequently asked questions
Got questions about the perfect soil for your pelargoniums? You’re not alone! Here are answers to the most common queries—so you can keep those vibrant blooms thriving with confidence.
What’s the ideal pH range for pelargonium soil?
Pelargoniums thrive in slightly acidic to neutral soil, with a pH range of 6.0 to 7.0. Test your soil with a kit—if it’s too alkaline (above 7.0), amend it with peat moss or sulfur to lower the pH. Pro tip: Avoid over-acidifying; aim for a balanced mix!
Can I use regular potting soil for pelargoniums?
Nope! Regular potting soil retains too much moisture, risking root rot. Pelargoniums need a fast-draining, gritty mix (like 60% potting soil + 30% perlite + 10% sand). Skip the cheap blends—your plants will thank you with more blooms!
How often should I repot pelargoniums for better soil?
Repot every 1–2 years or when roots crowd the container. Spring is the best time! Use a pot with drainage holes and refresh the soil mix to prevent nutrient depletion. Warning: Overcrowded roots = fewer flowers.
What if my pelargonium leaves turn yellow?
Yellow leaves often signal overwatering or poor drainage. Check the soil—if it’s soggy, let it dry out and adjust your watering. If the mix is too dense, amend it with coarse sand or vermiculite to improve airflow. Bonus: Yellow edges? It might be underwatering!
Are there soil alternatives for pelargoniums?
Yes! If you’re short on supplies, try:
- Cactus/succulent mix (add 20% perlite for extra drainage)
- Orchid bark chunks (mimics their natural rocky habitat)
- DIY blend: 50% coconut coir + 30% perlite + 20% worm castings
Wrapping up and next steps
Choosing the right soil for pelargoniums is your secret weapon for lush, vibrant blooms! 🌸 With a fast-draining, slightly acidic mix packed with organic matter, you’re setting your plants up for success.
Don’t overthink it—just focus on aeration, moisture control, and a little TLC, and your pelargoniums will reward you with stunning color all season.
Ready to level up your garden game? Grab your supplies, mix that soil, and watch your pelargoniums thrive! 🌱 For extra flair, experiment with container styles or companion plants—happy gardening!