
Propagation
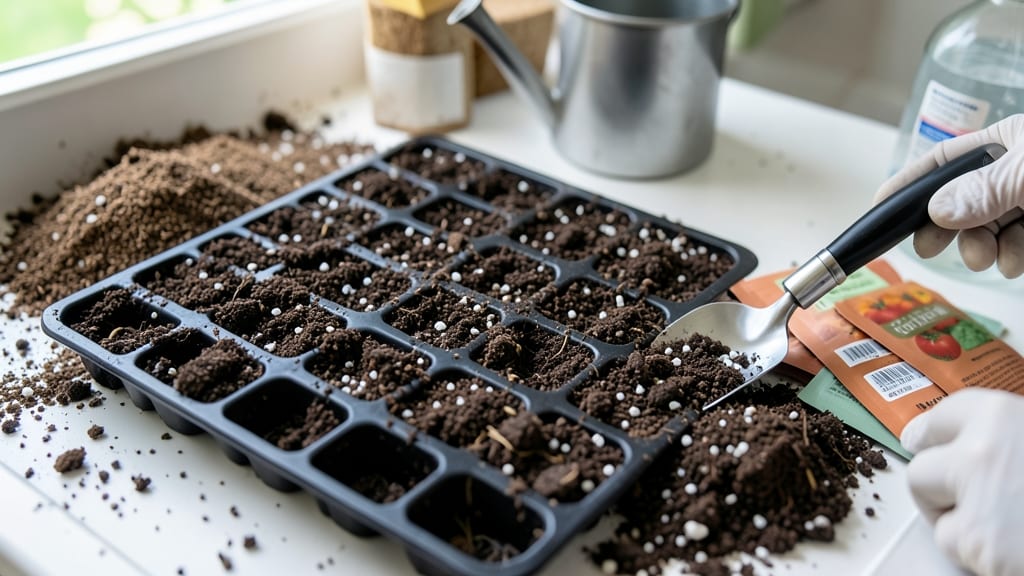
The right soil mix for seed starting makes the difference between weeks of waiting and seedlings popping up in days. 🌱 I learned this the hard way after struggling with slow germination—until I created a light, sterile blend that keeps seeds happy and roots growing strong.
This mix combines peat moss or coconut coir for moisture retention, perlite or vermiculite for aeration, and a touch of compost for nutrients. Sterilizing it with heat or hydrogen peroxide ensures no fungal surprises. The texture should be fluffy—like a cloud—so roots breathe easily and seeds stay snug.
You'll see tiny sprouts in 5-7 days for fast-germinating seeds like lettuce, or 10-14 days for slower starters like tomatoes. The key is keeping it damp (not soggy) and warm—just like a seed's natural environment. No more guessing games.
Works for veggies, flowers, and herbs alike—just tweak the compost ratio for heavy feeders like peppers. Here's how to mix it right the first time!
📚 In This Guide
- What you need
- Instructions
- Tips and common mistakes
- Wrapping up and next steps
What you need
- ● Peat moss or coco coir: 4 parts (sterile, moisture-retentive base—opt for sphagnum peat moss or coco coir for sustainability).
- ● Perlite or vermiculite: 1 part (adds aeration and prevents compaction; perlite for extra air, vermiculite for moisture retention).
- ○ Compost or worm castings: 1 part (optional but recommended for nutrients—sterilized compost or worm castings work best).
- ○ Seed-starting mix (optional): 1 part (pre-mixed blends like Pro-Mix or Fox Farm Seedling Mix for convenience).
- ● Large mixing container: A clean, sterilized bucket or bin (5+ gallons).
- ● Gloves & mask: Protect yourself from dust and pathogens (especially if using raw peat or compost).
- ● Sterilization method: Microwave, oven (200°F for 30 mins), or hydrogen peroxide (3% solution) to kill fungi/bacteria.
- ○ pH testing kit (optional): Aim for 5.8–6.5 (most seeds thrive in slightly acidic soil).
- ● Spray bottle: For gentle moisture control during mixing.
Step-by-Step guide to creating the perfect seed-starting soil mix
Here's the exact blend I use to get seedlings off to a fast, healthy start—no more weak, leggy sprouts.
🌱 Step 1: Choose Your Base Components
Start with 50% peat moss or coco coir—this gives your mix that light, airy texture seedlings need to push through easily. I like coco coir because it holds moisture better than peat while still allowing roots to breathe. If you're using peat, make sure it's sterile and free of additives.
Add 30% perlite or vermiculite for drainage and aeration. Perlite is great for moisture control, while vermiculite holds nutrients better. I usually split the difference—half perlite, half vermiculite—to balance both properties. These additives prevent soil compaction, which is deadly for tiny seedling roots.
🌿 Step 2: Add Nutrients and Conditioners
Mix in 10% worm castings or compost for gentle, slow-release nutrition. Avoid fresh manure—it can burn seedlings with ammonia. I prefer worm castings because they're sterile and packed with beneficial microbes that boost early root growth. A handful per quart of mix is plenty.
For extra insurance, add 5% horticultural charcoal to prevent damping-off disease. This fungal infection is the #1 killer of seedlings, and charcoal acts like a natural fungicide while also improving drainage. Sift it into the mix so it's evenly distributed.
✂️ Step 3: Blend Thoroughly and Sterilize
Combine all components in a large bin or wheelbarrow. Use a shovel or garden fork to mix until the texture is uniform—no clumps larger than a pea. I like to sift the mix through a quarter-inch mesh screen to break up any remaining lumps and ensure even consistency.
Sterilize your mix by baking it in the oven at 200°F for 30 minutes or microwaving it in 2-cup batches for 90 seconds. This kills pathogens that could cause seed rot or damping-off. Let the mix cool completely before using—warm soil can shock seeds and delay germination.
💧 Step 4: Moisten and Test Before Use
Add water gradually until the mix holds together when squeezed but doesn't drip. It should feel like a damp sponge—not soggy, not dry. I use room-temperature water because cold water can shock seeds. Fill your seed-starting containers with this mix and press down gently to settle it.
Test your mix by sticking a finger in—it should feel light and fluffy, not dense. If it's too compacted, add more perlite or vermiculite. The goal is a mix that crumbles easily when dry but holds moisture without becoming waterlogged. This balance is what gives seedlings the perfect environment to germinate fast and strong.
Tips & tricks for perfect seed-starting soil mix
This blend is your secret weapon against leggy seedlings—here's how to make it even more effective.
Texture is Everything: After blending your components in Step 3, take an extra minute to rub the mix between your fingers. You're aiming for a texture that feels like crumbled styrofoam—not too fine, not too coarse. If it feels powdery, add a bit more perlite; if it's clumpy, sift again or add a touch of vermiculite. The right texture lets air circulate while holding moisture just enough for tender roots.
Sterilization Shortcut: While the oven method at 200°F for 30 minutes is foolproof, I've found microwaving works surprisingly well for small batches. Just divide your mix into 2-cup portions and zap for 90 seconds. The key is to stir halfway through—this ensures even heat distribution that kills pathogens without drying out your mix completely. Test one batch first to confirm your microwave's power level.
Moisture Balance Test: In Step 4, when you're checking the damp sponge consistency, here's a pro trick: squeeze a handful firmly. If water beads form on your palm, it's too wet; if it crumbles when released, it's perfect. This test is more reliable than the squeeze method alone because it accounts for both moisture retention and drainage. Remember, seedlings need oxygen as much as water!
Storage Wisdom: Once you've prepared your mix, store it in an airtight container at room temperature for up to 3 months. To prevent mold, sprinkle a thin layer of horticultural charcoal on top before sealing. If you notice any musty smells when opening, simply rebake the entire batch at 200°F for 15 minutes to refresh it. This extends your mix's shelf life while maintaining its sterile properties.
Pro Tips for Soil Mix For Seed Starting
- This blend is your secret weapon against leggy seedlings—here's how to make it even more effective.
- Texture is Everything: After blending your components in Step 3, take an extra minute to rub the mix between your fin...
- Sterilization Shortcut: While the oven method at 200°F for 30 minutes is foolproof, I've found microwaving works surp...
Frequently asked questions
Got questions about the perfect soil mix for seed starting?
You’re not alone! Here are some of the most common concerns—and their solutions—to help you grow confidently.
What’s the best ratio of peat moss, perlite, and vermiculite for seed starting?
A balanced mix like 50% peat moss (or coco coir), 30% perlite, and 20% vermiculite works for most seeds. Adjust perlite (for drainage) or vermiculite (for moisture retention) based on your plant type—succulents need more perlite, while finicky seeds (like orchids) thrive with extra vermiculite.
Can I reuse last year’s seed-starting mix?
Not ideal! Old mix may harbor fungi, bacteria, or pests that can stunt seedlings. Sterilize it by baking at 200°F for 30 minutes or replace it entirely. Fresh mix ensures a clean slate for germination.
Are there budget-friendly alternatives to store-bought seed-starting mixes?
Try:
- Coconut coir + perlite (cheaper than peat moss)
- Compost + sand (sterilized first!)
- Used potting soil + vermiculite (sifted and pasteurized)
My seeds aren’t germinating—could the soil mix be the issue?
Check these first:
- Is the mix too dense? Add perlite for airflow.
- Is it too dry? Keep it consistently moist (not waterlogged).
- Did you sterilize the mix? Fungi like Pythium can block germination.
How long does a homemade seed-starting mix stay fresh?
Homemade mixes last 1–2 months if stored dry in a sealed container. After that, sterilize or replace to prevent mold. Store-bought mixes often include preservatives, extending shelf life to 6–12 months if unopened.
Wrapping up and next steps
Creating the perfect soil mix for seed starting is your secret weapon for fast, healthy germination! 🌱 With the right balance of sterility, aeration, and moisture retention, you’ll give your tiny seedlings the fluffy, nutrient-rich foundation they deserve.
Whether you’re mixing your own blend or tweaking a store-bought option, remember: consistency is key—and so is patience as those first sprouts break through.
Now that you’re armed with the knowledge, it’s time to roll up your sleeves and start sowing! Grab your supplies, follow your customized mix, and watch your garden dreams take root—literally. Happy planting! 🌱✨