
How To
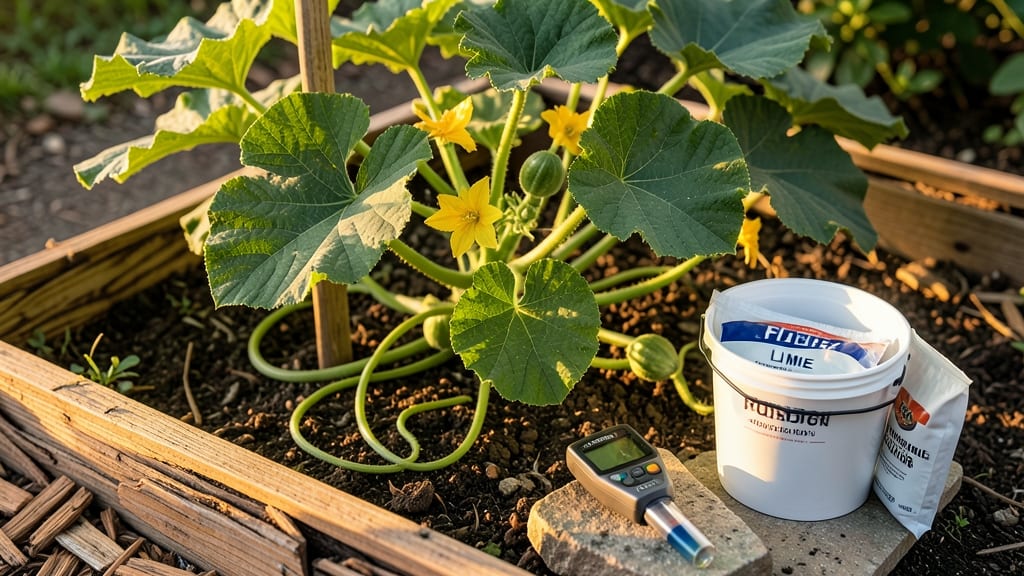
The ideal soil pH for cantaloupe is between 6.0 and 7.0, where these sweet melons thrive with vibrant flavor and robust growth.
Picture this: you’ve waited all spring to plant your 🍈, only to watch the vines struggle or the fruit turn bland. That’s often a pH problem—too acidic or alkaline, and your cantaloupes won’t reach their full potential.
The right balance isn’t just about soil; it’s about unlocking the nutrients your plants need to produce that signature sweetness.
Most gardeners overlook pH until issues arise, but testing early saves time and frustration. A simple soil test reveals whether your garden bed needs a boost of lime (to raise pH) or sulfur (to lower it).
Without the right conditions, even the best cantaloupe varieties can underperform, leaving you with bitter fruit or sparse yields.
In this guide, I’ll walk you through how to test your soil, adjust it naturally, and troubleshoot common pH-related problems—so your cantaloupes grow sweeter and stronger than ever.
Optimal soil pH range for cantaloupe growth and sweetness
Cantaloupes thrive when their soil pH falls between 6.0 and 7.0, a slightly acidic to neutral range that unlocks their full sweet potential. This isn't just a random number—it's the sweet spot where cantaloupes can absorb the magnesium, calcium, and phosphorus they need to develop that signature sugary flavor.
When pH strays too far from this window, nutrient uptake suffers, leading to bitter fruit or poor yields.
Think of soil pH like the taste buds of your cantaloupe. Too acidic (below 6.0) or too alkaline (above 7.0) and the plant can't properly access essential minerals.
For example, phosphorus becomes locked up in alkaline soils, starving your vines of the energy they need to produce sweet, ripe fruit. Meanwhile, calcium deficiencies in acidic soils often lead to blossom-end rot, a common problem that ruins harvests.
Here’s why this pH range matters so much for flavor development: cantaloupes convert sugars more efficiently when their roots can access the right balance of nutrients.
A pH of 6.5 (the midpoint) is often ideal for maximizing both yield and sweetness, but even slight deviations can make a difference in your harvest's quality.
| pH Range | Nutrient Availability | Flavor Impact | Common Issues |
|---|---|---|---|
| Below 6.0 | High aluminum, low phosphorus | Bitter, poor sugar development | Root damage, blossom-end rot |
| 6.0–7.0 | Optimal magnesium, calcium, phosphorus | Sweet, ripe, full flavor | None (ideal range) |
| Above 7.0 | Low iron, zinc, manganese | Pale, watery, low sugar | Chlorosis, stunted growth |
If your soil tests below 6.0, you’ll need to raise the pH using organic amendments like wood ash or crushed oyster shell. These materials add calcium and help neutralize acidity.
On the other hand, if your soil is above 7.0, you’ll want to lower the pH with elemental sulfur or peat moss, which gradually acidifies the soil over time. The key is patience—soil pH changes slowly, so test it every few weeks to avoid overcorrecting.
Another critical factor is buffer capacity, which refers to how well your soil resists pH changes. Sandy soils have low buffer capacity and require more frequent adjustments, while clay soils hold their pH steady longer.
If you're growing cantaloupes in containers or raised beds, you’ll need to monitor pH more closely because these environments dry out faster and can become more acidic.
For container growers, I recommend mixing compost and aged manure into your potting mix to maintain a stable pH. These organic materials not only improve nutrient availability but also help retain moisture, which cantaloupes love during their fruiting stage.
Aim for a well-draining yet moisture-retentive mix—think of it as giving your cantaloupes a nutrient-rich spa day every time they drink.
One of the biggest myths about cantaloupe growth is that any fertile soil will do. While cantaloupes are forgiving plants, they’re picky about pH. Even a slight dip below 6.0 or rise above 7.0 can reduce your harvest’s sweetness by up to 30%.
That’s why I always test my soil before planting, especially if I’ve grown other crops like tomatoes or peppers in the same bed—these plants can leave behind residues that alter pH.
To test your soil’s pH, grab a DIY test kit (they’re cheap and easy to use) or send a sample to your local cooperative extension office.
For a quick at-home test, mix a spoonful of soil with water and use litmus paper to check the pH. If you’re seeing yellow or green results, your soil is acidic; blue or purple means it’s alkaline. Adjust accordingly before planting your seeds.
Remember, cantaloupes aren’t just about sweetness—they’re also about texture and aroma. The right pH ensures your fruit develops that perfect balance of creamy flesh and fragrant rind.
When you nail the pH, you’re not just growing a melon; you’re cultivating a dessert straight from your garden. Now that’s what I call a sweet victory!
How to test and adjust soil pH for maximum cantaloupe yield
Testing and adjusting your soil's pH level is the secret to growing cantaloupes with explosive sweetness. Cantaloupes thrive in a neutral to slightly acidic range, but most garden soils need tweaking.
I’ll walk you through the simplest methods to get your soil perfect—whether you’re using DIY test kits or lab precision—and how to fix imbalances naturally or chemically.
Before you start, grab a soil sample from 4–6 inches deep (where roots grow). Mix it with water in a clean container and let it settle. The color of the liquid will give you clues: blue-green means acidic, red-purple means alkaline.
But for exact numbers, you’ll need a test. Let’s dive into your options.
Soil pH Testing Methods
- ✅ Pros: Affordable ($10–$20), quick results (10–30 mins), reusable.
- ✅ Best for: Home gardeners, container growers, seasonal checks.
- ❌ Cons: Less precise (±0.5 pH), color-matching can be tricky.
- ❌ Limitations: Doesn’t test nutrient levels, only pH.
- ✅ Pros: Highly accurate (±0.1 pH), includes nutrient analysis, trusted by pros.
- ✅ Best for: Large gardens, commercial growers, troubleshooting.
- ❌ Cons: Costs $20–$50, takes 1–2 weeks for results.
- ❌ Limitations: Overkill for small plots or beginners.
My Recommendation: Start with a DIY kit for quick feedback, then send a sample to a lab if your cantaloupes still struggle.
Once you’ve got your pH number, aim for 6.0–7.0—this is where cantaloupes absorb nutrients like magnesium and phosphorus most efficiently. If your soil is below 6.0, it’s too acidic.
Add pelletized lime (organic) or hydrated lime (faster-acting) to raise pH. For soil above 7.0, use elemental sulfur (organic) or aluminum sulfate (chemical) to lower it.
For container gardens, adjustments are faster but require more frequent checks. Mix amendments directly into the potting soil, and water thoroughly to activate them.
In-ground gardens need deeper amendments—till lime or sulfur into the top 6–12 inches of soil 2–4 weeks before planting. Wood ash can also help raise pH slightly, but use it sparingly (it’s alkaline and can overcorrect).
Seasonal timing matters too. Test your soil in early spring before planting and again in late summer after harvest. Cantaloupes are heavy feeders, and their roots can acidify the soil over time. If you notice yellowing leaves or stunted growth, retest immediately—it’s often a pH problem.
Pro tip: Mix in compost (even slightly acidic) to buffer pH swings naturally. It also improves soil structure, helping roots access nutrients even when pH is borderline. And always water after amending—this helps distribute the changes evenly.
With the right pH, your cantaloupes won’t just grow—they’ll burst with flavor. Start testing today, and in 70 days, you’ll be harvesting melons sweeter than store-bought. 🍈