
How To
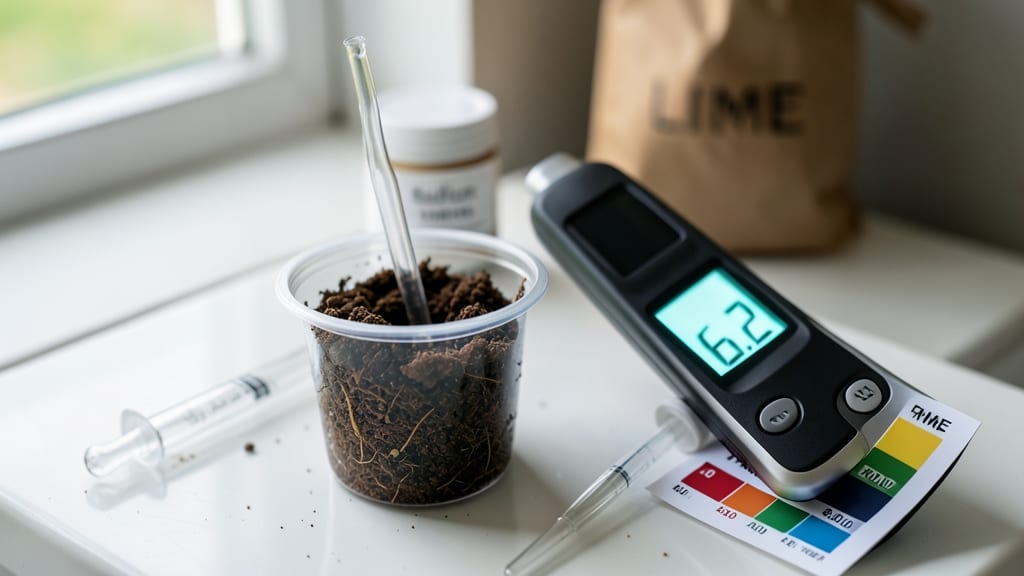
A soil pH tester meter reveals the hidden chemistry that decides whether your plants thrive or struggle. 🌱 I learned the hard way—my blueberries turned sour and my tomatoes stayed puny until I finally tested the soil.
The meter gives you numbers, not guesswork, so you can match plants to their perfect growing conditions.
Most meters work in minutes: stick the probe into moist soil, wait 30 seconds, and read the pH number. Acid-loving plants like azaleas need 4.5-5.5, while veggies prefer 6.0-7.0.
The key is testing before planting—skipping this step is like watering with saltwater. My first test showed my garden was 7.2, way too alkaline for my raspberries.
With the right reading, you’ll know exactly what to add: sulfur for acidity, lime for alkalinity, or just compost to buffer extremes. My soil now sits at 6.5, and the difference in growth is shocking—lush, vibrant plants that actually produce.
The meter pays for itself in one season.
Calibrate yours every few months with a known pH solution, and test 2-3 spots in your garden for accuracy. Pair it with a basic soil test kit for even better insights. Once you master this, your garden will finally match the vision you’ve been dreaming of.
📚 In This Guide
- What you need
- Instructions
- Tips and common mistakes
- Wrapping up and next steps
What you need
- ● Soil pH Tester Meter: A digital or analog meter (e.g., Bluelab pH Meter, Apera AI200, or LaMotte Soil pH Kit). Ensure it’s waterproof and calibrated for soil testing.
- ● Soil Samples: Fresh, undisturbed soil from 3–5 inches deep (avoid surface debris). Collect 3–5 samples from different garden areas for accuracy.
- ● Clean Container: A non-reactive plastic or glass container (e.g., a 500–1000 mL cup or bowl) to hold soil and water.
- ● Distilled Water: 1 cup (240 mL) per sample. Tap water may skew results!
- ● Spoon or Trowel: For mixing soil evenly.
- ● pH Calibration Solution (if required): Some meters need a pH 4.0 and 7.0 buffer solution for calibration (check your meter’s manual).
- ● Soil pH Adjustment Supplies: Lime (for raising pH) – 1–2 lbs per 100 sq ft (e.g., pelletized lime).
- ● Sulfur or peat moss (for lowering pH) – 5–10 lbs per 100 sq ft.
- ● Gloves: Nitrile or latex gloves to keep hands clean.
- ● Notebook & Pen: To log pH readings and track soil health over time.
- ● pH Test Strips (backup): For quick, non-digital checks (e.g., API Soil pH Test Strips).
How to use a soil pH tester meter for optimal plant health
Here’s how I get precise, reliable pH readings every time—so your plants thrive without guesswork.
🌱 Step 1: Prepare the Soil Sample for Accurate Testing
Collect soil from 4-6 inches deep in multiple spots around the planting area, then mix thoroughly in a clean bucket. Remove debris like rocks or roots—these skew results. I like to use a trowel to scrape a small trench, then blend the samples with my hands until uniform. Moisten the sample slightly if dry; you want damp but not soggy soil for consistent readings.
If testing a container garden, sample from 2-3 different spots in the pot, scraping the sides where roots cluster. The goal is a representative mix that reflects your plant’s actual growing conditions. Avoid testing right after fertilizing—wait 2-3 weeks for chemical residues to settle.
💧 Step 2: Calibrate the Meter Before Testing
Most meters come with pH 4.0 and 7.0 calibration solutions—use these to ensure accuracy. Fill the calibration cups halfway with each solution, then insert the meter probe until it beeps or stabilizes. If the reading drifts more than 0.2 pH units, recalibrate or check the battery. I’ve seen meters drift over time, especially in humid conditions, so I calibrate before every major testing session.
For digital meters, follow the manufacturer’s wait time (usually 30-60 seconds) before recording the reading. Analog meters often use color charts—match the probe’s color to the chart immediately after removal. Note the exact pH value; even small variations matter for acid-loving plants like blueberries versus alkaline-tolerant rosemary.
☀️ Step 3: Test the Soil and Interpret Results
Insert the meter probe into the prepared soil sample, pressing gently but firmly to ensure full contact. Hold for 1-2 minutes or until the reading stabilizes—most meters flash or beep when ready. Record the pH value, then compare it to your plant’s ideal range. For example, blueberries thrive at 4.5-5.5, while tomatoes prefer 6.0-6.8—knowing this helps you adjust amendments precisely.
If the reading is off, don’t panic. Most plants tolerate 0.5-1.0 pH units outside their ideal, but extreme deviations (below 5.0 or above 8.0) signal urgent action. I keep a log of readings over time to track changes after amendments—this helps me fine-tune future adjustments.
✂️ Step 4: Adjust Soil pH Based on Test Results
For acidic soil (below 6.0), add elemental sulfur or peat moss—these lower pH gradually. Work 1 pound of sulfur per 100 square feet into the top 6 inches of soil, then water thoroughly. For alkaline soil (above 7.0), use lime (calcium carbonate) or wood ash—apply 5-10 pounds per 100 square feet, depending on severity. Always test again in 4-6 weeks to confirm changes.
Container gardens respond faster to amendments. I mix 1 tablespoon of sulfur or lime per gallon of potting mix for small pots, then water deeply. Avoid overcorrecting—small adjustments over time yield better results than drastic shifts. If your meter shows 7.5 pH, don’t dump a bag of lime on the soil; aim for 0.5-1.0 pH unit changes per treatment.
⏰ Step 5: Maintain Testing for Long-Term Plant Success
Test soil every 3-6 months for established gardens, or before planting for new beds. Seasonal changes—like heavy rains leaching nutrients or summer heat altering microbial activity—can shift pH unexpectedly. I mark my calendar with reminders, especially after major amendments or when introducing new plants with specific pH needs.
Store your meter in a cool, dry place away from direct sunlight to prolong accuracy. Clean the probe with distilled water after each use to prevent mineral buildup. If readings become unreliable, replace the meter—cheap models degrade faster, but investing in a high-quality glass electrode meter pays off for serious gardeners. The difference in precision is night and day.
Tips & tricks for perfect soil pH testing
Precision matters when you're chasing perfect plant health—these small details make all the difference between guesswork and garden success.
Sample Depth Matters: The 4-6 inch depth for soil sampling isn't arbitrary—this captures the root zone where most microbial activity occurs. If you're testing for shallow-rooted plants like strawberries, sample from 2-3 inches deep instead. I've seen gardeners take surface samples that show wildly different pH than what's actually affecting their plants' roots. For container gardens, scrape the sides where roots cluster rather than just the surface.
Calibration is Non-Negotiable: That 0.2 pH unit drift after calibration might seem minor, but it's enough to mislead you about whether your blueberries need sulfur or your tomatoes need lime. I've learned the hard way—always calibrate with both pH 4.0 and 7.0 solutions before testing, even if you're in a hurry. Digital meters often need the full 30-60 second wait time to stabilize; rushing this step is a common mistake that throws off all subsequent readings.
Timing Your Test: Those 1-2 minutes of probe contact in Step 3 might feel like forever when you're eager for results, but this ensures an accurate reading. For stubborn samples, gently stir the soil-probe mixture every 30 seconds to maintain even contact. I've noticed that wetter soils often stabilize faster, while dry samples can take the full 2 minutes. Write down the exact time your meter stabilizes—this helps you spot potential meter issues if future tests take significantly longer.
Long-Term Tracking Pays Off: The 3-6 month testing interval might seem excessive, but seasonal changes can shift pH unexpectedly. I keep a simple spreadsheet tracking pH, amendments, and plant performance. After adding sulfur, I test again at 4-6 weeks—this shows the real progress rather than just guessing. For container gardens, I test before planting and again after 6 weeks to catch any unexpected shifts from potting mix breakdown.
Pro Tips for Soil Ph Tester Meter
- Precision matters when you're chasing perfect plant health—these small details make all the difference between guessw...
- Sample Depth Matters: The 4-6 inch depth for soil sampling isn't arbitrary—this captures the root zone where most mic...
- Calibration is Non-Negotiable: That 0.2 pH unit drift after calibration might seem minor, but it's enough to mislead ...
Frequently asked questions
Got questions about using a soil pH tester meter? You’re not alone! Here are some of the most common ones—plus clear, no-fluff answers to help you get the most out of your tool.
How often should I test my soil pH?
For most gardeners, testing every 3–6 months is ideal—especially if you’re growing acid-loving plants (like blueberries) or alkaline-tolerant crops (like asparagus). If your soil is new or you’ve amended it recently, check it before planting and again in 4–6 weeks to monitor changes.
Can I use a soil pH tester on wet soil?
Most digital soil pH meters require moist (not soggy) soil for accurate readings. Follow the manufacturer’s instructions—typically, you’ll mix soil with distilled water (1:1 ratio) and let it sit for 30 minutes. Avoid testing on freshly watered soil, as excess moisture can skew results.
Are cheap soil pH testers accurate?
Budget testers (under $20) often rely on colorimetric strips, which can be less precise due to human error or fading. For instant accuracy, invest in a digital meter (around $30–$50) with calibration features. If cost is a concern, lab testing (though slower) is the gold standard for critical projects.
Why does my pH reading keep changing?
Fluctuations are normal! Factors like recent fertilization, rainfall, or organic matter decomposition can shift pH temporarily. Retest after 24–48 hours for consistency. If readings vary dramatically, calibrate your meter or test multiple spots in your garden for an average.
What pH level is best for most vegetables?
Most vegetables thrive in a slightly acidic to neutral range:
- 6.0–7.0: Ideal for tomatoes, peppers, cucumbers, and leafy greens.
- 5.5–6.5: Perfect for strawberries, blueberries (need 4.5–5.5), and potatoes.
- Avoid extremes: Below 5.0 or above 8.0 can lock out nutrients, stressing plants.
Wrapping up and next steps
Mastering your soil’s pH with a soil pH tester meter is the secret to thriving plants and bountiful harvests! 🌱 Whether you're a seasoned gardener or just starting, understanding and adjusting pH levels ensures your greens grow strong and healthy.
Now that you’re equipped with the knowledge, take action—test your soil today and give your plants the perfect foundation for success!
Ready to dive deeper? Explore our guide on pH-balancing amendments to fine-tune your garden like a pro!