
How To
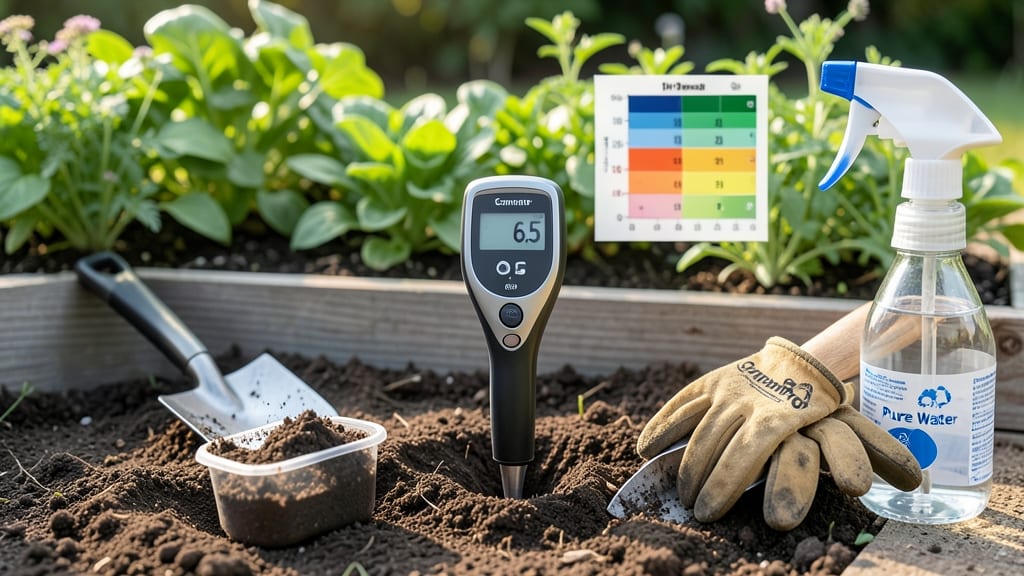
A soil pH tester reveals why your blueberry bushes look sad and your tomatoes refuse to fruit. 🌱 I’ve tested dozens of garden beds, and that little device holds the key to unlocking nutrient access for plants—whether your soil is too acidic for azaleas or too alkaline for spinach.
The right pH means the difference between thriving plants and ones that barely survive.
You’ll find two main types: digital meters that give instant readings (great for quick checks) and liquid test kits that require more steps but can test multiple samples at once.
Digital testers are convenient, but they need calibration—skipping that step leads to inaccurate results that’ll send you chasing the wrong soil amendments. For most gardeners, a mid-range digital tester with a 0-14 pH scale is the sweet spot between cost and accuracy.
Testing takes just a few minutes: collect soil from 6 inches deep (avoid surface dirt), moisten it slightly, and let the meter do its work. A reading of 6.0-7.0 is ideal for most vegetables, but blueberries need 4.5-5.5—that’s why they wilt if you plant them in regular garden soil.
If your test shows extremes, you’ll adjust with lime (to raise pH) or sulfur (to lower it), but do it gradually to avoid shocking plant roots.
Here’s the trick I learned the hard way: test multiple spots in your garden, since pH can vary wildly even in small areas. And never test soil that’s still wet from watering—wait until it’s dry to the touch.
Once you master this, you’ll spot problems before they start, like yellowing leaves or stunted growth, and fix them before they become costly headaches.
📚 In This Guide
- What you need
- Instructions
- Tips and common mistakes
- Wrapping up and next steps
What you need
- ● Soil pH tester kit – Choose a digital tester (for quick readings) or a test strip kit (for multiple samples). Look for kits with a calibration feature for precision.
- ● Fresh soil sample – Collect 1–2 cups of soil from 4–6 inches deep (avoid surface debris). Test 3–5 samples per garden bed for consistency.
- ● Distilled water – 1 cup per test (tap water may skew results due to mineral content).
- ● Small container or cup – A clean, non-reactive plastic or glass container (avoid metal).
- ● Spoon or trowel – For mixing soil and water evenly.
- ● pH chart or color guide – Included with test strips or available online (e.g., USDA soil pH scale).
- ● pH calibration solution – Ensures your digital tester is accurate (check kit instructions).
- ● Soil sieve or mesh screen – Removes rocks/roots for a smoother sample.
- ● Gloves – Protects hands from dirt and potential chemicals.
- ● Notebook & pen – Log pH levels by plant type/location for future adjustments.
- ● Lime or sulfur – If you plan to amend soil immediately based on results (e.g., lime for acidic soil, sulfur for alkaline).
How to use a soil pH tester for accurate plant diagnostics
Skip the guesswork—here’s how to get precise pH readings in minutes.
🌱 Step 1: Prepare Your Soil Sample for Testing
Collect soil from multiple spots in your garden or container—don’t just test one area. Use a clean trowel to dig a 4-6 inch deep sample, then mix it thoroughly in a bucket. Remove rocks, debris, and plant matter since they skew results. For containers, scoop from the middle of the pot where roots are active.
Moisten the sample with distilled water until it’s damp like a wrung-out sponge. Tap the bucket gently to settle the soil—this ensures even moisture distribution. If you’re testing multiple plants, keep samples separate in labeled containers. Real talk: using tap water can alter pH readings, so stick with distilled.
💧 Step 2: Calibrate Your pH Tester
Before testing, calibrate your device using the included pH buffer solutions (usually pH 4.0 and pH 7.0). Dip the probe into the pH 7.0 solution first, then follow the manufacturer’s instructions to set the baseline. Wait 30 seconds for the reading to stabilize—this is critical for accuracy.
Repeat with the pH 4.0 solution to confirm the tester’s range. If the readings are off by more than 0.3 pH units, recalibrate or check for probe damage. I’ve seen cheap testers drift over time, so always calibrate before a new batch of tests. Pro tip: Store the probe in the storage solution when not in use to keep it functional.
☀️ Step 3: Test the Soil and Interpret Results
Insert the calibrated probe into your prepared soil sample, pressing it in 1-2 inches deep for 1-2 minutes to get a stable reading. Most testers display results within 30 seconds, but wait until the number stops fluctuating. For liquid testers, mix soil with distilled water in the provided container, then dip the strips or use the dropper.
Compare your reading to your plants’ ideal pH range (e.g., 6.0-7.0 for most vegetables, 4.5-5.5 for blueberries). A reading outside this range explains why your plants look stressed—yellowing leaves, stunted growth, or poor flowering. If your soil is below 6.0, it’s acidic; above 7.0, it’s alkaline. Here’s the thing—small adjustments (like adding lime or sulfur) can make a huge difference.
✂️ Step 4: Adjust Soil pH Based on Your Findings
For acidic soil (pH < 6.0), sprinkle pelletized lime evenly over the bed and water it in. Start with 5 pounds per 100 square feet and retest in 2-3 months—lime takes time to work. For alkaline soil (pH > 7.0), mix elemental sulfur into the top 6 inches of soil at a rate of 1 pound per 100 square feet and water thoroughly.
Don’t overcorrect! A sudden pH shift can shock plants. For containers, use pH-adjusted fertilizer or mix in peat moss for acidity or crushed oyster shell for alkalinity. I’ve seen gardeners add too much amendment at once, which can lock nutrients out of reach. Test again after 4-6 weeks to monitor progress—patience is key here.
🪴 Step 5: Maintain Accurate Testing Over Time
Retest soil every 1-2 years or whenever you notice plant health decline. Keep a log of your readings and adjustments—this helps track long-term trends. Store your pH tester in a dry place, and rinse the probe with distilled water after each use to prevent mineral buildup. If the probe becomes sluggish or inaccurate, replace it; they’re inexpensive and worth the investment for reliable results.
For container gardens, test soil before repotting—old soil can become compacted and pH-drifted over time. Here’s where it gets fun: experiment with different plants to see how their pH preferences vary. Some, like tomatoes, thrive in slightly acidic soil, while others, like lavender, prefer neutral to alkaline. Your tester becomes a tool for fine-tuning your garden’s chemistry.
Tips & tricks for perfect soil pH testing
Precision matters when diagnosing plant health—here’s how to avoid common mistakes and get reliable results every time.
Sampling Strategy: When collecting your 4-6 inch deep soil sample, focus on the root zone where nutrients are most active. For container plants, dig from the center where roots are densest rather than the edges. I’ve found that surface soil can give misleading results—it’s often drier and less representative of the growing environment. For lawns, take samples from multiple spots and mix them thoroughly to account for variations in soil composition.
Calibration Check: The 30-second wait during calibration isn’t just about patience—it’s about allowing the probe to reach equilibrium with the buffer solution. I learned this the hard way after getting inconsistent readings. If your tester shows readings that fluctuate by more than 0.2 pH units during calibration, there might be probe damage or mineral buildup. In that case, clean the probe with distilled water and vinegar (1:1 ratio) before recalibrating. Store your tester properly to prevent future issues.
Testing Depth Matters: Pressing the probe 1-2 inches deep ensures you’re testing where most plant roots actually grow. Shallow testing can give you a false reading, especially in containers where surface soil might be different from deeper layers. For heavy clay soils, you might need to press slightly deeper—up to 2-3 inches—since roots often grow deeper in compacted soils. Always check the manufacturer’s guidelines for your specific tester.
Interpretation Insight: Remember that 6.0-7.0 is ideal for most vegetables, but some plants like blueberries actually prefer 4.5-5.5. If your reading falls outside your plant’s ideal range, don’t panic—small adjustments can make a big difference. For example, adding pelletized lime raises pH gradually, while elemental sulfur lowers it. The key is patience—retesting after 4-6 weeks gives you a true picture of how your soil is responding to amendments.
Pro Tips for Soil Ph Tester
- Precision matters when diagnosing plant health—here’s how to avoid common mistakes and get reliable results every time.
- Sampling Strategy: When collecting your 4-6 inch deep soil sample, focus on the root zone where nutrients are most ac...
- Calibration Check: The 30-second wait during calibration isn’t just about patience—it’s about allowing the probe to r...
Frequently asked questions
Got questions about using a soil pH tester? You’re not alone! Here are some of the most common concerns—and quick, actionable answers to help you get the most out of your tool.
How often should I test my soil pH?
For most gardeners, testing every 3–6 months is ideal—especially if you’re dealing with acid-loving plants (like blueberries) or alkaline-tolerant crops (like asparagus). New gardens or after major amendments (like compost or lime) should be tested immediately to monitor changes. Pro tip: Keep a simple logbook to track trends over time!
Why is my soil pH tester giving inconsistent readings?
Inconsistencies often stem from moisture levels or soil sample prep. Always test in moist (not soggy) soil and rinse the probe between uses. Calibrate your tester monthly with a known pH solution (usually included in kits). If readings still fluctuate, try multiple samples from different spots—soil pH can vary even in small areas!
Are digital soil pH testers worth the extra cost?
Digital testers (like pen-style or meter-based models) offer faster, more precise readings and often include backlight displays or memory features. They’re ideal for large gardens or commercial use. However, for small home gardens, affordable test strips or liquid kits can suffice—just expect slightly less accuracy. Budget pick: Test strips are great for quick checks!
Can I adjust soil pH naturally without chemicals?
To raise pH (make soil less acidic), mix in wood ash, crushed eggshells, or lime. To lower pH (make soil more acidic), use pine needles, coffee grounds, or sulfur. Organic amendments take weeks to months to work—retest regularly! For faster results, elemental sulfur (for acidifying) or pelletized lime (for alkalizing) are chemical-free but more potent.
How do I clean and store my soil pH tester?
After each use, rinse the probe with distilled water and wipe it dry with a soft cloth. For digital meters, store in a dry, cool place (like a toolbox) and recalibrate before each new season. Never leave probes submerged in water or cleaning solutions—this can damage sensors. Storage hack: Keep test strips in an airtight container to preserve accuracy!
Wrapping up and next steps
Understanding your soil’s pH is the first step toward a thriving garden—no more guesswork, just data-driven plant care! 🌱 With a soil pH tester
Ready to see real results? Grab your tester and start adjusting your soil today—your plants will thank you!🚀 Next Steps: