
How To
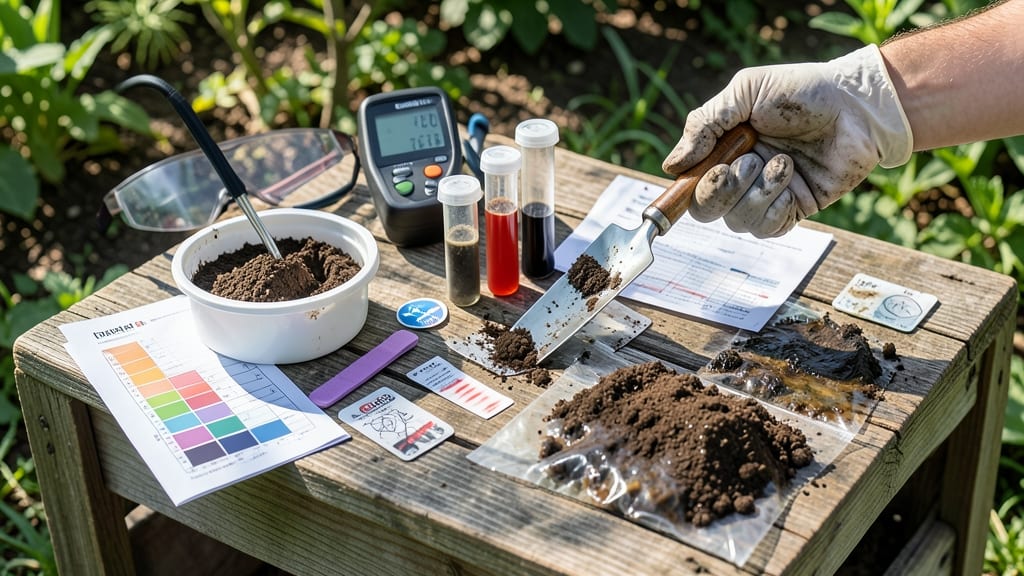
Your garden’s soil might be hiding dangerous contaminants—testing soil for contaminants could save your family’s health and your harvest. 🌱 I learned the hard way when my urban garden produced wilted greens that tasted metallic, only to discover elevated lead levels from old paint dust.
A simple DIY kit revealed the problem before it became a bigger risk.
Most kits test for lead, pesticides, and heavy metals—exactly what urban and suburban soils often hide. The process is straightforward: collect samples, send them off, and wait for results in about 2-4 weeks.
If contaminants show up, don’t panic—composting, soil amendments, or even raised beds can help. The key is acting before crops go from soil to stomach.
You’ll know exactly what’s safe to grow and what needs remediation, giving you peace of mind for every bite. Even if results are clean, you’ll have proof to share with curious neighbors. This isn’t just about plants—it’s about protecting the people who eat what you grow.
Whether you’re testing a backyard plot or a community garden, the same principles apply. Start with a few key spots, follow the kit’s instructions precisely, and don’t skip the remediation step if needed. Your future harvest—and your family’s health—will thank you.
📚 In This Guide
- What you need
- Instructions
- Tips and common mistakes
- Wrapping up and next steps
What you need
- ● DIY Soil Test Kit: A reliable kit designed for heavy metals (e.g., lead, arsenic, cadmium) and pesticides (e.g., MySoil Test Kit, Luster Leaf Rapid Test, or LaMotte Soil Test Kit). Ensure it covers EPA-recommended contaminants.
- ● Clean Sampling Containers: 5–10 sterile, airtight jars or bags (e.g., Whirl-Pak® bags or glass jars with lids). Use new, uncontaminated containers.
- ● Disposable Gloves: Nitrile or latex gloves (5–10 pairs) to avoid cross-contamination.
- ● Hand Trowel or Soil Scoop: Stainless steel or plastic (avoid metal tools that may introduce contaminants).
- ● Mapping Tool: Notebook or GPS app to record sample locations (e.g., Google Maps or a field sketch).
- ○ pH Test Kit (Optional but Recommended): To check soil acidity (e.g., LaMotte pH Test Kit)—some contaminants behave differently in acidic vs. alkaline soil.
- ● Labeling Supplies: Permanent markers or waterproof tape to label containers with sample number, date, and location.
- ● Plastic Spoon or Spoonula: For transferring soil into containers (avoid metal utensils).
- ● Portable pH Meter: For quick field testing (e.g., Bluelab Soil pH Meter).
- ● Sieve or Mesh Screen: To remove debris (¼-inch mesh size works well).
- ● Aluminum Foil: For lining containers if testing for volatile contaminants.
- ● Cooler with Ice Packs: If mailing samples to a lab (some kits require refrigeration).
- ● Reference Guide: EPA’s Soil Contaminant Guidelines or your kit’s manual for interpretation.
Step-by-step instructions for testing soil for contaminants
Here’s how to safely test your soil at home—no lab required.
🌱 Step 1: Collect Representative Soil Samples
Grab a clean bucket or container and dig 12-15 small samples from your garden bed, spaced 6-12 inches apart. Mix them together in the bucket to create a composite sample—this evens out any hotspots. Dig 4-6 inches deep but avoid surface litter like leaves or mulch, as those can skew results. If testing multiple beds, repeat the process for each area separately.
Here’s the thing—don’t just test one spot. Soil contaminants often vary across a garden, so 4-6 samples per bed gives you the most accurate picture. Label each sample with its location (e.g., "Tomato Bed, South Side") using a permanent marker and masking tape. You’ll want to reference these later if results come back questionable.
💧 Step 2: Prepare the Sample for Testing
Let your composite sample air-dry for 24-48 hours in a clean, dry container. Once dry, break it into smaller chunks with your hands or a mortar and pestle—you’re aiming for a fine, crumbly texture. Sift out any large debris like rocks or roots, as these can interfere with test accuracy. The goal is a uniform, soil-only sample that’s ready for analysis.
I like to use a fine-mesh kitchen strainer for this step—it catches debris while letting the soil pass through. If your sample feels clumpy, crumble it further until it resembles dry sand. This ensures consistent results whether you’re using a home test kit or sending it to a lab. Store the prepared sample in a sealed plastic bag until you’re ready to test.
☀️ Step 3: Run the DIY Test Kit
Follow the instructions on your DIY soil test kit carefully, but here’s the general process: Start by weighing out 2-4 tablespoons of your prepared soil sample (check your kit’s guidelines—some require exact amounts). Place it in the test container provided, then add the reagent solution as directed. Most kits use color-changing indicators to flag contaminants like lead, arsenic, or pesticides.
Watch for the color change—this is your key signal. Compare the result to the kit’s color chart immediately after the reaction completes (usually 5-15 minutes). If the color matches a "safe" range, you’re in the clear. But if it falls into a warning or hazardous zone, take notes on the exact reading and consider retesting or consulting a professional.
✂️ Step 4: Interpret Results and Take Action
If your test shows elevated contaminants, don’t panic—but do act. Start by restricting vegetable gardening in the affected area until you’ve remediated the soil. For heavy metals like lead, you might need to remove the top 6 inches of soil and replace it with clean, tested topsoil. For pesticides or herbicides, washing produce thoroughly before eating can reduce risks, but long-term solutions like composting organic matter can help detoxify the soil over time.
I always keep a garden journal to track test results by location. This helps me plan future plantings—safe areas for vegetables, ornamental beds for less critical plants, or even designated zones for non-edible crops. If contaminants are severe, consider container gardening with tested potting mix as a temporary fix while you work on soil improvement.
⏰ Step 5: Retest and Monitor Long-Term
Soil contamination isn’t a one-time fix—it’s an ongoing process. Retest every 6-12 months if you’ve taken remediation steps, especially in high-risk areas like urban gardens or former farmland. Keep records of your test results, including dates and locations, so you can track improvements over time. This is how you’ll know if your efforts are paying off.
Real talk: Some contaminants, like lead, don’t break down naturally. In those cases, planting deep-rooted cover crops (like clover or alfalfa) can help bind contaminants in the soil over time. But if your tests show dangerously high levels, it’s worth consulting a local agricultural extension office—they often offer low-cost retesting and remediation advice tailored to your area.
Tips & tricks for accurate soil contaminant testing
Testing your garden soil for contaminants is all about precision—here’s how to avoid common pitfalls and get reliable results every time.
Sampling Strategy: When collecting your 12-15 samples in Step 1, focus on areas where you plan to grow food. Avoid spots near driveways, old paint chips, or where chemicals might have been spilled—these are common contamination hotspots. I’ve seen tests come back clean in one area of the garden only to reveal dangerous levels just a few feet away. If you’re testing a large garden, divide it into zones (e.g., "North Vegetable Bed," "South Flower Bed") and test each separately. This helps you pinpoint exactly where to plant and where to avoid.
Drying and Processing: The 24-48 hour drying time in Step 2 is crucial—rushing this step can leave moisture that interferes with test accuracy. Place your sample in a well-ventilated area away from direct sunlight, which can bake the soil unevenly. For stubborn clumps, I’ve found a rolling pin works better than a mortar and pestle—it’s faster and more thorough. Once your sample resembles dry sand, transfer it to a clean, airtight container. This prevents contamination from dust or debris during storage.
Kit Handling: During Step 3, handle your DIY soil test kit with clean hands to avoid introducing contaminants. I’ve made the mistake of using the same spoon for multiple samples—always dedicate a clean spoon or scoop to each test. When measuring your 2-4 tablespoons of soil, use the back of a butter knife to level it off for consistency. Most kits are sensitive to even small variations in sample size, so precision matters. Work quickly after adding the reagent solution, as the 5-15 minute reaction window is when the color change happens—delaying this step can lead to inaccurate readings.
Interpreting Results: If your test shows elevated contaminants in Step 4, don’t assume the entire garden is unsafe. Contaminants often concentrate in specific areas, so retest nearby spots before making decisions. For heavy metals like lead, I’ve had success using a soil remediation kit (available online) that binds contaminants in place. Always document your results in your garden journal—this helps track improvements over time and ensures you’re making informed planting choices.
Pro Tips for Testing Soil For Contaminants
- Testing your garden soil for contaminants is all about precision—here’s how to avoid common pitfalls and get reliable...
- Sampling Strategy: When collecting your 12-15 samples in Step 1, focus on areas where you plan to grow food. Avoid sp...
- Drying and Processing: The 24-48 hour drying time in Step 2 is crucial—rushing this step can leave moisture that inte...
Frequently asked questions
Got questions about testing your soil for contaminants? You’re not alone—safety and clarity are key when it comes to protecting your garden and family. Here are some of the most common concerns, answered simply and practically.
How often should I test my soil for contaminants?
For most home gardens, testing every 1–3 years is a good rule of thumb—especially if you’ve noticed unusual plant growth, discoloration, or suspect nearby pollution (like industrial sites or old fuel spills). If you’re growing food, test annually for peace of mind. Pro tip: Keep records to track changes over time!
Are DIY soil test kits as accurate as lab tests?
DIY kits are great for basics (like pH, heavy metals, or pesticides) and are far more affordable, but they may lack the precision of professional labs for complex contaminants. For legal or high-stakes concerns (e.g., selling produce or near hazardous waste), a certified lab is the gold standard. Pro tip: Compare your DIY results with a lab test once to calibrate expectations.
How long does it take to get results from a DIY kit?
Most kits deliver results in 24–72 hours, depending on the type. Quick tests (like colorimetric strips) may show results in minutes, while mail-in kits or lab submissions can take 1–2 weeks for detailed reports. Always check the kit’s instructions for exact timelines.
What do I do if my soil tests positive for contaminants?
Don’t panic! Start by identifying the source (e.g., old paint, pesticides, or runoff). For heavy metals or chemicals, consider remediation options like:
- Removing topsoil (6–12 inches deep) and replacing it with clean soil.
- Using raised beds with uncontaminated fill.
- Planting non-edible crops (like flowers or grasses) to absorb toxins.
Can I reuse soil that failed a contaminant test?
It depends on the contaminant and its severity. For low-level issues (e.g., slightly elevated lead), you might mitigate risks by:
- Avoiding root crops (like carrots) that absorb contaminants.
- Washing produce thoroughly before eating.
- Using compost or organic matter to dilute contaminants.
Wrapping up and next steps
Testing your soil for contaminants is a simple yet powerful way to protect your garden—and your family’s health. 🌱 By following these steps, you’ve taken a proactive leap toward safer harvests, whether you’re growing veggies, herbs, or flowers.
Now that you’re equipped with knowledge, the next logical step is to act on your results: amend your soil if needed, choose the right plants, or consult a professional for deeper remediation.
Your green thumb is stronger than ever—keep growing with confidence! 🌿