
How To
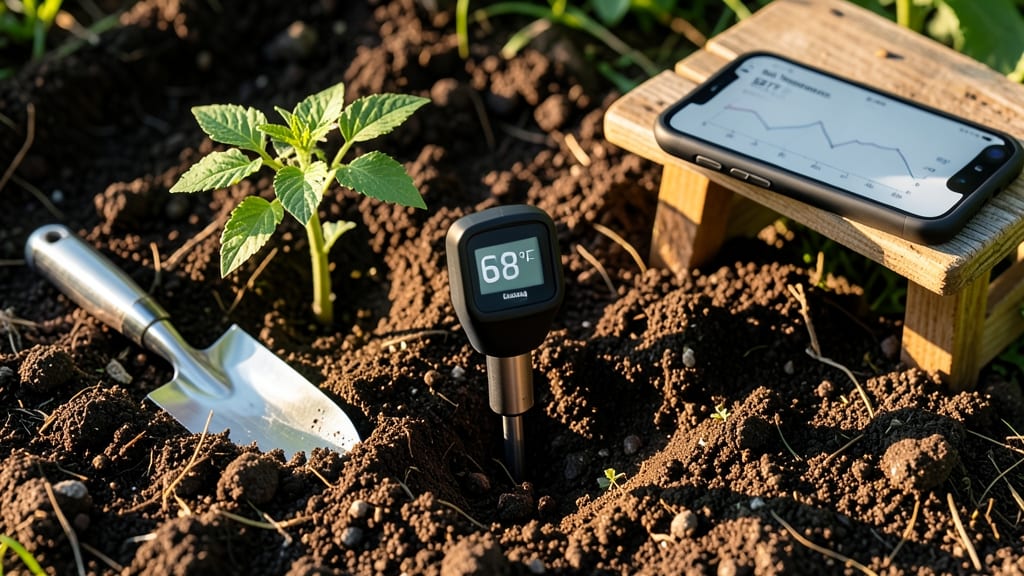
Your spring planting success starts with knowing what is the current soil temperature—because seeds don’t care about your calendar, only the temperature. 🌱 I’ve learned the hard way that rushing cool-season crops into warm soil or waiting too long for warm-season plants means wasted seed packets and empty garden beds.
The right soil temperature is the difference between a thriving garden and a season of second-guessing.
Most gardeners don’t realize their planting schedule hinges on this invisible number. Cool-season crops like peas and lettuce need soil at 40-50°F to germinate, while tomatoes and peppers won’t even think about sprouting until it hits 60°F.
A simple soil thermometer (just $10) takes the guesswork out—stick it in 2-3 inches deep, wait 30 seconds, and you’ve got your answer. No more waiting for "spring" to magically arrive.
Here’s the game-changer: warm soil speeds up germination—some seeds pop up in days instead of weeks when conditions are perfect. But too-hot soil (above 85°F) can actually kill tender seedlings before they emerge.
That’s why I check the temp twice a week in spring, adjusting my planting dates like a pro. The payoff? A garden that starts strong and stays productive all season.
Pro tip: If your soil’s too cold, cover it with black plastic or a cold frame for a week to warm it up naturally. And if you’re in a hurry, try soil warming mats for containers—they’re a lifesaver for extending the growing season.
Now grab that thermometer and let’s get planting!
📚 In This Guide
- What you need
- Instructions
- Tips and common mistakes
- Wrapping up and next steps
What you need
- ● Soil thermometer – A digital or analog probe-style thermometer (e.g., Taylor’s 19702 or ThermometerWorks models). Must read in °F or °C.
- ○ Notebook or smartphone – To log readings (optional but helpful for tracking trends).
- ● Garden trowel or small shovel – For digging a 4–6 inch deep hole (standard for planting depth).
- ● Water spray bottle – To dampen dry soil if needed (helps with accurate readings).
- ● Soil moisture meter – Checks hydration alongside temperature (e.g., AcuRite or Xiaomi models).
- ● Weather app with soil temp alerts – For real-time updates (e.g., Weather Underground or NOAA).
- ● Garden journal – Track soil temps weekly to plan planting schedules.
- ● Gloves – Protect your hands from dirt or sharp tools.
How to check soil temperature for spring planting success
Here's the quick, foolproof method I use to avoid planting too early—and wasting seeds.
🌱 Step 1: Choose the Right Time of Day to Measure
Soil temperature fluctuates dramatically, so timing matters. Take readings on a shady, overcast day between 10 AM and 2 PM when the ground has warmed but isn't baking. Early morning or late afternoon readings will be misleadingly cool or warm, respectively. I always check the same spot at the same time to maintain consistency.
Use a soil thermometer—the kind with a long probe that sinks into the ground. If you don’t have one, a regular kitchen thermometer with a deep probe works in a pinch. Just be sure it reads Fahrenheit for accurate planting zone comparisons.
☀️ Step 2: Measure at the Correct Depth for Your Plants
Most spring vegetables and flowers need soil temperatures between 50°F and 65°F to germinate properly. For cool-season crops like peas, lettuce, or spinach, measure 1 inch deep—that’s where their seeds will be planted. For warm-season crops like tomatoes, peppers, or cucumbers, check 2-3 inches deep, as their seeds need slightly warmer soil to sprout.
Push the thermometer probe into the soil gently but firmly, then wait 30 seconds before reading. If the temperature is below 50°F, your seeds may rot or fail to germinate. Above 85°F, many seeds won’t sprout at all—wait for cooler days or use shade cloth to protect the soil.
⏰ Step 3: Compare to Plant-Specific Requirements
Not all plants have the same needs. Peas and spinach thrive at 40-50°F, while tomatoes and peppers need 60-85°F. Check the back of your seed packet for the optimal germination temperature range—this is your green light to plant. If your soil is 10°F below the recommended range, hold off for another week or two.
Pro tip: Keep a planting journal to track soil temps over time. Note when certain crops finally germinate—this helps you predict future planting windows. I’ve found that in my climate, soil temps rise about 2°F per week once the sun consistently breaks through, so I can plan accordingly.
💧 Step 4: Adjust for Microclimates and Soil Types
Soil doesn’t warm uniformly—sandy soil heats up faster than clay or loamy soil, and south-facing beds warm 3-5°F warmer than north-facing ones. If your garden has shaded areas or varies in texture, test multiple spots to avoid surprises. I always check the coolest, shadiest corner first, as that’s where seeds are most likely to struggle.
If your soil is consistently too cold, try black plastic mulch or clear plastic tunnels to raise the temperature by 5-10°F. These methods accelerate warming but must be removed once plants emerge to prevent overheating. For raised beds, soil warms 1-2 weeks earlier than in-ground plots, so adjust your timeline accordingly.
✂️ Step 5: Plan for a 3-Day Warm Streak
Don’t plant just because the soil hits the right temperature—wait for three consecutive days of stable warmth. Cold snaps can reverse progress overnight. I set a reminder in my phone to check the forecast and soil temp daily until conditions are ideal. This extra patience prevents the heartbreak of watching seeds rot in the ground.
Once you’ve confirmed the soil is ready, mark your calendar for planting day and prep your seeds or seedlings ahead of time. The moment the thermometer reads just right, you’ll know it’s time to get growing—no more guesswork.
Tips & tricks for accurate spring soil temperature Checks
These precision-focused tips will help you avoid the most common mistakes when testing soil readiness for planting.
Timing is Everything: The 10 AM to 2 PM window in Step 1 is non-negotiable for consistency. I've seen readings vary by 15°F between morning and afternoon in my garden—morning soil is still cooling from night, while afternoon soil hasn't peaked yet. For extra accuracy, take readings on three consecutive days at the same time to account for daily fluctuations.
Depth Precision Matters: When measuring at 1 inch for cool-season crops (Step 2), use a ruler to ensure consistent depth—surface soil can be 10°F warmer than 1 inch down. For warm-season crops, mark your thermometer probe at 2-3 inches with tape to maintain accuracy. I keep a small marker in my gardening toolbox specifically for this purpose.
Thermometer Calibration Check: Before each use, test your soil thermometer in ice water (should read 32°F) and then boiling water (should read 212°F). Many gardeners don't realize their thermometers lose accuracy over time. If yours is off by more than 2°F, recalibrate or replace it—small errors compound when you're working within tight temperature ranges like 50-65°F.
Microclimate Mapping: After testing your main garden bed, walk your entire property with your thermometer. I've found 5°F differences between south-facing beds and north-facing ones in my yard. Mark these variations on a garden map so you know exactly where to plant heat-sensitive crops. This simple step can mean the difference between thriving seedlings and failed germination.
Pro Tips for What Is The Current Soil Temperature
- These precision-focused tips will help you avoid the most common mistakes when testing soil readiness for planting.
- Timing is Everything: The 10 AM to 2 PM window in Step 1 is non-negotiable for consistency.
- Depth Precision Matters: When measuring at 1 inch for cool-season crops (Step 2), use a ruler to ensure consistent depth—surface soil can be 10°F warmer than 1 inch down.
Frequently asked questions
Got questions about soil temperature?
You’re not alone! Here are the most common queries—plus quick, actionable answers to help you prep for planting like a pro.
What’s the ideal soil temperature for spring planting?
Most cool-season veggies (like lettuce or peas) thrive at 40–50°F (4–10°C), while warm-season plants (tomatoes, peppers) need 60–70°F (15–21°C). Use a soil thermometer to check before seeding—cold soil can stunt growth!
How long does it take for soil to warm up in spring?
Timing varies by climate, but soil typically warms 5–10°F (3–6°C) per week in sunny conditions. In cooler zones, mulch or black plastic can speed it up by 1–2 weeks. Check local frost dates for a head start!
Can I plant if the soil is still cold but above freezing?
Yes—but not all plants! Hardy crops (spinach, kale) handle 32–40°F (0–4°C), but tender seedlings (like basil) will fail. Start with cold-tolerant varieties or use row covers to protect young plants.
What’s the easiest way to check soil temperature without a thermometer?
Try the “fist test”: If soil feels cool but not icy (like a chilled soda can), it’s likely 50–60°F (10–15°C). For precision, bury a digital thermometer 2–3 inches deep for 30 minutes—no guesswork!
Why did my seeds rot even though the soil wasn’t frozen?
Overly wet or too-cold soil (below 40°F/4°C) can suffocate seeds, causing rot. Improve drainage with compost, wait for warmer temps, or switch to transplants instead of direct sowing.
Wrapping up and next steps
Understanding current soil temperature is your secret weapon for a thriving garden—no guesswork needed! 🌱 With the right tools and a quick check, you’ll know exactly when to plant for the best results.
Whether you’re a seasoned gardener or just starting, this simple step ensures your seeds and seedlings get the perfect head start.
Ready to take action? Grab your soil thermometer today and give your plants the ideal conditions they deserve. Happy planting! 🌿