
How To
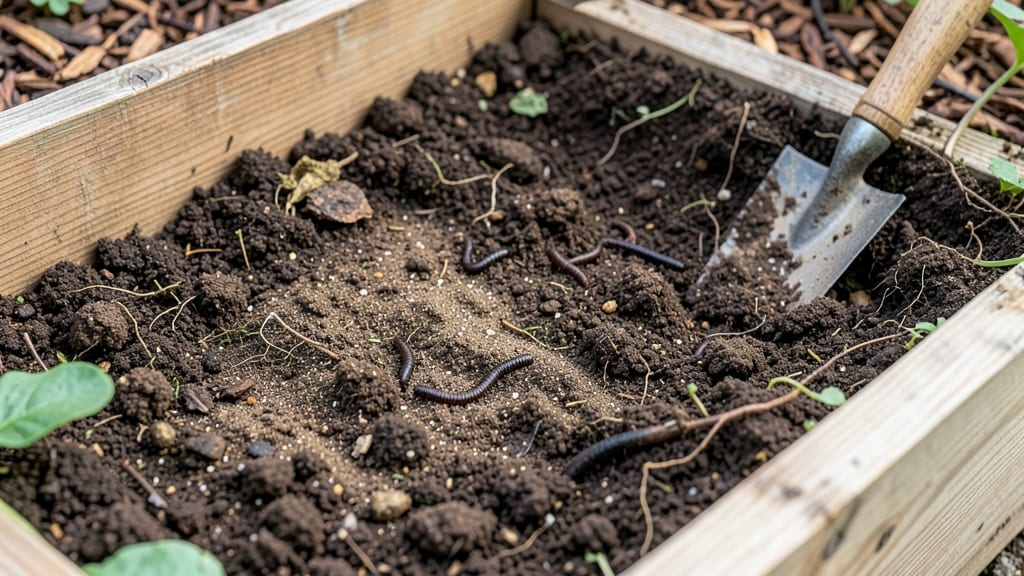
The perfect soil for raised beds isn't about expensive mixes—it's about balance. 🌱 My balanced loam recipe combines equal parts topsoil, compost, and perlite to create the ideal foundation for vegetables, flowers, or herbs, regardless of your starting soil type.
Most gardeners overlook drainage and organic matter ratios, but these two factors determine whether your plants thrive or struggle. Clay-heavy soil? Add more perlite and compost. Sandy soil? Mix in peat moss or coconut coir to retain moisture.
The goal is 60% mineral matter, 30% organic matter, and 10% air space—a formula that works for nearly any raised bed. You’ll see the difference immediately: roots spread freely, water drains properly, and plants grow stronger and faster than in store-bought mixes.
This recipe also reduces compaction, which is especially critical for heavy vegetables like tomatoes and squash. Once mixed, maintain it with annual compost top-dressing and occasional perlite refreshes. The result? Soil that stays fertile for years, not just one season. Let’s get your raised beds growing like never before.
📚 In This Guide
- What you need
- Instructions
- Tips and common mistakes
- Wrapping up and next steps
What you need
- ● Garden soil (topsoil) – 50% of the mix (2 parts). Use high-quality, organic topsoil with minimal clay.
- ● Compost – 30% of the mix (1.5 parts). Well-aged, nutrient-rich compost (avoid fresh manure—it can burn plants!).
- ● Peat moss or coconut coir – 10% of the mix (½ part). Improves moisture retention and aeration.
- ● Perlite or vermiculite – 5-10% of the mix (¼ part). Boosts drainage and prevents compaction.
- ○ Sand (coarse horticultural) – Optional but helpful (up to 5% if your soil is heavy clay).
- ● Wheelbarrow or large bin – For mixing ingredients efficiently.
- ● Garden fork or shovel – To aerate and blend materials.
- ● Gloves and dust mask – Protect yourself from dirt and dust!
- ○ pH testing kit – Optional but recommended to check soil acidity (ideal pH: 6.0–7.0 for most veggies).
- ● Raised bed frame – Pre-built or DIY (ensure it’s at least 6–12 inches deep for root growth).
- ○ Landscape fabric (optional) – To block weeds if placing the bed on grass or soil.
Step-by-Step guide to building perfect raised bed soil
This is the recipe I’ve used for years to create fertile, well-draining soil that vegetables absolutely thrive in.
🌱 Step 1: Gather the Base Materials for Structure
Start with a foundation of equal parts by volume of topsoil, compost, and coarse sand or perlite. I like to use 1/3 topsoil for structure, 1/3 compost for nutrients, and 1/3 sand to prevent compaction. The sand or perlite creates air pockets that roots love, while the compost feeds them over time.
Spread these materials evenly across the bottom of your raised bed, mixing them together with a garden fork. Don’t overwork the soil—just break up clumps and blend until it looks uniformly crumbly. This layer should be about 6-8 inches deep, leaving room for additional top dressing later.
🌿 Step 2: Add Organic Matter for Long-Term Fertility
Next, incorporate aged manure or worm castings (about 1-2 inches spread evenly) to boost microbial activity. I prefer well-aged cow or horse manure because it’s nutrient-dense but not overly acidic. Sprinkle it lightly over the base layer and mix it in with your hands or a fork, ensuring even distribution.
This step is where the magic happens—manure and castings introduce beneficial bacteria and fungi that break down organic matter into plant-accessible nutrients. You’ll notice the soil darken slightly as you work, signaling improved fertility. Avoid fresh manure, which can burn roots due to high ammonia levels.
✂️ Step 3: Adjust Texture and Drainage
Test the soil’s drainage by scooping a handful and squeezing it gently. If it holds together like a rock, add more sand or perlite (about 10-15% by volume) to improve aeration. The ideal texture should crumble easily when dry but still retain moisture when damp—like a well-worn sponge.
For heavy clay soils, I often add shredded hardwood mulch or coconut coir (about 5-10% by volume) to lighten the mix further. This prevents compaction while adding organic matter that decomposes slowly. Mix everything thoroughly, breaking up any large clumps to ensure uniformity.
💧 Step 4: Top-Dress for Immediate Planting
Finish by spreading a 1-inch layer of compost or aged bark over the surface. This top layer helps retain moisture, suppresses weeds, and provides a slow-release nutrient boost. Press it lightly into the soil to secure it, but don’t compact it—you want to maintain that fluffy, inviting texture for roots.
Water the bed deeply before planting to settle the soil and encourage root penetration. You’ll know it’s ready when the surface feels slightly damp but not soggy. This final layer also makes the bed look finished and ready for your vegetables, herbs, or flowers.
☀️ Step 5: Maintain Soil Health Over Time
After planting, add a 2-inch layer of mulch (straw, leaves, or wood chips) to protect the soil from erosion and temperature swings. Replenish compost annually—especially after harvest—to keep nutrients high. I like to side-dress with a balanced organic fertilizer (like 5-5-5) in early spring to give plants a quick boost.
Here’s the thing—perfect soil isn’t static. Over time, organic matter breaks down, so I top-dress with compost every 3-4 months to maintain fertility. This routine keeps your raised bed productive season after season, with minimal effort.
Tips & tricks for perfect raised bed soil
Building the ideal raised bed soil mix is all about balance—here’s how to refine the process for flawless results every time.
Layering Strategy: When mixing your 1/3 topsoil, 1/3 compost, and 1/3 sand in Step 1, I recommend adding the sand first and mixing it thoroughly before incorporating the compost. This creates a more uniform distribution of air pockets throughout the entire layer, preventing clumping. Think of it like baking a cake—you want even distribution of ingredients for consistent texture. The 6-8 inch depth is perfect for most vegetables, but for heavy feeders like tomatoes, you might want to add an extra inch of compost later.
Organic Matter Selection: In Step 2, while aged cow or horse manure is ideal, you can substitute well-rotted leaf mold or composted chicken manure for an even stronger nutrient punch. Just be cautious with chicken manure—it’s highly concentrated and should be composted for at least 6 months to avoid burning plants. The 1-2 inch layer is crucial; too little won’t boost fertility enough, while too much can create an anaerobic environment that smells bad and harms roots.
Texture Test: The drainage test in Step 3 is where most people go wrong. When squeezing a handful of soil, it should break apart with gentle pressure—not crumble instantly (that’s too sandy) or hold together tightly (that’s too clay-heavy). For the perfect balance, aim for a texture that resembles a well-worn sponge: firm when pressed but still crumbly. If you’re working with clay soil, the 5-10% shredded mulch or coconut coir addition can make all the difference in preventing compaction over time.
Maintenance Hack: The 3-4 month compost top-dressing in Step 5 is non-negotiable for long-term success. I schedule this every spring and fall to coincide with planting and harvest seasons. For a quick visual cue, think of it like adding a fresh layer of mulch to your garden—just as you’d refresh garden beds, your raised soil needs regular nourishment to stay productive. A simple reminder to mark your calendar for these dates will keep your soil consistently fertile year after year.
Pro Tips for Perfect Soil For Raised Beds
- Building the ideal raised bed soil mix is all about balance—here’s how to refine the process for flawless results every time.
- Layering Strategy: When mixing your 1/3 topsoil, 1/3 compost, and 1/3 sand in Step 1, I recommend adding the sand first and mixing it thoroughly before incorporating the compost.
- Organic Matter Selection: In Step 2, while aged cow or horse manure is ideal, you can substitute well-rotted leaf mold or composted chicken manure for an even stronger nutrient punch.
Frequently asked questions
Got questions about creating the perfect soil mix for your raised beds?
You’re not alone! Here are answers to the most common queries—so you can grow like a pro.
What’s the easiest way to test if my soil is already good for raised beds?
Grab a handful of your soil and squeeze it—if it crumbles easily when dry and holds shape when wet, it’s likely balanced. For a quick check, dig a small hole and fill it with water; if it drains in 10–20 minutes, drainage is good. For precision, use a soil test kit (under $20) to check pH and nutrient levels.
Can I use garden soil directly from my yard in raised beds?
Not ideal! Yard soil is often compacted or heavy with clay, which can suffocate roots. Instead, mix it lightly (20–30%) with your raised bed recipe to add organic matter, but prioritize compost, coconut coir, and perlite for fluffier, nutrient-rich soil. Pro tip: Avoid soil with weeds or pests!
What’s a budget-friendly alternative to expensive soil mixes?
Skip pre-mixed bags and DIY! Combine:
- 50% compost (free from local farms or homemade)
- 30% coconut coir or peat moss (cheaper than perlite)
- 20% sand or coarse builder’s sand (improves drainage)
How often should I add fresh soil to my raised beds?
Top up with 1–2 inches of compost or fresh mix every spring and after harvesting heavy feeders (like tomatoes or squash). For perennial beds, a light layer of compost in fall replenishes nutrients. Pro tip: Mulch with straw to slow moisture loss and reduce top-ups!
My raised bed soil smells bad—what’s wrong?
A sour or rotten smell means too much moisture or anaerobic conditions (no oxygen). Fix it by:
- Adding coarse sand or perlite (10–20%) to improve aeration.
- Mixing in dried leaves or straw to absorb excess moisture.
- Avoid overwatering—stick to 1 inch per week (more in extreme heat).
Does soil temperature matter for raised beds?
Yes! Ideal soil temps for planting are 60–70°F (15–21°C). Raised beds warm up faster than ground soil—cover with black plastic or row fabric 1–2 weeks before planting to speed germination. In cold climates, use straw mulch to insulate roots in winter.
Wrapping up and next steps
Creating the perfect soil for raised beds is all about balance—rich nutrients, proper drainage, and the right texture to help your veggies thrive! 🌱 With a well-mixed loam blend of compost, topsoil, and organic matter, you’ve set the stage for a bountiful harvest.
Remember, consistency is key: test your soil, adjust as needed, and keep amending over time.
Now that you’re ready to roll up your sleeves, take the next step—fill those raised beds and plant with confidence! Whether you’re growing tomatoes, leafy greens, or herbs, your hard work will soon pay off in delicious, homegrown rewards. Happy gardening! 🌿