
How To
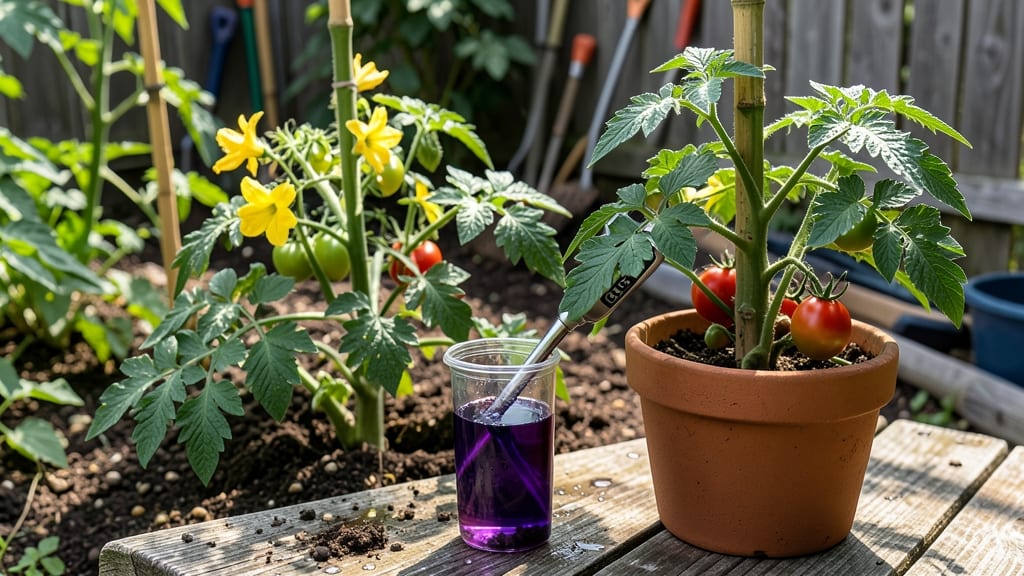
What pH soil do tomatoes like? They thrive best in soil with a pH between 6.0 and 6.8—getting this right unlocks bigger yields and healthier plants 🍅.
Struggling with blighted tomato plants or stunted fruit? The secret might be hiding in your soil’s pH—getting this right could mean the difference between a thriving harvest and a disappointing one.
Most gardeners overlook pH until problems appear, but it’s the invisible factor controlling how your tomatoes absorb nutrients like nitrogen, phosphorus, and calcium. Too high or too low, and you’ll see yellowing leaves or poor fruit development—even if you’re watering and fertilizing correctly.
Below, I’ll break down how to test your soil’s pH, the quick fixes for common imbalances, and why lime or sulfur might be your new best friends in the garden.
The ideal soil pH range for tomatoes and how it affects growth
If you’ve ever grown tomatoes, you know how heartbreaking it is to watch plants struggle despite your best efforts. The issue might be hiding in plain sight—your soil pH. Tomatoes thrive when their soil sits between 5.8 and 6.8, a range that unlocks their full potential.
This isn’t just a number; it’s the key to unlocking nutrient absorption, preventing common diseases, and ensuring juicy, flavorful fruit. When the pH strays too high or low, your tomatoes send out distress signals like yellowing leaves or blossom-end rot, often misleading gardeners into thinking other problems exist.
Think of soil pH as the foundation of your tomato’s health. Too acidic (below 5.8) or too alkaline (above 6.8) locks out essential nutrients like phosphorus, calcium, and magnesium, leaving your plants starving even if you’re fertilizing regularly.
For example, a pH of 7.0 can make iron and manganese unavailable, causing yellowing between leaf veins—a classic sign of deficiency.
But here’s the good news: adjusting pH is simpler than you think, and once you get it right, your tomato plants will reward you with vibrant growth and heavy yields.
Let’s break down the ideal pH range for tomatoes and how it directly impacts their ability to absorb critical nutrients. Understanding this connection will help you diagnose issues before they derail your harvest.
Below, you’ll find a quick-reference table showing how pH affects nutrient availability, followed by real-world symptoms to watch for in your garden.
| pH Level | Nitrogen (N) Availability | Phosphorus (P) Availability | Calcium (Ca) Availability | Magnesium (Mg) Availability | Iron (Fe) Availability |
|---|---|---|---|---|---|
| Below 5.5 | High (toxic risk) | Low | Low | Low | Very Low |
| 5.5–5.8 | Optimal | Moderate | Moderate | Moderate | Low |
| 5.8–6.8 (Ideal) | Optimal | High | High | High | Optimal |
| 6.8–7.2 | Low | Very Low | Moderate | Low | Very Low |
| Above 7.2 | Very Low | Extremely Low | Low | Very Low | Extremely Low |
As you can see, the 5.8–6.8 pH range is where tomatoes hit their stride. When pH dips below 5.5, aluminum toxicity can occur, stunting roots and causing purple stems. Meanwhile, pH levels above 7.0 restrict phosphorus and iron uptake, leading to weak stems and poor fruit set.
For example, if your soil is alkaline (common in areas with limestone bedrock), your tomatoes may develop blossom-end rot—a telltale sign of calcium deficiency caused by high pH blocking nutrient absorption.
One of the most frustrating pH-related issues is yellowing leaves, often mistaken for nitrogen deficiency. However, if your soil pH is too high, the problem isn’t a lack of nitrogen but rather the plant’s inability to access it.
The same goes for interveinal chlorosis (yellowing between leaf veins), which typically signals iron deficiency in alkaline soils. In these cases, adding chelated iron
How to test and adjust your soil pH for perfect tomato growth
Testing your soil pH is one of the simplest ways to unlock your tomato plants' full potential. Tomatoes thrive in a slightly acidic to neutral range, but many gardeners unknowingly grow them in soil that's either too alkaline or acidic.
Without the right pH, your plants struggle to absorb essential nutrients, leading to weak stems, yellowing leaves, and poor fruit development.
Before you grab a shovel, know that adjusting pH isn't a one-time task—it's an ongoing process. Organic matter like compost helps stabilize pH over time, but extreme conditions may require targeted amendments. The good news?
You don’t need a lab to get started—simple DIY pH test kits give you accurate results in minutes. Let’s break down how to test, adjust, and maintain the perfect pH for your tomato garden.
Quick pH Adjustment Tips for Tomatoes
- 🌱 Ideal pH range: 6.0–6.8 for tomatoes
- 📉 Lower pH (more acidic): Add elemental sulfur (1/4 lb per 10 sq ft) or peat moss (2–3 inches mixed in)
- 📈 Raise pH (less acidic): Use pelletized lime (5 lbs per 100 sq ft) or wood ash (1/2 cup per plant)
- ⏳ Wait 2–4 weeks after amending before planting or transplanting
- 💧 Water thoroughly after applying amendments to activate changes
- 🔄 Retest pH after 4–6 weeks to confirm adjustments
- 🌿 Add compost annually to maintain balanced pH naturally
Start by testing your soil’s current pH using a home pH test kit, which typically costs under $10 and works with soil samples from 6–8 inches deep. For more precise results, send a sample to a local cooperative extension office—they often offer affordable lab testing.
Dig samples from multiple spots in your garden, especially if you suspect uneven pH levels. Mix the soil with distilled water (as directed on the kit) and compare the color to the chart provided.
If your soil tests below 6.0, it’s too acidic, and your tomatoes may show signs like yellowing leaves or stunted growth. To raise the pH, spread pelletized lime evenly over the soil and lightly till it into the top 6 inches.
For organic gardeners, wood ash is a great alternative—just sprinkle 1/2 cup per plant and water it in. If your pH is above 7.0, the soil is too alkaline, and you’ll need to add elemental sulfur or peat moss to lower it.
Monitoring pH changes takes patience. After amending, wait 4–6 weeks before retesting—this gives the soil time to stabilize. Keep a garden journal to track adjustments and note any improvements in plant health.
For example, if your tomatoes previously suffered from blossom-end rot (a calcium deficiency often linked to high pH), lowering the pH might resolve the issue within a few weeks. Remember, organic matter like well-aged compost helps buffer pH swings naturally over time.
Don’t overlook the role of mulch in maintaining pH balance. Organic mulches like straw or shredded leaves slowly release nutrients and help regulate soil acidity. Avoid synthetic mulches, which can disrupt the natural pH cycle.
If you’re planting in containers, use a pre-mixed tomato soil with a pH of 6.0–6.8, and add a slow-release fertilizer to support nutrient uptake. With consistent testing and adjustments, your tomato plants will reward you with bigger, healthier fruit all season long.