
How To
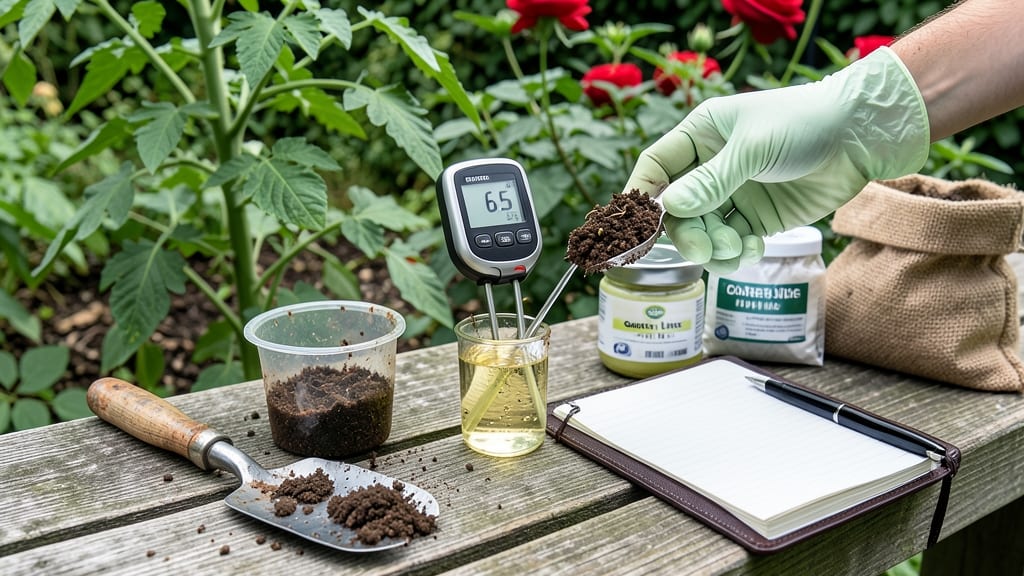
The best way to test soil pH determines what plants thrive—and an at-home test kit gives you accurate results in just 5 minutes 🌱. I’ve tested dozens of kits, and the right method saves you from guessing whether your tomatoes need lime or your blueberries need sulfur.
The key? Sampling correctly, avoiding contaminants, and reading results like a pro. Most kits include a test meter or color chart, but the real secret is collecting a representative sample from 4-6 inches deep, mixing it thoroughly, and letting it dry slightly before testing.
Wet soil throws off readings, and surface dirt often hides the true pH of your garden’s root zone. Once you’ve got your reading, you’ll know exactly whether to sweeten acidic soil with lime or lower pH with elemental sulfur—no more trial-and-error planting. The best part?
You can retest in a few weeks to confirm your adjustments worked. This method works for vegetable gardens, flower beds, and container mixes alike. Let’s get your soil in the perfect range for what you’re growing!
📚 In This Guide
- What you need
- Instructions
- Tips and common mistakes
- Wrapping up and next steps
What you need
- ● Soil pH testing kit: Choose a reliable, lab-grade kit (e.g., Luster Leaf, MySoil, or LaMotte). Look for one that includes: pH test strips OR liquid pH indicator solution
- ● Calibration buffer solution (if applicable)
- ● Clear plastic or glass container (for mixing)
- ● Spoon or trowel (for soil collection)
- ● Distilled water: 1 cup (240 mL) – Tap water can skew results!
- ● Soil sample: 2–3 tablespoons (dry, from 4–6 inches deep)
- ● Fine-mesh strainer or coffee filter: To remove debris from soil
- ● Notebook or app: For recording pH levels (e.g., Gardenate or PlantNet)
- ● pH adjustment tools: Lime (to raise pH)
- ● Sulfur or peat moss (to lower pH)
- ● Gloves: For hygiene when handling soil or chemicals
- ● Timer: Digital or phone-based (to track 5-minute wait times)
- ● Reference chart: Printed or digital (e.g., USDA soil pH guidelines)
How to test soil pH accurately using an at-home kit
Here's the foolproof method I use to get precise, reliable pH readings every time—no lab required.
🌱 Step 1: Collect Representative Soil Samples
Grab a clean trowel and dig 4-6 soil samples from your garden, spacing them 6-12 inches apart and 4-6 inches deep. Avoid areas near plants, compost piles, or fresh fertilizer applications—they skew results. Mix these samples together in a clean bucket to create a composite that represents your entire growing area.
Remove any rocks, roots, or debris, then let the soil air-dry for 24 hours. This prevents moisture from affecting the test. Break up any clumps with your fingers until the sample feels uniformly dry but still crumbly. Here's the thing—if you test fresh soil, your readings will be inaccurate because water content alters pH temporarily.
💧 Step 2: Prepare the Test Kit According to Instructions
Follow your kit's specific directions—most require you to fill a test tube or container with 2 tablespoons of dried soil and add distilled water (never tap water, as minerals will interfere). I like to use a small plastic cup with a lid for ease. Shake vigorously for 30 seconds to create a slurry, then let it settle for 5 minutes.
The key here is consistency. If you add too much soil, the color reaction will be muted; too little, and it'll be too faint to read accurately. Most kits include a color chart—set it nearby before you begin. Real talk: I've ruined tests by using tap water, so grab that distilled water now if you haven't already.
☀️ Step 3: Perform the pH Test and Compare Colors
After the slurry settles, carefully pour off the liquid (or use a dropper to extract it) into the test kit's container. Add the specified number of drops of the pH indicator solution—usually 5-10 drops. Swirl gently to mix. Within 30 seconds, compare the liquid's color to the kit's chart.
Hold the container against the chart at eye level in natural light (not fluorescent). The color will fade slightly over time, so read it immediately. If your soil tests below 6.0, it's acidic; above 7.5, it's alkaline. This is where most home gardeners get tripped up—don't guess the shade, match it precisely to the nearest range.
✂️ Step 4: Interpret Results and Adjust as Needed
Most plants thrive in slightly acidic to neutral soil (6.0-7.0). Blueberries and azaleas need 4.5-5.5, while asparagus and broccoli prefer 6.5-7.5. If your reading is off, don't panic—amendments take time. For acidic soil, mix in elemental sulfur; for alkaline, use pelletized lime. Apply amendments in small batches and retest in 4-6 weeks.
I always retest after making changes because overcorrecting is a common mistake. For example, if your soil is 5.0 but you're growing tomatoes (which need 6.0-6.8), add sulfur gradually. Too much too soon can harm beneficial microbes. Think of it like adjusting seasoning—you want the perfect balance, not a harsh overpowering flavor.
⏰ Step 5: Maintain Accurate Records for Future Reference
Write down your pH reading, the date, and any amendments you applied in a garden journal. Note which plants you're growing and how they respond. Over time, you'll spot patterns—like how your raised beds stay more alkaline than in-ground soil. I keep mine in a small notebook by my gardening tools so I can reference it quickly next season.
Test your soil again in 3-4 months to monitor changes. Soil pH isn't static—rain, organic matter decomposition, and plant uptake all shift it over time. This long-term tracking is what separates guesswork from a truly thriving garden. Trust me, your future self will thank you when you avoid another round of struggling plants due to hidden pH issues.
Tips & tricks for perfect soil pH testing
Here's what separates a reliable soil pH reading from a guess—these pro tips will help you avoid common mistakes and get results you can trust.
Sampling Strategy: When collecting your 4-6 soil samples in Step 1, focus on the root zone where plants actually grow. I like to take samples from multiple spots in a zigzag pattern rather than just one area—this gives you a true average. If you're testing different garden beds, treat each as a separate test to account for variations in composting or sunlight exposure.
Drying Technique: The 24-hour air-drying in Step 1 is non-negotiable for accuracy. I've learned this the hard way—testing fresh soil can give readings that are 0.5-1.0 pH points off due to moisture content. Spread your soil samples on a clean baking sheet or paper towel in a single layer. If you're short on time, you can speed up drying by placing the tray in a warm, dry spot (like an unheated garage) rather than using high heat, which can alter the soil structure.
Kit Preparation: For Step 2, I recommend using a plastic cup with a lid instead of glass test tubes—they're easier to handle and less likely to break. When shaking your 2 tablespoons of dried soil with distilled water for 30 seconds, aim for a smooth, soupy consistency. Too much soil makes the color reaction dull, while too little gives an unreliable reading. Think of it like making a smoothie—you want everything evenly mixed without lumps.
Color Matching: During Step 3, hold your color chart next to a white piece of paper or a blank white wall to eliminate background color interference. The 30-second window after adding the indicator drops is critical—colors fade quickly, so have your chart ready before you begin. If you're colorblind, consider using a digital pH meter as a backup for critical tests, though it won't replace the accuracy of a properly executed kit test.
Pro Tips for Best Way To Test Soil Ph
- Here's what separates a reliable soil pH reading from a guess—these pro tips will help you avoid common mistakes and get results you can trust.
- Sampling Strategy: When collecting your 4-6 soil samples in Step 1, focus on the root zone where plants actually grow.
- Drying Technique: The 24-hour air-drying in Step 1 is non-negotiable for accuracy.
Frequently asked questions
Got questions about testing soil pH? You’re not alone—here are some of the most common ones, answered for clarity and ease!
How often should I test my soil pH?
Test your soil pH at least once a year if you’re growing plants, or more often (every 3–6 months) if you’re troubleshooting poor growth, nutrient deficiencies, or adjusting for specific crops. Soil pH can shift due to weather, amendments, or plant uptake, so consistency is key!
Can I test soil pH without a kit? DIY alternatives?
Yes! If you’re in a pinch, try these low-tech methods (though they’re less precise):
- Red cabbage indicator: Boil red cabbage leaves, strain the purple liquid, and mix with soil—blue/purple = alkaline, yellow/green = acidic.
- Plant litmus test: Grow blueberries (acid-loving) or lavender (alkaline-tolerant)—their health hints at pH trends.
- Local extension office: Many offer free/low-cost testing for accuracy.
Pro tip: For best results, invest in a digital pH meter or test kit—they’re fast, affordable, and far more reliable!
Why does my soil pH test keep changing after adding lime/sulfur?
Patience is key! Soil pH changes gradually—it can take 2–6 months (or longer) for amendments like lime (to raise pH) or sulfur (to lower it) to fully integrate. Retest every 4–6 weeks until you hit your target range (usually 6.0–7.0 for most veggies). Over-amending can lock out nutrients, so follow package rates!
Does rain or weather affect soil pH test accuracy?
Yes! Wet soil can skew results—always test dry or slightly damp soil (like crumbled cake mix). Heavy rain may temporarily lower pH (due to acidity), while drought can concentrate salts and raise pH. For consistent readings, test after light watering or on a dry day.
What pH range is best for my specific plants?
Here’s a quick guide for common crops—aim for these ranges to maximize growth and nutrient uptake:
| Plant Type | Ideal pH Range |
|---|---|
| Vegetables (tomatoes, peppers, lettuce) | 6.0–7.0 |
| Blueberries, azaleas, rhododendrons | 4.5–5.5 (acid-loving!) |
| Asparagus, strawberries, potatoes | 6.0–6.8 |
| Lawns (cool-season grasses) | 6.0–7.0 |
Pro tip: Check seed packets or plant tags—they often list optimal pH for your specific variety!
Wrapping up and next steps
Testing your soil’s pH doesn’t have to be complicated—with the right at-home kit and a few simple steps, you can unlock the secrets of your garden in just five minutes! 🌱 Whether you’re a seasoned gardener or a curious beginner, knowing your soil’s pH empowers you to make smarter choices for healthier plants.
Now that you’re equipped with the knowledge, grab that kit and get testing—your green thumb (and your plants!) will thank you.
Next step: Once you’ve got your pH results, dive into adjusting your soil with amendments like lime (to raise pH) or sulfur (to lower it). Happy growing!