
Container Gardens
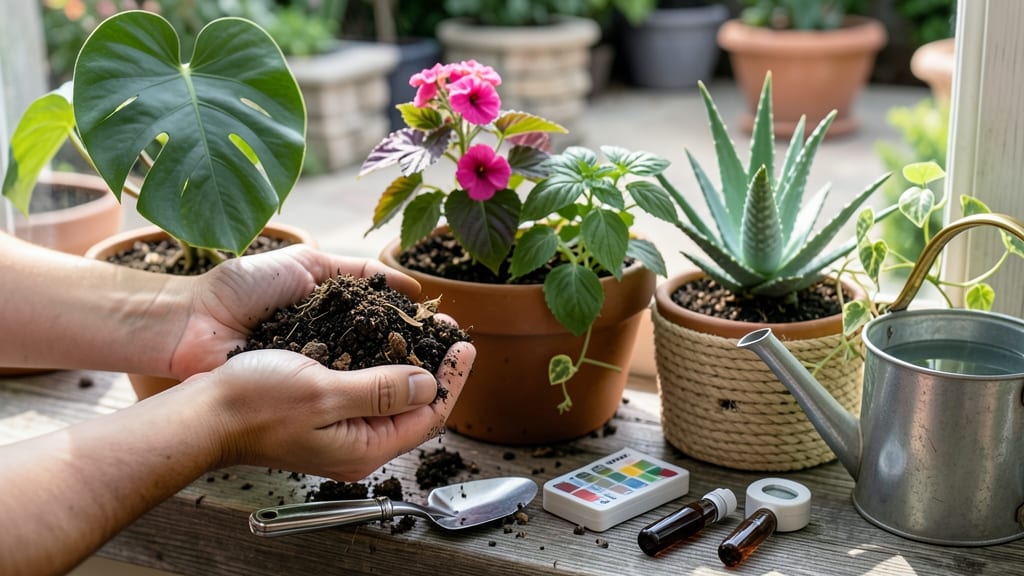
The right garden soil for potted plants makes all the difference—roots need air, water, and nutrients packed into every square inch. 🌱 I learned this the hard way when my ferns turned yellow and my succulents rotted, despite my best watering efforts.
The problem wasn't my green thumb (or lack thereof) but the soil itself—too dense, too heavy, and suffocating roots. Most gardeners grab the cheapest potting mix at the store, but that's often too light for heavy feeders like tomatoes or too moisture-retentive for cacti.
The ideal blend combines one-third peat or coconut coir for moisture control, one-third perlite or vermiculite for aeration, and one-third compost or worm castings for nutrients. This trio keeps roots happy year-round while preventing the dreaded "soggy bottom" syndrome.
You'll notice plants growing faster, with darker green leaves and stronger stems within weeks. The soil stays crumbly yet moist—not dry as dust or stuck together like wet cement. For repotting, mix in fresh compost every 6 months to keep nutrients topped up without compacting the blend.
This approach works for everything from herb pots on the windowsill to large containers on the patio. The key? Adjust the ratios based on your plants' thirst—succulents need more grit, while ferns prefer finer texture. Let's get those roots breathing easy!
📚 In This Guide
- What you need
- Instructions
- Tips and common mistakes
- Wrapping up and next steps
What you need
- ● Potting soil (base): 50% high-quality peat-free potting mix (e.g., Miracle-Gro Potting Mix or FoxFarm Ocean Forest).
- ● Organic compost: 20% well-aged compost (homemade or store-bought, like Black Kow).
- ● Perlite or pumice: 15% for aeration (ensure it’s sterile and expanded).
- ● Coarse sand or grit: 10% (e.g., builder’s sand or horticultural grit) to improve drainage.
- ○ Worm castings (optional but recommended): 5% for extra nutrients (e.g., Worm Power or homemade).
- ● A large mixing container (e.g., wheelbarrow, plastic tote, or clean trash can).
- ● A garden trowel or shovel for mixing.
- ● Gloves (to protect your hands from grit and compost).
- ● Measuring tools (e.g., buckets, cups, or a kitchen scale for precision).
- ● Spray bottle with water (to moisten dry ingredients).
- ○ pH testing kit (optional) to check soil acidity (ideal range: 6.0–7.0 for most potted plants).
How to create the perfect potting mix for thriving container plants
Here's my foolproof blend that keeps roots oxygenated and prevents the dreaded "soggy bottom" syndrome.
🪴 Step 1: Start With a Quality Base Soil
Use 50% high-quality potting mix as your foundation—never garden soil. The lightweight, sterile nature of potting mix prevents compaction and allows roots to spread freely. I like to add a handful of worm castings (about 1/4 cup per gallon of mix) to introduce beneficial microbes and nutrients that regular potting soil lacks.
Sift the potting mix to break up any clumps, then fluff it with your hands until it feels airy. You want a consistency similar to crumbled cake—light enough to hold shape when compressed but still crumbly. This ensures roots won't suffocate from poor aeration, which is the #1 killer of container plants.
💧 Step 2: Add Organic Matter for Moisture Retention
Blend in 30% coconut coir or peat moss for moisture retention without compacting. These materials hold water like a sponge while still allowing excess to drain. I measure by volume—about 1 part coir to 1 part potting mix—and mix thoroughly with a trowel to distribute evenly.
Here's the thing—peat moss can be acidic, so if you're growing acid-sensitive plants like succulents, reduce it to 20% of the mix and add 1/4 cup perlite per gallon instead. You'll notice the difference immediately: plants in this blend stay evenly moist without the risk of root rot that comes from soggy conditions.
☀️ Step 3: Incorporate Drainage Materials
Add 20% perlite or pumice for drainage and aeration. These volcanic minerals create air pockets that prevent waterlogging while still holding moisture for roots. I use a 1:1 ratio of perlite to potting mix—just enough to give the blend a slightly gritty texture when squeezed.
For heavy feeders like tomatoes or peppers, I boost this to 25% perlite and add 1/2 cup coarse sand per gallon. The sand prevents the mix from becoming too dense as roots grow. You'll see the difference in root health—strong, white roots instead of the black, mushy ones that signal rot.
✂️ Step 4: Customize for Your Plant Type
For succulents and cacti, reduce the organic matter to 20% coconut coir and increase perlite to 30% of the mix. These plants need rapid drainage to prevent root rot. I also add 1/4 cup chicken grit per gallon to improve drainage further—it's the secret to keeping these drought-lovers happy.
Herbaceous plants like basil or parsley thrive in a 60% potting mix, 20% coir, 20% perlite blend. The extra organic matter feeds their rapid growth while still allowing roots to breathe. You'll notice faster leaf production and fewer wilting issues, especially in hot weather.
🌱 Step 5: Test and Adjust Before Planting
Fill a container with your mix and water it thoroughly. After 10 minutes, check the drainage by lifting the pot—water should drip freely from the bottom holes. If it pools at the surface, add more perlite. If it drains too fast (within 2 minutes), increase the coir content by 10%.
Press the mix gently with your fingers—it should hold its shape but still crumble easily. This is your "goldilocks zone" for root health. Now your blend is ready for planting, and you're avoiding the two biggest potting mix mistakes: suffocating roots from poor aeration or drowned roots from poor drainage.
Tips & tricks for perfect root-friendly potting mix
Took me years of trial-and-error to perfect this blend—here's how to avoid the same mistakes and create a mix that actually works.
Base Soil Prep: When sifting your 50% high-quality potting mix, don't skip the fluffing step. I learned this the hard way after watching roots suffocate in compacted soil. After sifting, spread the mix on a clean surface and gently break up any remaining clumps with your fingers. Think "crumbled cake" consistency—this creates the perfect air pockets roots need to breathe.
Organic Matter Balance: The 30% coconut coir or peat moss ratio is crucial, but here's what nobody tells you—peat moss breaks down faster than coir. For long-term mixes (especially for perennials), I recommend using 100% coir instead. It retains moisture longer without compacting, and you'll notice your plants stay healthier between waterings.
Drainage Testing: That 10-minute drainage test in Step 5 is your quality control moment. If water pools after 10 minutes, you need more perlite—aim for 25% perlite if you're growing heavy feeders like tomatoes. For succulents, push it to 30% perlite and add that 1/4 cup chicken grit per gallon. The grit creates micro-channels that wick away excess moisture instantly.
Customization Shortcut: For quick adjustments, keep small bags of perlite, coir, and sand on hand. I store them in labeled jars near my gardening tools. When customizing for different plants, you can tweak the ratios in minutes without measuring everything from scratch. This saves time and prevents the frustration of mixing a whole batch only to realize it's not right for your specific plant.
Pro Tips for Garden Soil For Potted Plants
- Took me years of trial-and-error to perfect this blend—here's how to avoid the same mistakes and create a mix that actually works.
- Base Soil Prep: When sifting your 50% high-quality potting mix, don't skip the fluffing step.
- Organic Matter Balance: The 30% coconut coir or peat moss ratio is crucial, but here's what nobody tells you—peat moss breaks down faster than coir.
Frequently asked questions
Got questions about using garden soil for potted plants? You’re not alone! Below, we’ve rounded up the most common concerns—plus practical tips to keep your container garden thriving.
Can I use regular garden soil for potted plants?
While garden soil can work in a pinch, it’s not ideal for potted plants. It tends to compact, reducing airflow and drainage—key factors for root health. Instead, mix it with perlite, vermiculite, or coconut coir (20-30%) to lighten the texture and improve aeration. For best results, opt for a well-draining potting mix designed for containers.
When is the best time to repot with garden soil blends?
Repot during the plant’s active growing season—typically spring or early summer. Avoid winter or dormancy periods, as roots are less resilient to disturbance. If using garden soil, amend it with organic matter (like compost) and ensure the pot has drainage holes. Pro tip: Water the plant 1-2 days before repotting to reduce stress!
How often should I water potted plants with garden soil mixes?
Frequency depends on climate, pot size, and plant type, but garden soil blends dry out faster than heavy garden soil. Stick your finger 1-2 inches into the soil—if it’s dry, it’s time to water. Rule of thumb: Water thoroughly until it drains from the bottom, then let excess water escape. Mulch the surface to retain moisture and prevent crusting.
What’s a good alternative if I don’t have garden soil?
No garden soil? No problem! Use these store-bought or DIY alternatives:
- Potting mix: Pre-formulated for containers (e.g., Miracle-Gro or FoxFarm).
- Cactus/succulent mix: For drought-tolerant plants (add 10% organic matter).
- DIY blend: 60% peat moss/coco coir + 30% perlite/vermiculite + 10% compost.
Why do my potted plants wilt even with “good” soil?
Wilting can signal overwatering, underwatering, or poor drainage. Check these fixes:
- Ensure the pot has drainage holes (no exceptions!).
- Test soil moisture—wilting + soggy soil = root rot. Let it dry slightly between waterings.
- Add worm castings or compost to boost nutrient retention.
- If roots are circling the pot, repot into a larger container with fresh mix.
Wrapping up and next steps
Choosing the right garden soil for potted plants is the secret ingredient to thriving container gardens! 🌱 Whether you opt for a pre-mixed potting mix or craft your own blend, prioritize airy drainage, nutrient balance, and organic matter to keep roots happy.
With the perfect soil, your plants will flourish—so roll up your sleeves and get growing!
Ready to transform your space? Start by picking a sunny spot, grab your supplies, and plant with confidence. Your green thumb is closer than you think!