
Tools
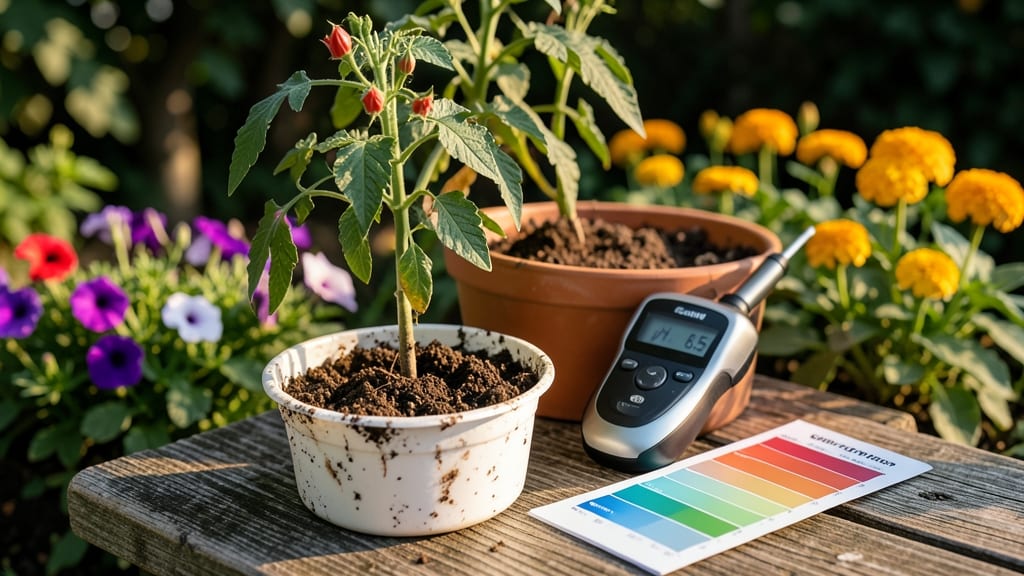
A garden soil pH test kit reveals the hidden secret behind your plants' struggles—or their shocking success. 🌱 I've used mine to turn my struggling blueberries from sad to thriving by simply adjusting the soil chemistry.
Most gardeners don't realize that pH affects nutrient availability more than anything else—even the best fertilizer won't help if the soil is too acidic or alkaline.
The kit itself is simple: you take a soil sample, mix it with water, and compare the color to a chart. But the results change everything—like discovering your tomatoes need slightly acidic soil (pH 6.0-6.8) while your roses prefer a neutral range (6.5-7.0).
The real magic happens when you act on those numbers with lime to raise pH or sulfur to lower it, giving your plants exactly what they need to flourish.
You'll see the difference within weeks: deeper green leaves, stronger stems, and plants that actually use the nutrients you're providing. My zucchini went from yellowing leaves to producing three times as many fruits after just one adjustment. The kit pays for itself in one season of better growth.
Perfect for beginners and seasoned gardeners alike—just avoid these common mistakes: testing too soon after fertilizing, using contaminated containers, or ignoring the color chart's lighting conditions. With the right approach, you'll have soil that's perfectly tuned to your plants' needs in no time.
📚 In This Guide
- What you need
- Instructions
- Tips and common mistakes
- Wrapping up and next steps
What you need
- ● Soil pH test kit – Choose a kit with clear instructions (digital or liquid test strips are great for beginners).
- ● Clean sampling tools – A trowel, small shovel, or soil auger (sterilized with rubbing alcohol).
- ● Sample containers – Small, clean plastic or glass containers (at least 3-5 for multiple test spots).
- ● Distilled water – 1-2 cups per test (tap water may affect accuracy).
- ● Plastic spoon or spatula – For mixing soil samples.
- ○ pH adjustment materials (optional but helpful) – Lime (to raise pH) or sulfur (to lower pH), if you plan to amend soil.
- ● Gloves – Disposable or reusable to keep samples uncontaminated.
- ● Notebook & pen – To record pH readings and notes on soil conditions.
- ● Soil moisture meter – Helps ensure your samples are at the right consistency.
- ● Calibration solution (if using a digital pH meter) – Ensures precise readings.
- ● Garden journal – Track pH changes over time for different plant types.
- ● pH buffer solutions – For double-checking test kit accuracy.
How to use a garden soil pH test kit for perfect plant growth
Here’s how to get precise, reliable pH readings every time—no guesswork, just perfect growing conditions.
🧪 Step 1: Gather Your Test Kit and Prepare Samples
Start by unpacking your kit and reading the included instructions—each brand varies slightly, but the core process remains the same. I recommend testing at least 4-5 soil samples from different garden areas to account for natural variability. Use a clean, dry trowel to collect soil from the top 6 inches of your garden bed, avoiding surface mulch or compost.
Discard any rocks or debris, then break up clumps with your fingers until the sample is fine and crumbly. You’ll need about 1 tablespoon of soil per test, so divide your samples into small containers. Label each one with its location—this helps track pH variations across your garden. If your kit includes a calibration solution, prepare that first; it ensures your readings stay accurate.
💧 Step 2: Mix Soil with Distilled Water
Fill a clean container with distilled water—tap water can skew results due to mineral content. Add 1 tablespoon of soil to 2 tablespoons of water per test, following your kit’s specific ratio. Stir vigorously for 30 seconds to create a uniform slurry. The consistency should resemble wet sand, not mud.
Let the mixture sit for 5-10 minutes—this allows any bound nutrients to release into the water. Avoid stirring again; you’re creating a stable suspension, not a solution. If your kit uses a colorimetric method (liquid reagent), pour the slurry into a separate container for testing. For electronic probes, gently press the probe into the mixture without pressing too hard, which can damage sensors.
📊 Step 3: Perform the Test and Record Results
For liquid reagent kits, add the prescribed amount of reagent to your soil-water mixture and stir immediately. The color change happens within 1-2 minutes, so time it carefully. Compare the resulting hue to the included color chart—hold it up to natural light for the most accurate match. I always test in daylight to avoid fluorescent lighting distortions.
For electronic probes, rinse the probe with distilled water between tests to remove residue. Insert it into the slurry and wait for the reading to stabilize, which usually takes 10-15 seconds. Record the pH value for each sample, rounding to the nearest 0.5 for consistency. Note any discrepancies between samples—this helps identify areas needing amendments like lime or sulfur.
✂️ Step 4: Adjust Soil pH Based on Plant Needs
Now that you have precise pH readings, compare them to your plants’ ideal ranges. For example, blueberries thrive at 4.5-5.5, while tomatoes prefer 6.0-7.0. If your soil is too acidic (below 6.0), add crushed limestone or wood ash. For alkaline soil (above 7.5), mix in elemental sulfur or peat moss, following package rates.
Apply amendments in small batches—overcorrecting can harm soil biology. Re-test after 4-6 weeks to confirm changes. I like to mark adjusted areas with flags so I remember where I made changes. This step is where precision pays off; perfect pH means perfect growth.
📅 Step 5: Maintain pH Balance Through the Season
Soil pH isn’t static—rain, decomposition, and plant uptake shift it over time. Test again in 3-4 months, especially after heavy rain or if you notice stunted growth. I schedule reminders in my gardening app to avoid surprises. For container gardens, test monthly since potting mixes degrade faster.
Use your results to fine-tune your garden strategy. For instance, if your soil stays stubbornly acidic, consider growing acid-loving plants like hydrangeas or azaleas in those beds. The key is consistency—regular testing keeps your soil in the sweet spot for whatever you’re growing.
Tips & tricks for perfect soil pH testing
Precision pH testing transforms your garden from guesswork to science—here’s how to get flawless results every time.
Sample Selection: The top 6 inches of soil is where plant roots actively interact, so focus there. Avoid areas with fresh mulch or compost, which can skew readings. I’ve found that testing both sunny and shady spots in the same bed often reveals surprising pH differences—sometimes up to 1 full pH unit apart. For container gardens, test the potting mix itself, not the drainage layer.
Consistency is Key: That 30-second vigorous stir in Step 2 isn’t just about mixing—it’s creating a reproducible suspension. Use a timer if needed, and stir in a figure-eight motion to prevent clumping. For electronic probes, press gently but firmly into the slurry; too little pressure gives inaccurate readings, while too much can damage the sensor. I’ve ruined two probes this way before learning to treat them like delicate glass.
Color Chart Mastery: When comparing your reagent’s color to the chart in Step 3, hold both at eye level against a white background under natural light. Fluorescent bulbs can cast a greenish tint that throws off your reading. Pro tip: Take a photo of your sample next to the chart—you’ll have a reference if you’re unsure later. I’ve caught errors this way that would’ve led to incorrect amendments.
Amendment Application: When adjusting pH in Step 4, think of it like seasoning a dish—start small. For example, if your soil is 5.5 and you want 6.5, apply half the recommended lime dose first. Re-test after 4-6 weeks; soil microbes need time to process amendments. I’ve seen gardeners overcorrect and end up with soil so alkaline their plants wilted—don’t make that mistake.
Pro Tips for Garden Soil Ph Test Kit
- Precision pH testing transforms your garden from guesswork to science—here’s how to get flawless results every time.
- Sample Selection: The top 6 inches of soil is where plant roots actively interact, so focus there.
- Consistency is Key: That 30-second vigorous stir in Step 2 isn’t just about mixing—it’s creating a reproducible suspension.
Frequently asked questions
Got questions about testing your garden soil’s pH? You’re not alone! Here are some of the most common concerns—and straightforward answers—to help you get the most out of your garden soil pH test kit.
How often should I test my garden soil’s pH?
For most gardeners, testing soil pH once a year is a great baseline. However, if you’re dealing with acid-loving plants (like blueberries or azaleas) or alkaline-tolerant crops (such as asparagus), test every 3–6 months to monitor changes. Newly amended soil or areas with frequent plantings may also need more frequent checks!
How long does it take to get accurate results with a pH test kit?
Most garden soil pH test kits deliver results in 5–15 minutes, depending on the type. Liquid test kits (like those with color charts) are fastest, while electronic probes may take a few extra seconds to stabilize. Always follow the kit’s instructions for the most precise timing—rushing can lead to inaccurate readings!
Can I use a pH test kit from my indoor plants on garden soil?
Not ideal! Indoor plant kits are designed for potting mix, which has a much finer texture and different composition than garden soil. For accurate results, use a dedicated soil pH test kit—they’re calibrated for outdoor conditions and provide reliable readings for vegetables, flowers, and lawns.
What should I do if my soil pH test results are inconsistent?
Inconsistent readings? Try these fixes:
- Test multiple spots—soil pH can vary across your garden.
- Use fresh, undisturbed soil (avoid surface debris or recently fertilized areas).
- Clean your kit’s probe or test strips between uses to prevent contamination.
- Compare results with a second kit or send a sample to a lab for verification.
Are there any natural alternatives to pH test kits?
While nothing beats a professional test kit, you can estimate soil pH with these DIY methods:
- Red cabbage indicator: Boil red cabbage leaves, strain the liquid, and mix with soil—purple = acidic, green = neutral, yellow = alkaline.
- Plant bioindicators: Grow comfrey (alkaline soil) or lobelia (acidic soil)—their health can hint at pH trends.
Wrapping up and next steps
Testing your garden soil’s pH with a garden soil pH test kit is the first step toward unlocking vibrant, thriving plants! 🌱 By understanding your soil’s acidity or alkalinity, you’re empowering yourself to make smart amendments—whether it’s lime for acid-loving blueberries or sulfur for citrus trees.
The results? Healthier roots, bolder blooms, and a garden that feels like a masterpiece in the making.
Ready to take the next step? Grab your test kit, dig in, and let your green thumb shine! Start adjusting your soil today—your plants will thank you!