
How To
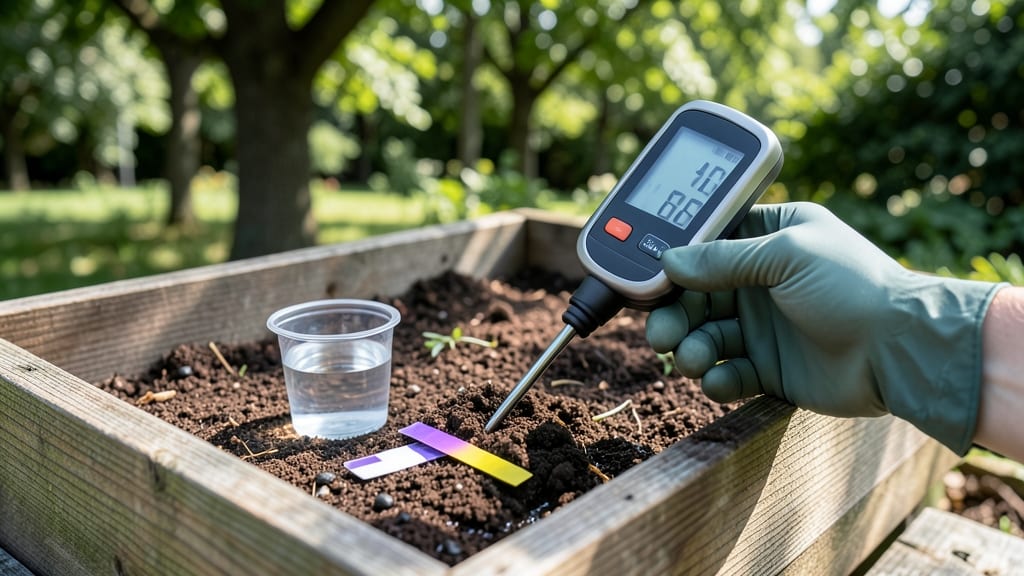
Your soil’s pH is the secret to unlocking perfect plant health—and a home soil pH tester puts that power in your hands. 🌱 I’ve used mine to turn struggling tomatoes into prolific producers, and the process is simpler than you’d think.
Most gardeners don’t realize how much their soil’s chemistry affects growth, but with just a few drops of water and a color chart, you’ll know exactly what your plants need.
First, grab your tester (digital or liquid test kits both work), a clean trowel, and a small container. Dig a 6-inch-deep sample from multiple spots in your garden, mix the soil, and moisten it with distilled water.
The tester will show you whether your soil is too acidic, too alkaline, or just right—most plants thrive between 6.0 and 7.0.
If your results are off, don’t panic: simple amendments like lime (for acidic soil) or sulfur (for alkaline) can adjust pH in as little as 3-6 months.
Once you’ve dialed in the right pH, you’ll see stronger stems, brighter blooms, and fewer pests—because healthy soil means happy plants. The best part? You’ll stop guessing and start growing with confidence.
For example, blueberries need 4.5-5.5, while lavender thrives at 6.5-8.0. Your tester becomes your garden’s personal lab, helping you tailor care to every plant’s needs.
Pro tip: Test your soil every 1-2 years, especially if you’re dealing with new plants or persistent issues. Over time, you’ll build a soil profile that makes your garden foolproof—no more trial and error, just consistent, thriving growth. Ready to get started?
📚 In This Guide
- What you need
- Instructions
- Tips and common mistakes
- Wrapping up and next steps
What you need
- ● Home Soil pH Tester: A digital or probe-style tester (e.g., Bluelab Soil pH Meter or Apera AI Soil Sensor—ensure it includes calibration features).
- ● Soil Samples: 3–5 fresh samples (1 cup each) from different garden beds or pots. Avoid surface debris or fertilized areas.
- ● Distilled Water: 1–2 cups (tap water may contain minerals that skew results).
- ● pH Calibration Solutions: 1 bottle of pH 4.0 buffer solution (for acidic calibration).
- ● 1 bottle of pH 7.0 buffer solution (for neutral calibration).
- ○ 1 bottle of pH 10.0 buffer solution (for alkaline calibration—optional but recommended for precision).
- ● Small Containers: 3–5 clean, shallow containers (e.g., plastic cups or test tubes) for mixing samples.
- ● Spoon or Trowel: For collecting and stirring soil.
- ● Paper Towels or Rags: To wipe the pH probe between tests.
- ● Soil pH Adjustment Products: Lime (for raising pH) or sulfur (for lowering pH).
- ● Compost or organic matter to improve soil structure.
- ● Journal or App: To log pH readings and track changes over time (e.g., Gardenate or a simple notebook).
- ● Gloves: Protect your hands from dirt and chemicals.
- ● pH Test Strips: A backup method if your digital tester malfunctions.
Step-by-step instructions for calibrating your home soil pH tester
Here’s how to get razor-sharp accuracy—because perfect plant health starts with trustworthy readings.
🧪 Step 1: Gather Your Calibration Tools
You’ll need two pH buffer solutions (typically pH 4.0 and pH 7.0) that come with most testers, plus distilled water to rinse everything. I always use a clean glass jar or small container for testing—plastic can leach chemicals that skew results. Grab a soft cloth or paper towel too; you’ll be wiping probes between tests.
Check your tester’s manual for specific buffer requirements. Some digital meters need three solutions (4.0, 7.0, and 10.0), while analog probes often only require the two extremes. Never reuse buffer solutions—they degrade after a few tests. If your kit doesn’t include buffers, buy them separately from a garden supply store.
🔄 Step 2: Prepare the Tester for Calibration
Turn off your tester and unplug it if it’s battery-powered. For probe-style meters, rinse the electrode thoroughly with distilled water to remove any soil residue or old buffer. Wipe it dry with the cloth—moisture left on the probe can dilute new buffer solutions and throw off readings.
If you’re using a digital meter, press the calibration button (usually labeled "Cal") and wait for the display to prompt you. Analog meters often have a small screw or dial you’ll need to adjust. Here’s the thing—never calibrate a dirty probe. Even microscopic soil particles can create a thin insulating layer that makes the electrode sluggish. Take your time here.
⚖️ Step 3: Test and Adjust with pH 4.0 Buffer
Pour enough pH 4.0 buffer solution into your clean container to fully submerge the probe’s electrode (usually ½ inch of liquid above the tip). For digital meters, insert the probe and wait 30-60 seconds until the reading stabilizes. You’ll see a number flicker briefly before settling.
If the reading isn’t 4.0 ±0.1, adjust the calibration screw or follow your meter’s menu prompts. Turn it clockwise to increase the reading, counterclockwise to decrease. For analog meters, this might take a few tries—be patient. Once it’s spot-on, rinse the probe again with distilled water and pat dry. This step ensures your low-end accuracy, which is critical for acid-loving plants like blueberries or azaleas.
⚖️ Step 4: Verify with pH 7.0 Buffer
Repeat the process with the pH 7.0 buffer. Submerge the probe, wait for stabilization, and check the reading. A properly calibrated meter should now show 7.0 ±0.1. If it’s off, recalibrate using the same adjustment method as before. This neutral-point check catches drift in the electrode’s response.
Here’s where most people mess up: they don’t rinse between buffers. Always clean the probe between solutions—buffer residues can create a mixed solution that confuses the meter. After the 7.0 test, give it one final rinse and dry. Your tester is now calibrated for the full pH range. For digital meters, some will automatically switch between calibration modes—check your manual.
🌱 Step 5: Test Real Soil for Accuracy
Take a small sample of your garden soil (about ½ cup) and mix it with equal parts distilled water in a separate container. Stir well to create a slurry, then insert the probe. Wait 2-3 minutes for a stable reading. Compare this to results from a lab-tested sample if you have one—you’ll be amazed how often home testers are off by 0.5-1.0 pH points without calibration.
If your reading seems inconsistent (e.g., fluctuating by 0.3+), recalibrate immediately. Soil salinity or organic matter can sometimes interfere, but a properly calibrated meter should give you repeatable results within 0.2 pH units. Store your tester in a dry place when not in use—condensation on the probe ruins accuracy faster than anything else.
Tips & tricks for perfect soil pH calibration
Precision matters when you're tuning your soil pH tester—these insider tricks will help you get flawless, repeatable results every single time.
Buffer Solution Selection: If your tester requires three buffers (pH 4.0, 7.0, and 10.0), always use the most precise solutions available. I recommend buying pH buffer kits designed specifically for soil testing—they're formulated to match the electrode's response curve. For analog meters, the 4.0 and 7.0 buffers are typically sufficient, but digital meters often need the full range to account for their wider measurement span. Never use tap water to dilute buffers—even small mineral impurities can throw off your calibration by 0.2-0.3 pH points.
Electrode Care Between Tests: Here's what nobody tells you—your probe's electrode has a delicate glass membrane that can dry out or develop a film if not properly maintained. After each test, rinse with distilled water for at least 10 seconds, then gently wipe with a lint-free cloth. Store the probe in its protective cap when not in use, and avoid touching the electrode tip with your fingers. I've seen probes that worked perfectly for years suddenly fail because someone stored them wet or exposed them to direct sunlight between uses.
Environmental Conditions: Temperature fluctuations can cause readings to drift by 0.1-0.2 pH units. Always calibrate and test in a stable environment—avoid doing this near air conditioners, heaters, or direct sunlight. I calibrate mine in my kitchen at room temperature (around 70°F) for consistent results. If you're testing outdoors, let your meter and buffers acclimate to the ambient temperature for at least 15 minutes before starting. The 30-60 second stabilization time in Step 3 becomes especially critical when temperature differences exist.
Real Soil Testing Secrets: When testing your actual soil sample in Step 5, stir the soil-water slurry vigorously for 30 seconds before inserting the probe. This ensures even distribution of particles that could otherwise create localized pH variations. For the most accurate results, test multiple samples from different areas of your garden—the pH can vary significantly even within a small space. I always take three samples from each test area and average the results, which gives me confidence in my readings within 0.1 pH units.
Pro Tips for Home Soil Ph Tester
- Precision matters when you're tuning your soil pH tester—these insider tricks will help you get flawless, repeatable results every single time.
- Buffer Solution Selection: If your tester requires three buffers (pH 4.0, 7.0, and 10.0), always use the most precise solutions available.
- Electrode Care Between Tests: Here's what nobody tells you—your probe's electrode has a delicate glass membrane that can dry out or develop a film if not properly maintained.
Frequently asked questions
How often should I test my soil pH at home?
For most plants, test your soil pH once every 6–12 months to monitor changes. If you’re troubleshooting poor growth or nutrient deficiencies, test every 2–3 months until you stabilize the pH. Acid-loving plants (like blueberries) may need more frequent checks—every 3–4 months.
Can I calibrate a home soil pH tester without buffer solutions?
No, you must use pH buffer solutions (usually pH 4.0 and 7.0) for accurate calibration. DIY alternatives like vinegar or baking soda won’t give precise readings. If buffers aren’t available, consider investing in a digital tester with auto-calibration or send samples to a lab for professional testing.
Why does my tester give inconsistent readings?
Inconsistent readings often stem from dirt buildup on probes, old calibration, or improper rinsing. Clean probes with distilled water, recalibrate, and ensure soil samples are moist (not soggy). If issues persist, try a new tester—cheap models degrade faster.
What pH range is best for most garden plants?
Most vegetables, flowers, and lawns thrive in a neutral to slightly acidic range (6.0–7.0). However, specific plants vary:
- Acid-lovers (blueberries, azaleas): 4.5–5.5
- Alkaline-tolerant (asparagus, lavender): 7.0–8.0
- Sensitive (tomatoes, peppers): 6.0–6.8
How long does a home soil pH tester last?
With proper care, a high-quality tester lasts 1–3 years. Probes degrade faster if exposed to harsh chemicals or stored damp. Replace probes every 6–12 months for accuracy. Digital testers often outlast analog ones due to fewer moving parts.
Wrapping up and next steps
Testing and calibrating your home soil pH tester is the first step to unlocking thriving plants and a lush garden. With the right tools and a little patience, you’ll gain the precision needed to fine-tune your soil’s health—because happy plants start with the perfect balance! 🌱
Now that you’re equipped with knowledge, grab your tester and take the next step: test a small patch of soil and adjust as needed. Your green thumb is about to get even greener—one pH level at a time!