
How To
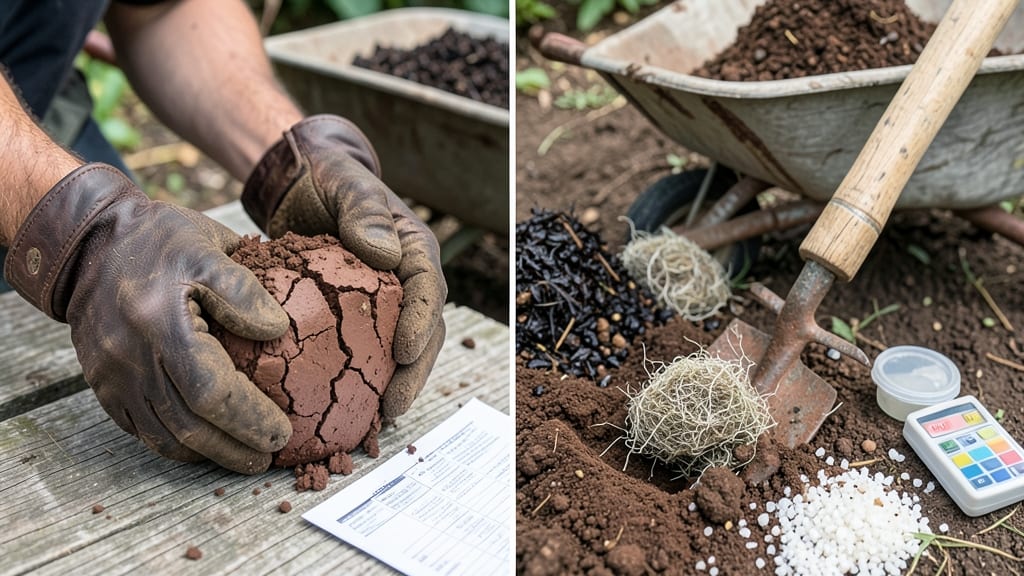
How to amend clay soil for gardening—I’ve turned my stubborn, waterlogged plot into loose, crumbly earth that plants actually thrive in—no more struggling through planting season. The key isn’t brute force; it’s understanding what clay soil needs to breathe, drain, and feed roots properly. Most gardeners overcomplicate this by adding too much sand (it makes things worse!) or relying on quick fixes that don’t last. What works is a layered approach: organic matter to break up compaction, structural amendments to improve drainage, and patience to let the soil rebuild itself over time.
Start with a soil test to pinpoint your clay’s biggest issues—is it too dense, too alkaline, or just holding water like a sponge?
For most heavy clay, compost and well-rotted manure are your best friends: they add air pockets, improve structure, and feed microbes that break down the soil over time.
Mix in 2-3 inches of compost into the top 6-12 inches of soil, then top-dress with a thin layer of coarse sand or perlite to help with drainage. (Yes, sand can help—just the right kind, not playground sand!)
The goal isn’t to turn clay into sandy loam overnight, but to create a balanced mix that holds moisture without suffocating roots.
What you’ll end up with is soil that holds nutrients instead of washing them away, warms up faster in spring, and lets roots spread without fighting compaction. My zucchini plants now grow twice as fast, and my tomatoes don’t rot at the first heavy rain. The best part?
Once you’ve amended it, maintaining improved soil is easier than you think—just keep adding compost yearly and avoid tilling, which destroys the structure you’ve worked so hard to build. Think of it like building a foundation: the first year is the hardest, but the payoff lasts for seasons.
Here’s where most gardeners trip up: they expect results after one season, or they go overboard with amendments. Clay soil improvement is a long-term project, not a weekend fix.
But trust me—once you feel that first forkful of light, workable soil in your hands, you’ll never go back to struggling with heavy ground. Let’s get your soil working for you, not against you.
📚 In This Guide
- What you need
- Instructions
- Tips and common mistakes
- Wrapping up and next steps
What you need
- ● Organic matter: Compost (5–10 gallons per 10 sq ft), well-rotted manure (horse, cow, or chicken), or leaf mold (1–2 inches spread evenly).
- ● Amendments: Peat moss or coconut coir (1–2 bags per 10 sq ft), perlite or coarse sand (5–10 lbs per 10 sq ft), and gypsum (10–20 lbs per 100 sq ft, if soil is highly alkaline).
- ● Tools: Garden fork or broadfork (for deep aeration, 12–18 inches long).
- ● Shovel or spade (for mixing amendments).
- ● Rake (bow rake for leveling, leaf rake for debris).
- ● Wheelbarrow (to haul materials).
- ○ Prerequisites: Test your soil’s pH (optional but helpful—use a soil test kit or send a sample to a local extension office).
- ● Choose a dry or slightly damp day for working (clay sticks when wet!).
- ● Soil conditioners: Vermiculite (for moisture retention), biochar (for nutrient boost), or worm castings (for microbial activity).
- ● Tools: Rototiller (for large areas), soil knife (for precision), or a soil probe (to check drainage depth).
- ● Mulch: Straw, wood chips, or pine needles (to lock in moisture and prevent compaction).
Step-by-step instructions for amending clay soil
Here’s how to transform dense, waterlogged clay into fertile, well-draining soil—no shortcuts, just proven techniques.
Test Soil Texture and Compaction
First, dig a 6-inch deep hole and grab a handful of undisturbed soil. Squeeze it tightly—if it forms a hard, durable clod that cracks when dropped, you’re dealing with classic clay. This heavy texture blocks water and air, suffocating roots. Next, poke your finger into the soil: if it feels like pushing through concrete, compaction is your biggest hurdle.
Walk your garden bed and note where water pools after rain or where plants struggle to emerge. These spots need the most attention. Clay soil often has pockets of varying density, so test multiple areas before deciding on amendments. The goal here isn’t just to loosen the surface but to improve drainage throughout the root zone.
Break Up Clay with Organic Matter
Spread a 2-3 inch layer of coarse organic matter—think composted leaves, well-rotted manure, or shredded hardwood bark—over the entire bed. This isn’t just about adding nutrients; the fibrous texture physically disrupts clay’s tight structure. Work it into the top 6-8 inches of soil using a broadfork or sturdy garden fork, prying apart compacted layers like you’re flaking a cake.
Here’s the thing—don’t skimp on this step. Clay soil needs 3-5 years of consistent organic matter additions to fully transform. After mixing, water the bed deeply to help the organic material break down and bind with the clay particles. You’ll know it’s working when the soil feels lighter and crumbles easily between your fingers.
Incorporate Sand and Gypsum for Drainage
For areas with severe drainage issues, blend in coarse sand (like builder’s sand, not fine beach sand) at a ratio of 1 part sand to 3 parts soil. This creates larger pores for water to escape. If your clay is high in sodium (test with a soil pH kit), add gypsum—it won’t change pH but helps break up the sodium bonds that make clay stick together like glue.
Mix these amendments into the top 12 inches of soil, where most roots will grow. Avoid overdoing it: too much sand can create a "flashy" soil that drains too quickly, while gypsum works best when applied gradually. After amending, rake the surface smooth and water again to settle everything. You’ll notice water disappearing faster than before—that’s progress.
Mulch to Protect and Improve Over Time
Top the amended bed with a 3-4 inch layer of organic mulch, like straw or wood chips. This keeps the soil moist, regulates temperature swings, and slowly adds more organic matter as it breaks down. For clay soil, mulch is non-negotiable—it prevents the surface from sealing back into a hardpan when it dries.
Replenish mulch annually in spring, focusing on areas where plants struggled last season. Over time, the mulch will integrate into the soil, continuing to loosen clay’s grip. You might not see dramatic changes overnight, but after one growing season, you’ll notice roots penetrating deeper and water staying where it’s needed—not pooling or evaporating.
Monitor and Adjust Long-Term
Plant a test crop like beans or radishes—they’re sensitive to soil conditions and will show you if drainage is still an issue. If water still pools or plants wilt quickly, add more organic matter and repeat the process. Clay soil is a marathon, not a sprint. Every year, till in 1-2 inches of compost before planting to maintain structure.
Pay attention to how different plants respond: some, like blueberries, thrive in slightly acidic clay once amended, while others, like tomatoes, need even looser conditions. Adjust your approach based on what you’re growing. With patience, your clay soil will go from a waterlogged nightmare to a productive, moisture-retentive garden bed.
Tips & tricks for perfect clay soil amendments
Transforming heavy clay into garden-friendly soil takes patience—but these key strategies will accelerate your progress without compromising quality.
Test Beyond the Surface: Don't rely on just one spot when testing your soil. Dig multiple test holes across your garden bed, especially in areas where water pools or plants struggle. Clay soil often has hidden pockets of different densities—what looks like good soil at one end of the bed might be completely different just a few feet away. I once spent hours amending a section only to discover the adjacent area still had compacted clay underneath. Always test thoroughly before committing to amendments.
The Organic Matter Depth Game: When working the 2-3 inch layer of organic matter into the top 6-8 inches of soil, think of it as creating a "sponge layer." The deeper you can incorporate this material, the better the long-term results. For stubborn clay, consider renting a rototiller to reach the full 12 inches mentioned in Step 3—this breaks up compaction more effectively than hand tools alone. Just be careful not to over-till, which can create a powdery texture that defeats the purpose.
Sand and Gypsum Precision: The 1:3 ratio of coarse sand to soil is non-negotiable for drainage improvement, but here's what most people miss: the sand must be coarse, not fine. Builder's sand with particles larger than 0.08 inches works best—fine sand (like beach sand) will clog pores rather than improve them. For gypsum, apply it in thin layers (about 1/4 inch) rather than dumping it all at once. This gradual approach prevents creating a sodium-rich layer that could harm plant roots.
Mulch Maintenance Matters: That 3-4 inch mulch layer isn't just decoration—it's your soil's protective shield. For clay soil, use straw or wood chips rather than leaves, which can mat down and recreate compaction. Replenish your mulch every spring before planting, focusing on areas where plants previously struggled. I've seen gardens where homeowners stopped mulching after the first year and ended up with hardpan forming again within months. Consistency is key.
Pro Tips for Amend Clay Soil For Gardening
- Transforming heavy clay into garden-friendly soil takes patience—but these key strategies will accelerate your progress without compromising quality.
- Test Beyond the Surface: Don't rely on just one spot when testing your soil.
- The Organic Matter Depth Game: When working the 2-3 inch layer of organic matter into the top 6-8 inches of soil, think of it as creating a "sponge layer."
Frequently asked questions
about amending clay soil—because even the best gardeners need a little guidance! Here are answers to the most common queries to help you transform that stubborn, heavy ground into fertile, workable soil.How long does it take to see improvements in clay soil after amending?
Patience is key! With consistent amendments like compost or organic matter, you’ll notice better drainage and texture within a few weeks. However, full transformation—especially for deep clay layers—can take several months to a year, depending on rainfall and soil depth. Test your progress by squeezing a handful: if it crumbles easily, you’re on the right track!
Can I amend clay soil without using compost? What are some alternatives?
If compost isn’t available, try these budget-friendly swaps:
- Peat moss (improves aeration but use sparingly—it’s non-renewable).
- Well-rotted manure (cow, horse, or chicken; aged for 6+ months to avoid burning plants).
- Leaf mold (decomposed leaves—free and nutrient-rich!).
- Sand (coarse, not fine)—but use only 10-20% of your mix to avoid creating a concrete-like texture.
Is there a best time of year to amend clay soil?
The ideal window is early spring or fall, when temperatures are mild and rain helps settle amendments into the soil. Avoid amending in summer heat (it can dry out too fast) or winter frost (amendments won’t integrate well). For container gardens, you can amend anytime—but water thoroughly after mixing!
Why does my clay soil still feel compacted after amending?
Compacted clay often needs more than just organic matter. Try these fixes:
- Deep tilling or broadforking (6–12 inches deep) to break up subsoil layers.
- Cover crops like clover or winter rye to add roots that loosen the soil naturally.
- Avoid walking or working the soil when it’s wet—this compacts it further!
Will amending clay soil attract pests or weeds?
Not if done right! Healthy soil supports beneficial microbes that outcompete pests. However, fresh amendments (like manure) can sometimes draw weeds—prevent this by:
- Using well-aged compost or manure (no seeds!).
- Mulching heavily after amending to block weed seeds.
- Choosing native plants that thrive in your climate (they’re pest-resistant!).
Wrapping up and next steps
Transforming clay soil into a thriving garden bed is totally doable with the right techniques! By adding organic matter, improving drainage, and testing your progress, you’ll create a fertile, workable space for plants to flourish. Don’t let heavy soil hold you back—your green thumb is ready for action!
Now that you’re armed with knowledge, roll up your sleeves and start small—pick one section of your garden to amend first. Watch your plants thank you with lush, healthy growth! 🌱✨