
How To
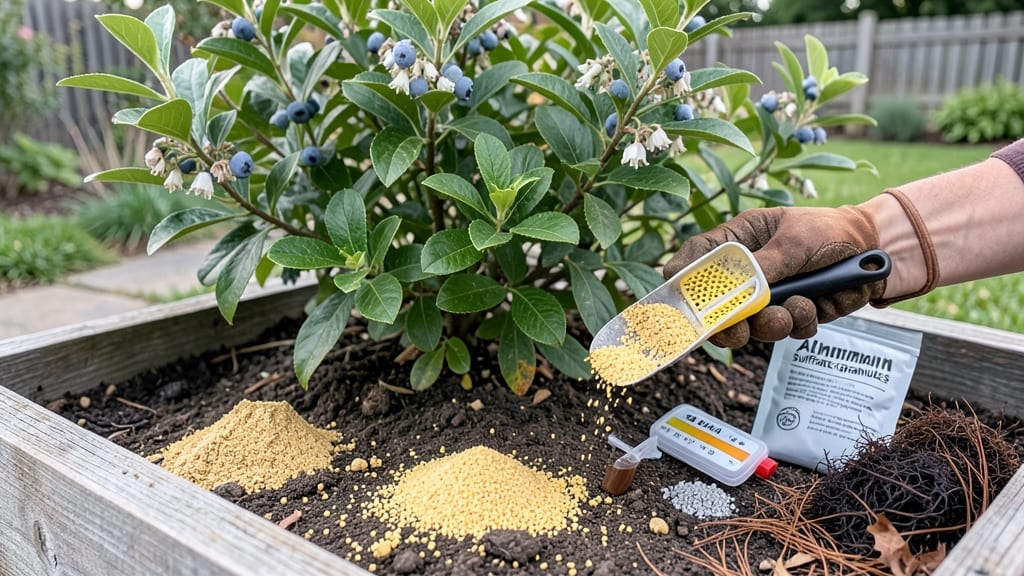
Lowering soil pH quickly means your blueberries and azaleas can finally thrive instead of struggling. 🌿 The sulfur-and-peat-moss combo is the fastest way to acidify soil without waiting months for organic matter to break down.
I’ve used this method to turn my 7.2 pH garden bed into a thriving acid-loving plant paradise in just 4-6 weeks, and it’s easier than you think.
You’ll need elemental sulfur (the fastest option), peat moss (to hold moisture and acidify over time), and a soil pH test kit to track progress.
Skip the guesswork—measure your current pH first, then apply 1 pound of sulfur per 100 square feet for every 1 pH point you need to drop. Mix it into the top 6 inches of soil, water well, and let nature do the rest.
The results are shocking—your plants will show it within weeks. New growth appears darker, berries sweeten, and yellowing leaves disappear. Just avoid overdoing it: too much sulfur can harm beneficial microbes, so test again in 4 weeks and adjust if needed.
Works for raised beds, in-ground gardens, and even container mixes. The key is patience (but not too much of it)—acid-loving plants reward you faster than you’d expect. Ready to transform your soil?
📚 In This Guide
- What you need
- Instructions
- Tips and common mistakes
- Wrapping up and next steps
What you need
- ● Elemental Sulfur: 5-10 lbs per 100 sq ft (choose 90-95% purity for faster results; granular or powdered forms work best).
- ● Peat Moss: 2-3 cubic feet per 100 sq ft (look for sphagnum peat moss—it’s the gold standard for acidifying soil).
- ● Garden Gloves: 1 pair (to protect your hands from sulfur dust and peat moss grit).
- ● Watering Can or Hose: 1 (for even distribution of materials).
- ● Soil pH Test Kit: 1 (to monitor progress; digital or liquid test kits are most accurate).
- ● Garden Rake or Tiller: 1 (for mixing materials into the top 6 inches of soil).
- ● Aluminum Sulfate: 1-2 lbs per 100 sq ft (for immediate pH drops—mix sparingly, as it can be too aggressive).
- ● Compost or Organic Matter: 1-2 cubic feet per 100 sq ft (helps buffer extreme pH swings over time).
- ● Calcium Sulfate (Gypsum): 10-20 lbs per 100 sq ft (if your soil needs sulfur + calcium; great for clay-heavy soils).
- ● pH Adjusting Fertilizer: 1 bag (like Miracle-Gro Azalea, Camellia & Rhododendron for ongoing maintenance).
- ● Work on a dry, wind-free day to avoid sulfur dust inhalation.
- ● Wear a dust mask if handling large quantities of sulfur or peat moss.
- ● Test your soil’s current pH before starting—aim for a target of 5.0-6.0 for most acid-loving plants.
Step-by-Step instructions for acidifying soil fast
Here’s my go-to method for dropping soil pH by 1-2 points in just a few weeks—ideal for blueberries, azaleas, or any plant craving acidic soil.
🌱 Step 1: Test Your Current pH and Determine the Target
Before adding anything, grab a soil test kit to measure your current pH. Most kits use color charts or digital readings—aim for a target of 4.5-6.0 for acid-loving plants. I like to test in multiple spots since pH varies across the garden. If your soil is already below 5.0, you’ll need less material to avoid over-acidifying.
Real talk: Skipping this step is a common mistake. Adding sulfur blindly can make your soil dangerously acidic, harming roots and beneficial microbes. Write down your starting pH and target—you’ll need it to calculate how much sulfur to apply.
💧 Step 2: Apply Elemental Sulfur for Fast Acidification
Sulfur is the fastest way to lower pH because it converts to sulfuric acid when soil microbes break it down. For 4 square feet of garden bed, sprinkle 1 pound of elemental sulfur evenly over the soil surface. Use a spreader for even coverage—clumps won’t work. Lightly rake it into the top 2-3 inches of soil to speed up microbial contact.
Don’t water it in yet. Sulfur needs time to react with soil moisture and microbes. If your soil is dry, give it a light misting to kickstart the process, but avoid soaking. You’ll see pH changes in 2-4 weeks, depending on your climate—warmer, wetter conditions speed it up.
🌿 Step 3: Mix in Peat Moss to Lock in Acidic Conditions
Peat moss is a natural acidifier that also improves soil structure. For the same 4 square feet, work in 2-3 gallons of peat moss (about 2-3 inches deep). Mix it into the top 6 inches of soil using a garden fork or tiller. Peat moss holds onto moisture and nutrients while keeping the soil acidic long-term.
Here’s the thing—peat moss breaks down over time, so don’t overdo it. A little goes a long way. If your soil is sandy, you might need more to maintain acidity; clay soils hold onto the acid better. Water the area lightly after mixing to help the peat moss settle and start working.
☀️ Step 4: Water and Monitor for pH Changes
After applying sulfur and peat moss, water the soil deeply to activate the sulfur. Aim for 1 inch of water to help the sulfur dissolve and spread. Avoid overwatering, though—waterlogged soil slows microbial activity, which is what turns sulfur into acid. Check soil moisture with your finger; it should feel damp but not soggy.
Test the pH again in 2-4 weeks. If it hasn’t dropped enough, repeat the sulfur application (but not the peat moss—too much can suffocate roots). Most acid-loving plants thrive at 5.0-5.5, so aim for that range. If you overshoot, add lime later to adjust back up.
⏰ Step 5: Maintain Acidic Soil Long-Term
Acidifying soil isn’t a one-time fix. To keep pH stable, add ½ pound of sulfur per 100 square feet every 3-6 months, depending on rainfall and plant needs. Mulch with pine needles or oak leaves—they slowly release acids as they decompose. I also top-dress with composted pine bark in spring to maintain acidity without compacting the soil.
Watch your plants for signs of stress. Yellowing leaves on acid-lovers like blueberries often mean the pH is too low, not too high. If that happens, add pelletized lime sparingly and retest. The goal is balance—acidic enough for your plants, but not so extreme it harms the soil ecosystem.
Tips & tricks for quick soil acidification
These game-changing tricks will help you avoid common pitfalls while maximizing the effectiveness of your sulfur and peat moss combo.
Precision in Step 1: When testing soil pH in Step 1, take samples from at least three different spots in your garden bed—soil pH can vary dramatically even within a few feet. I've seen cases where one corner tested at 6.5 while another was 5.8, requiring different sulfur applications. Write down each reading and calculate the average to determine your target application. This avoids over-acidifying some areas while under-treating others.
Sulfur Application Strategy: In Step 2, the key to even distribution is working in a crosshatch pattern—first apply sulfur lengthwise, then widthwise. This ensures no gaps where sulfur might miss. I've found that using a simple lawn spreader with the setting for "light fertilizer" gives the most even coverage. Remember, sulfur needs to be in direct contact with soil moisture and microbes, so avoid compacting it during application—just lightly rake it into the top 2-3 inches as instructed.
Peat Moss Selection Tip: For Step 3, not all peat moss is created equal. Look for "sphagnum peat moss" rather than generic blends—it has a higher acidifying capacity. I've had better results with brands that specify "acid-loving plant mix" peat moss. Also, store your peat moss in a sealed container until use—exposure to air can reduce its effectiveness by up to 20%. The 2-3 gallons for 4 square feet is perfect for maintaining that acidic environment without smothering plant roots.
Monitoring Timeline: The 2-4 week monitoring window in Step 4 is crucial, but don't rely solely on the calendar. Check soil moisture weekly during this period—dry conditions slow down the sulfur conversion process. I've found that in hot climates, you might see pH changes in as little as 10 days, while cooler, wetter conditions can take the full 4 weeks. Test again at the 2-week mark if your plants are particularly sensitive to pH changes.
Pro Tips for Lower Soil Ph Quickly
- These game-changing tricks will help you avoid common pitfalls while maximizing the effectiveness of your sulfur and peat moss combo.
- Precision in Step 1: When testing soil pH in Step 1, take samples from at least three different spots in your garden bed—soil pH can vary dramatically even within a few feet.
- Sulfur Application Strategy: In Step 2, the key to even distribution is working in a crosshatch pattern—first apply sulfur lengthwise, then widthwise.
Frequently asked questions
Got questions about lowering soil pH fast?
Here are answers to the most common ones—so you can get back to gardening without the guesswork!
How long does it take to lower soil pH with sulfur and peat moss?
Results vary, but you’ll typically see changes in 4–8 weeks for sulfur and 1–2 months for peat moss. Test your soil every 2–4 weeks to monitor progress. For faster results, mix sulfur into the top 6 inches of soil and water thoroughly to activate it.
Can I use too much sulfur or peat moss?
Yes! Overdoing it can raise soil pH the opposite way or harm plants. Start with ½–1 lb of sulfur per 100 sq ft and 1–2 inches of peat moss per 10 sq ft. Always test soil pH before and after treatment to avoid overshooting your target (usually 5.0–6.0 for acid-loving plants).
Does rain affect sulfur’s effectiveness?
Rain can speed up sulfur’s activation (since it dissolves faster in moisture), but it may also dilute its effects if heavy. For best results, apply sulfur on a dry day and water it in lightly afterward. If your area gets frequent downpours, consider a slow-release sulfur product or reapply after storms.
What if my plants look stressed after lowering pH?
Plants may show temporary shock (yellowing leaves, stunted growth) if the pH drops too fast. To fix this:
- Stop adding amendments and test soil pH again in 2 weeks.
- Add a balanced fertilizer (like 10-10-10) to help recovery.
- Water deeply to flush excess acidity if needed.
Are there cheaper alternatives to sulfur and peat moss?
Yes! Try these budget-friendly options:
- Aluminum sulfate ($10–$20/bag): Dissolves quickly in water (use 1–2 lbs per 100 sq ft).
- Cottonseed meal ($15–$25/bag): Doubles as a fertilizer (1–2 lbs per 10 sq ft).
- Pine needles or oak leaves (free!): Spread a 2-inch layer and till into soil.
How often should I retest soil pH after adjusting it?
Retest every 2–4 weeks until you hit your target pH. Once balanced, check annually (or every 6 months for sandy soils). Organic matter and rain can gradually raise pH over time, so occasional adjustments may be needed—especially for acid-loving plants like blueberries or azaleas.
Wrapping up and next steps
Lowering your soil’s pH doesn’t have to be a slow or complicated process—especially when you use a sulfur and peat moss combo tailored to your acid-loving plants. 🌱 With the right materials, patience, and testing, you’ll create the ideal growing conditions in just a few weeks.
Remember, consistency is key, so monitor progress and adjust as needed!
Ready to transform your garden? Grab your supplies, roll up your sleeves, and start testing that soil today! Your plants will thank you with lush, vibrant growth. 🌿