
How To
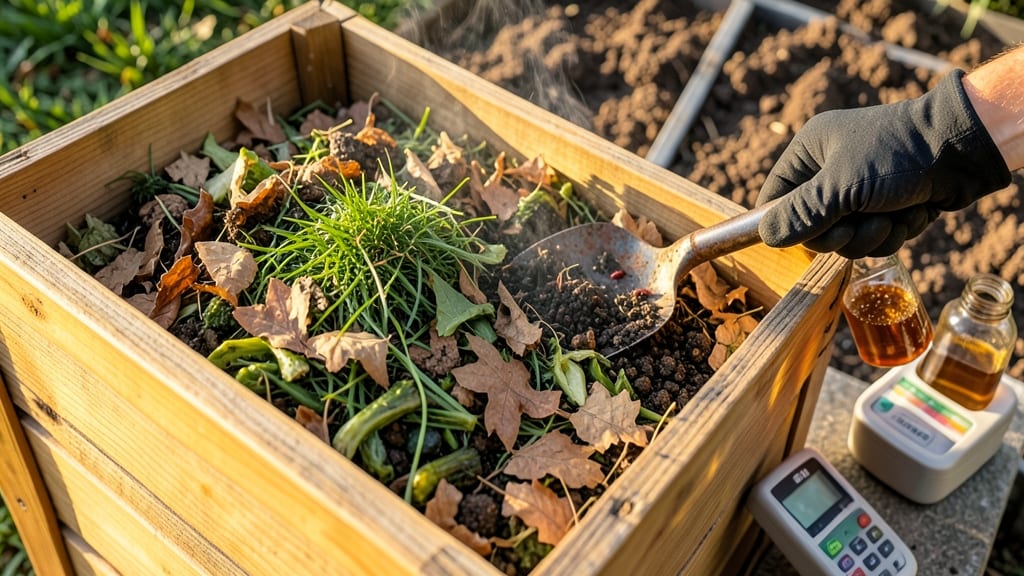
How to make soil fertile could be hiding a secret: the right mix of nitrogen-packed compost turns lifeless dirt into a thriving garden foundation. 🌱 I’ve transformed my own clay-heavy soil from a struggle to a productive patch by focusing on organic matter and microbial activity—no fancy tools required. The magic starts with a simple blend: equal parts compost, aged manure, and worm castings. This trio boosts nitrogen while improving soil structure, whether you’re dealing with sandy soil that drains too fast or clay that stays too compact. The key is consistency—adding this mix at planting and again mid-season keeps roots fed without burning plants. Within just a few weeks, you’ll notice darker, crumbly soil that holds moisture better and supports stronger plant growth. The real payoff? Fewer fertilizers needed later, and healthier plants that resist pests and diseases naturally. For clay-heavy soils, work in extra compost to loosen the texture over time. For quick results, top-dress plants with a thin layer of compost every few months. Over time, this builds a self-sustaining ecosystem where earthworms and microbes do the heavy lifting. The best part? This method works for vegetables, flowers, and even lawns—just adjust the ratio based on what you’re growing. Start small with a 1-gallon bucket of the blend per plant, and expand as you see improvements. The goal isn’t perfection but progress—soil fertility is a marathon, not a sprint. Once you master this, you’ll never buy bagged fertilizer again.
📚 In This Guide
- What you need
- Instructions
- Tips and common mistakes
- Wrapping up and next steps
What you need
- ● Green waste (nitrogen-rich, "greens") – 50% of your mix: Fresh grass clippings (1-2 lbs)
- ● Vegetable/fruit scraps (e.g., banana peels, coffee grounds – 1-2 cups)
- ● Fresh plant trimmings (weeds without seeds, young leaves – 2-3 handfuls)
- ● Brown waste (carbon-rich, "browns") – 50% of your mix: Dry leaves (crushed – 2-3 cups)
- ● Shredded newspaper or cardboard (non-glossy – 1-2 sheets)
- ● Straw or dry grass clippings (1-2 lbs)
- ● Wet ingredients (moisture): Water (enough to dampen the mix like a wrung-out sponge)
- ● Compost bin or pile (1-2 ft³ capacity; can be a store-bought bin, wire mesh, or even a DIY wooden box)
- ● Garden gloves (to keep hands clean and protected)
- ● Garden fork or pitchfork (for turning the mix – 18" length recommended)
- ● Wheelbarrow or large bucket (for mixing ingredients – 5+ gallon capacity)
- ● Spray bottle or hose (for adjusting moisture levels)
- ● Nitrogen boosters: Alfalfa meal (½ cup)
- ● Blood meal (¼ cup – use sparingly; it’s potent!)
- ● Microbe & enzyme activators: Worm castings (½ cup – for extra nutrients)
- ● Molasses or compost starter (1 tbsp – speeds up decomposition)
- ● pH balancers (if your soil is acidic/alkaline): Wood ash (sparingly – ¼ cup)
- ● Crushed eggshells (½ cup – for calcium)
Step-by-Step instructions for building a nitrogen-rich compost blend
Here’s how to create a nutrient-dense compost mix that’ll transform your garden soil into a thriving, plant-feeding powerhouse.
🌱 Step 1: Gather Your Green and Brown Materials
Start by collecting green materials (nitrogen-rich) like grass clippings, coffee grounds, fresh vegetable scraps, or fresh plant trimmings. These break down quickly and add the nitrogen your soil craves. I like to keep a small bin under the sink for kitchen scraps—it’s easier than you think.
Next, gather brown materials (carbon-rich) like dried leaves, straw, shredded newspaper, or cardboard. These provide structure and balance the mix. Aim for roughly three parts browns to one part greens—this ratio keeps the pile from smelling foul or heating up too fast. If your greens pile is taller than your browns, add more dry leaves or shredded paper.
🪴 Step 2: Layer Materials in a Compost Bin or Pile
Begin with a 4-6 inch layer of browns at the bottom of your bin or pile. This creates airflow and prevents compaction. Then, add a 2-3 inch layer of greens on top. Repeat these layers, ending with browns to keep the pile balanced and contained. If you’re using a closed bin, leave a small gap at the top for airflow.
Moisten each layer lightly with water—it should feel like a damp sponge, not dripping. Too much water suffocates the pile, while too little slows decomposition. If your pile feels dry, sprinkle more water; if it’s soggy, add dry leaves or shredded paper to absorb excess moisture.
💧 Step 3: Turn the Pile Weekly to Speed Up Decomposition
Every 7-10 days, use a pitchfork or shovel to turn the pile completely. This introduces oxygen, which speeds up microbial activity and prevents odors. You’ll notice the pile shrinks as materials break down—this is a good sign! After turning, check the moisture again. If it’s dry, add water; if it’s too wet, mix in more browns.
Within 4-6 weeks, the pile will start looking dark and crumbly. This is your compost turning into a rich, earthy blend. If it still smells like fresh kitchen scraps, it needs more time or a better balance of greens and browns. Patience here pays off—rushed compost can burn plants instead of feeding them.
☀️ Step 4: Test and Apply the Finished Compost
When the compost is dark, crumbly, and smells earthy (like a forest floor), it’s ready. Sift it through a ¼-inch mesh screen to remove any large chunks or unfinished bits. This ensures a fine, even texture perfect for mixing into garden soil or using as a top dressing.
Work 1-2 inches of finished compost into the top 6 inches of soil in your garden beds. For container plants, mix 20-30% compost into potting soil before planting. You’ll see stronger root growth, deeper green leaves, and healthier plants almost immediately. The key is consistency—add a fresh layer of compost every 3-4 months to keep soil fertile year-round.
Tips & tricks for perfect soil fertilization
Building a nitrogen-rich compost blend is easier than you think—here’s how to avoid common pitfalls and get the best results every time.
Balance is Everything: The three-to-one browns-to-greens ratio isn’t just a suggestion—it’s the magic number for preventing odors and speeding up decomposition. I learned this the hard way after my first pile turned into a smelly science experiment. If you’re unsure about ratios, start small with equal parts of each and adjust as you go. Too many greens? Add shredded paper or dry leaves. Too many browns? Toss in some fresh grass clippings or veggie scraps.
Layer Like a Pro: When building your pile in Step 2, think of it like lasagna—alternating layers create airflow and prevent compaction. Start with that 4-6 inch base of browns to anchor the pile, then add greens. The key is to keep each layer thin (2-3 inches max) so moisture and oxygen can circulate freely. If you’re using a closed bin, leave that small gap at the top—it’s crucial for airflow, especially in humid climates.
Moisture Matters: That damp sponge test in Step 2 is non-negotiable. Too much water creates an anaerobic environment that smells like rotten eggs, while too little slows down decomposition. If your pile feels dry, sprinkle water like you’re misting a houseplant—just enough to dampen, not soak. Pro tip: Use a spray bottle for precision, especially when working with small batches. And if your pile gets soggy, mix in more browns to absorb the excess moisture.
Patience Pays Off: The 4-6 week timeline in Step 3 is a guideline, not a deadline. If your compost still smells like fresh scraps after six weeks, it’s not ready—rushed compost can burn plant roots instead of feeding them. Keep turning weekly and check the balance again. The moment it smells earthy and looks dark, that’s your cue to sift and use it. I’ve seen compost take as little as three weeks in ideal conditions (warm, moist, and well-aerated) or up to eight weeks in cooler climates.
Pro Tips for Make Soil Fertile
- Building a nitrogen-rich compost blend is easier than you think—here’s how to avoid common pitfalls and get the best ...
- Balance is Everything: The three-to-one browns-to-greens ratio isn’t just a suggestion—it’s the magic number for prev...
- Layer Like a Pro: When building your pile in Step 2, think of it like lasagna—alternating layers create airflow and p...
Frequently asked questions
Got questions about revving up your soil’s fertility?
You’re not alone! Here are answers to the most common queries—so you can grow lush plants with confidence.
How long does it take to see results after improving soil fertility?
With a nitrogen-rich compost blend, you’ll notice improved plant vigor in 4–6 weeks. Roots grow faster, leaves turn greener, and weeds struggle to compete. For dramatic changes (like blooms or harvests), give it 2–3 months of consistent care. Patience pays off—think of it as a soil spa treatment!
Can I use kitchen scraps alone to make fertile soil?
Kitchen scraps (like fruit/veggie peels) are great, but they’re not enough on their own. They break down too quickly, creating smelly anaerobic conditions. Balance them with browns (dry leaves, cardboard, straw) and nitrogen sources (grass clippings, coffee grounds) for a well-rounded compost. Aim for a 3:1 brown-to-green ratio.
What’s the fastest way to add nitrogen to soil?
For a quick nitrogen boost, try these shortcuts:
- Blood meal or fish emulsion: Sprinkle 1–2 tbsp per plant and water in.
- Fresh grass clippings: Chop and layer into compost or topsoil.
- Legume cover crops: Plant clover or peas, then till them into the soil when they bloom.
Why does my compost smell bad after adding nitrogen?
A rotten-egg or ammonia stink usually means your compost is too wet or lacks oxygen. Fix it by:
- Fluffing the pile with a pitchfork to add air.
- Mixing in dry browns (straw, shredded paper) to absorb moisture.
- Avoiding meat/dairy (they attract pests and stink!).
Do I need to test my soil before adding compost?
Not required, but a DIY test (or cheap soil kit) can save time. Check for:
- pH: Aim for 6.0–7.0 (most plants thrive here).
- Texture: Sandy soil drains fast (add compost + organic matter); clay holds too much water (amend with perlite and compost).
Wrapping up and next steps
Transforming your soil into a nutrient-rich haven is simpler than you think! By blending nitrogen-packed compost with organic matter, you’re not just feeding your plants—you’re revitalizing your garden’s foundation. Start small, stay consistent, and watch your greens thrive like never before. 🌱
Ready to take the next step? Grab your gloves, pick a sunny patch, and let the composting begin—your future harvest will thank you!