
How To
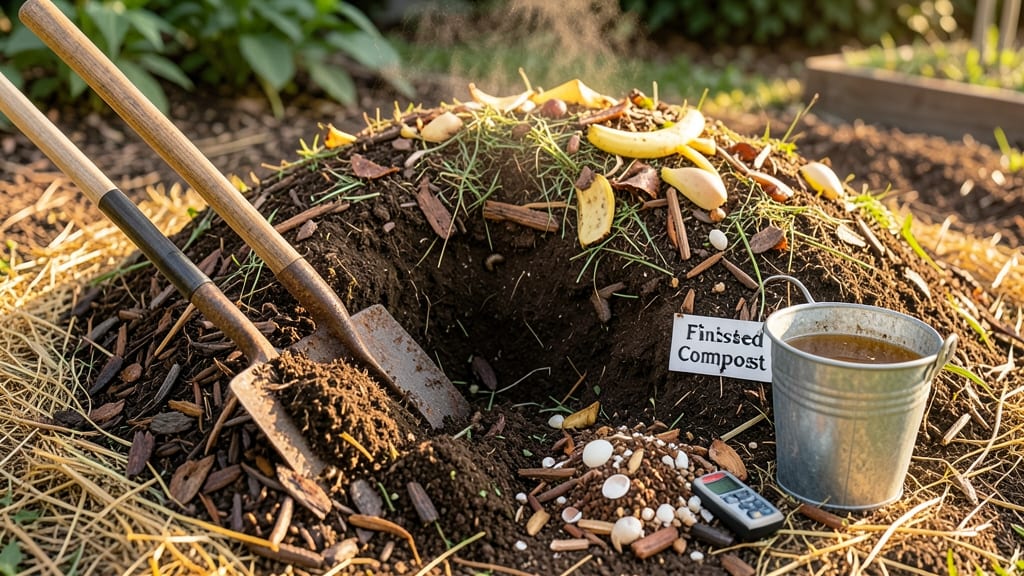
How to rejuvenate this old soil naturally without chemicals or expensive amendments. 🌱 I’ve turned my compacted, nutrient-depleted garden beds into thriving ecosystems using just coffee grounds, compost, and a little patience—no fancy tools or mystery mixes required. The secret lies in feeding the microbes that do the real work. A simple mix of compost, worm castings, and coffee grounds (for nitrogen) revives soil structure within weeks. You’ll see earthworms return, roots grow deeper, and plants that once struggled now reach for the sky. By the end of the season, your soil will hold moisture better, resist compaction, and teem with life. The best part? Everything you need is either free or costs pennies compared to store-bought fertilizers. This method works for vegetable beds, flower gardens, or even houseplant mixes. Let’s get your soil back to its best—naturally.
📚 In This Guide
- What you need
- Instructions
- Tips and common mistakes
- Wrapping up and next steps
What you need
- ● Coffee grounds – 1–2 cups per 10 sq. ft. of soil (fresh or dried; used or unused). Pro tip: ☕ Save them from your morning brew!
- ● Compost – 2–3 inches spread evenly (homemade or store-bought). Aim for well-decomposed material to avoid competing with plants.
- ○ Wood ash – Optional but helpful for acid-loving plants (e.g., blueberries, azaleas). Use sparingly (½ cup per 10 sq. ft.)—too much raises pH.
- ● Worm castings – ½ cup per 10 sq. ft. (boosts microbes and nutrients). Pro tip: ✨ Buy online or harvest from a thriving worm bin!
- ● Garden gloves – To keep hands clean while mixing.
- ● Garden fork or trowel – For aerating soil (6–12 inches deep). A broadfork works best for larger areas.
- ● Watering can or hose – To hydrate the soil post-mixing.
- ● Mulch (straw, leaves, or grass clippings) – 1–2 inches thick to retain moisture and feed soil long-term.
- ● Eggshells – Crushed, for calcium (great for leafy greens).
- ● Banana peels – Chopped, to add potassium.
- ● Seaweed or kelp meal – 1 tbsp per sq. ft. for trace minerals.
- ● Chicken manure (composted!) – ½ cup per 10 sq. ft. for nitrogen (avoid fresh—it burns plants!).
- ● Cover crop seeds (e.g., clover or vetch) – Plant after rejuvenation to prevent erosion and fix nitrogen.
Step-by-Step guide to reviving old soil naturally
Here's how to breathe new life into depleted soil using simple, organic methods.
🌱 Step 1: Test and Assess Your Soil's Current Condition
Begin by examining your soil's texture and structure. Healthy soil should crumble easily between your fingers and hold moisture without becoming soggy. If it feels compacted, dry, or lacks organic matter, it's time to revive it. I like to dig a small hole about 6 inches deep and observe the layers—dark, crumbly soil indicates life, while pale, hard layers show depletion.
For a more precise assessment, perform a simple jar test: fill a clean jar halfway with soil, add water to the top, and shake vigorously. Let it settle for 24 hours. The top layer should be rich organic matter, followed by sand, then silt. If your jar shows mostly sand or clay with little organic material, your soil needs serious rejuvenation.
💧 Step 2: Incorporate Coffee Grounds for Microbial Activity
Coffee grounds are a powerhouse for soil revival because they contain nitrogen, phosphorus, and potassium while also attracting beneficial microbes. Spread a 1-inch layer of used, dried coffee grounds evenly over your garden bed. Avoid using fresh grounds—they can create a temporary nitrogen spike that burns plants.
Work the grounds into the top 2-3 inches of soil using a garden fork or tiller. This ensures they mix thoroughly without creating a concentrated layer. If your soil feels particularly dry, lightly water the area before adding the grounds to help them integrate more easily. You'll notice worms and other soil organisms become more active within a few days.
🌿 Step 3: Layer Compost to Restore Organic Matter
Spread a 2-3 inch layer of well-aged compost over the soil surface. I prefer compost that's dark, crumbly, and free of large chunks—this ensures it breaks down quickly and enriches the soil without smothering plants. For best results, use compost made from a mix of green (nitrogen-rich) and brown (carbon-rich) materials.
Gently rake the compost into the top 4-6 inches of soil, focusing on the root zone where plants will grow. Avoid piling compost in mounds, as this can create anaerobic pockets that trap moisture and discourage microbial activity. Water the area lightly after incorporating the compost to help it settle and activate.
☀️ Step 4: Encourage Microbial Growth with Mulch
Apply a 2-3 inch layer of organic mulch, such as straw, shredded leaves, or wood chips, over the amended soil. Mulch protects your soil from erosion, retains moisture, and provides a food source for beneficial microbes as it breaks down. I prefer straw because it breaks down slowly and doesn’t compact like some other mulches.
Keep the mulch 6 inches away from plant stems to prevent rot and pest issues. Water the mulch lightly to help it settle and begin decomposing. Over the next few weeks, you'll see an increase in earthworms and other soil organisms, which are key indicators that your soil is reviving. This process can take 4-6 weeks for full microbial activation.
⏰ Step 5: Monitor and Maintain Soil Health Long-Term
After the initial amendment, continue to monitor your soil's condition by checking its moisture and texture regularly. Healthy soil should hold moisture without becoming waterlogged and should crumble easily when dry. If you notice compaction returning, repeat the process with another layer of compost and coffee grounds every 6-12 months.
Plant cover crops like clover or winter rye in the off-season to further improve soil structure and add organic matter. These plants also prevent erosion and attract pollinators. Within a few months, you'll see stronger plant growth and more vibrant blooms—a clear sign your soil is thriving again.
Tips & tricks for perfect soil revival
Between us, these small but mighty adjustments will supercharge your soil's natural revival process.
Assessment Accuracy: When performing the jar test in Step 1, use a clear glass jar so you can easily observe the distinct layers forming over the 24-hour settling period. The organic matter layer should be at least 1/4 inch thick—if it's thinner than that, your soil is severely depleted and needs more aggressive amendment. I've seen gardeners skip this step entirely, only to wonder why their plants struggled despite adding compost!
Coffee Grounds Prep: Before spreading that 1-inch layer of coffee grounds in Step 2, let them dry completely if you're using fresh grounds. Damp grounds can clump and create anaerobic zones where microbes struggle to thrive. Spread them evenly and avoid piling—think "snowfall" not "avalanche." The key is even distribution so microbes get access everywhere, not just in concentrated pockets.
Compost Quality Check: For Step 3, your compost should have a 3:1 ratio of browns (carbon) to greens (nitrogen)—think dried leaves to grass clippings. If it smells strongly of ammonia or has visible mold, it's too "hot" and needs more browns. I once used compost that was too nitrogen-heavy, and my soil ended up with a temporary nitrogen burn that took months to recover from.
Mulch Timing: After applying that 2-3 inch mulch layer in Step 4, wait 3-4 days before watering it in. This gives the mulch time to settle and establish contact with the soil below. Watering too soon can wash away the finer particles and create a barrier that prevents microbial activity at the critical soil-mulch interface. Think of it as letting the mulch "take root" before activating it with moisture.
Pro Tips for Rejuvenate Old Soil Naturally
- Between us, these small but mighty adjustments will supercharge your soil's natural revival process.
- Assessment Accuracy: When performing the jar test in Step 1, use a clear glass jar so you can easily observe the dist...
- Coffee Grounds Prep: Before spreading that 1-inch layer of coffee grounds in Step 2, let them dry completely if you'r...
Frequently asked questions
Got questions about breathing new life into your tired soil? Here are some of the most common concerns—and straightforward answers—to help you get started confidently!
How long does it take to see results after adding coffee grounds or compost?
Results depend on your soil’s current state, but you’ll often notice improvements within 4–8 weeks. Coffee grounds break down quickly (1–3 months), while compost may take 2–6 months to fully integrate. Test soil health with a DIY pH kit or observe plant vigor (e.g., greener leaves, stronger roots) as key signs!
Can I use coffee grounds or compost right away, or should I wait?
You can add them anytime, but fresh coffee grounds should compost first (1–2 weeks) to avoid mold or nitrogen theft. For compost, mix it into the top 6–12 inches of soil before planting. If your soil is already nutrient-rich, spread a thin layer (½ inch) to avoid overfeeding.
Will coffee grounds attract pests like ants or fungus gnats?
Yes, but it’s easy to prevent! Buried coffee grounds (6+ inches deep) deter pests, while dried grounds (spread on mulch) reduce moisture risks. To repel fungus gnats, let the soil dry slightly between waterings. A 1-inch layer of sand or perlite on top also helps block egg-laying.
What if my soil is already acidic? Can I still use coffee grounds?
Coffee grounds are mildly acidic (pH ~6.2–6.8), so they won’t drastically lower pH. However, if your soil is below pH 5.5, mix in lime or wood ash first. Test soil pH annually—aim for 6.0–7.0 for most plants. Pro tip: Use used (not fresh) grounds to minimize acidity spikes!
Are there budget-friendly alternatives to coffee grounds or compost?
Try these zero-cost or low-cost options:
- Leaf mold: Shred leaves in a bin for 1–2 years—free fertilizer!
- Grass clippings: Dry and chop into soil (avoid thick layers to prevent matting).
- Eggshells: Crush and bake to add calcium (great for tomatoes!).
- Banana peels: Bury chopped peels for potassium-rich boosts.
Even cardboard or newspaper (shredded and buried) can improve soil structure over time!
Wrapping up and next steps
Rejuvenating old soil naturally isn’t just possible—it’s empowering! By harnessing the power of compost, coffee grounds, and other organic amendments, you’re not only restoring microbial life but also creating a thriving ecosystem for your plants.
Small, consistent efforts can transform barren soil into a nutrient-rich haven, proving that nature’s best solutions are often the simplest.
Ready to take the next step? Start with just one of these methods—like adding a layer of compost or brewing a coffee-ground tea—and observe the changes. Your garden (and the planet) will thank you! 🌱✨