
Propagation
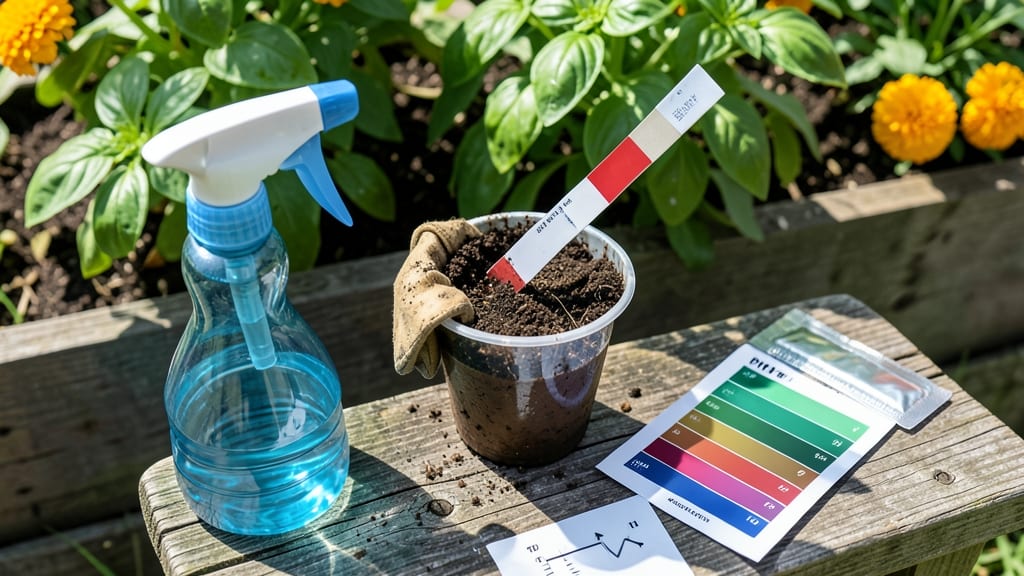
Testing soil pH with test strips takes 30 seconds—no lab, no guesswork. 🌱 I still remember the first time I saw my garden soil’s true pH: my blueberries were begging for acidity, and my tomatoes were thriving in neutral soil, all while I’d been treating them the same.
That’s when I realized how much pH dictates what plants can actually use from their soil.
You’ll need just three things: a soil test kit with pH strips, a clean container, and a small trowel. Grab a spoonful of soil from 3-6 inches deep, avoiding surface debris or compost piles—those can skew results.
Mix it with distilled water (tap water’s minerals interfere) until you get a thick paste, then dip in a strip. The color change happens instantly, but wait 10-15 seconds for accuracy.
What you see on that strip tells you everything: below 6.0? Your blueberries, azaleas, and hydrangeas will struggle unless you add sulfur or peat moss. Between 6.0-7.0? Most veggies and flowers are happy here—just keep an eye on it. Above 7.0? Lime lovers like broccoli and Brussels sprouts thrive, but acid-lovers will turn their backs.
The fix is simple: elemental sulfur lowers pH, pelletized lime raises it, and wood ash (sparingly) can tweak it up.
Here’s the secret most beginners miss: test in spring and fall, not just when problems appear. Soil pH shifts naturally with rain, decomposition, and amendments, so check before planting—it’s the difference between a garden that could grow and one that will.
Grab a kit today, and you’ll know exactly what your soil’s capable of in under a minute.
📚 In This Guide
- What you need
- Instructions
- Tips and common mistakes
- Wrapping up and next steps
What you need
- ● pH test strips: Purchase a pack of soil-specific pH test strips (e.g., 50–100 strips for frequent testing). Brands like Luster Leaf or LaMotte are reliable choices.
- ● Fresh soil sample: Collect 1–2 cups of topsoil (0–6 inches deep) from multiple spots in your garden or pot. Mix them for a representative sample.
- ● Small container or plastic bag: Use a clean, dry container (like a ziplock bag) to hold your soil sample.
- ● Distilled water: Fill a small cup with room-temperature distilled water (tap water may alter results).
- ● Spoon or trowel: A clean, dry tool to mix soil and water thoroughly.
- ● Timer: Your phone or a stopwatch to track the 30–60 seconds required for color development.
- ● Color chart (included with strips): Compare your strip’s color to the provided pH scale (0–14) for accuracy.
- ● Gloves: Protect your hands from dirt and potential irritants.
- ● Notebook or app: Record pH levels, soil type, and plant needs for future reference.
- ● pH adjustment products: Lime (to raise pH) or sulfur (to lower pH) if you plan to amend your soil.
- ● Magnifying glass: Helps closely inspect faint color changes on the strip.
Step-by-Step instructions for testing soil pH with test strips
Here’s how to get precise pH readings in under a minute—no lab or fancy equipment needed.
🧪 Step 1: Collect a Representative Soil Sample
Grab a clean, dry container and dig up soil from multiple spots in your garden bed, about 3-4 inches deep. Mix these samples thoroughly—this ensures an accurate reading of the overall soil chemistry, not just one isolated area. Avoid surface soil or areas with fresh mulch, compost, or fertilizer, as these can skew results. Aim for about 1 cup of well-mixed soil per test.
If testing multiple beds, repeat this process for each area. Soil pH can vary dramatically even within a small yard, so don’t assume one reading applies everywhere. For container gardens, sample from the top 2 inches of soil, since potted plants often have different pH dynamics than in-ground beds.
💧 Step 2: Prepare the Soil Sample for Testing
Place your mixed soil sample in a clean, shallow dish or small bowl. Add just enough distilled water (tap water can contain minerals that interfere with readings) to moisten the soil until it reaches the consistency of damp sand. Stir gently with a clean spoon—you’re not making mud, just a workable slurry. The goal is enough moisture to activate the test strip’s chemical reaction without diluting it.
Let the mixture sit for 5-10 minutes to allow any clumps to break down naturally. This step is critical: if the soil is too dry, the strip won’t absorb enough moisture to react properly. If it’s too wet, the reading will be inaccurate. You’ll know it’s right when the soil holds its shape but crumbles easily between your fingers.
⏱ Step 3: Dip the Test Strip and Read the Results
Carefully remove a test strip from its packaging—handle only by the edges to avoid contaminating the reactive surface. Dip the strip into the soil-water mixture for 3-5 seconds, ensuring the entire colored area makes contact. Withdraw it immediately and place it on a clean, dry surface (like a paper towel) to avoid smudging.
Wait 10-30 seconds for the color to develop fully. Compare the strip’s color to the chart provided in the kit—most strips change from one shade to another along a gradient. Match it as closely as possible; even slight variations can mean the difference between ideal pH (6.0-7.0 for most plants) and acidic or alkaline extremes. For best accuracy, test in natural light or under a bright lamp.
📝 Step 4: Interpret the Results and Adjust as Needed
If your reading falls between 6.0 and 7.0, congratulations—your soil is likely perfect for most vegetables, flowers, and fruits. For acid-loving plants (like blueberries or azaleas), aim for 4.5-5.5. If the pH is below 6.0, you’ll need to raise it by adding lime (calcium carbonate) or wood ash. For pH above 7.0, lower it with sulfur or peat moss, applied according to package instructions.
Don’t panic if your soil is outside the ideal range—most plants tolerate slight variations. However, if you’re growing calcium-sensitive crops (like tomatoes or peppers), keep pH between 6.0-6.8. For lawns, a slightly acidic 5.5-6.5 works best. Always retest after making adjustments, as changes can take 4-6 weeks to stabilize in the soil.
✂️ Step 5: Store Strips Properly for Future Tests
Keep unused test strips in their original sealed container, away from moisture and direct sunlight. Once opened, use them within 2-3 months for reliable results. Store used strips in a sealed bag or container to prevent contamination if you need to retest later. Label each test with the date, location, and plant type—this creates a record to track soil health over time.
Test strips are your fastest tool for monitoring soil chemistry, but for long-term planning, consider a soil test kit with multiple metrics (like nitrogen, phosphorus, and potassium). These give a fuller picture of what your soil needs beyond just pH. I like to test once in early spring and again after harvest to catch any shifts before the next growing season.
Tips & tricks for accurate soil pH testing
Testing soil pH doesn't have to be complicated—these pro tips ensure your results are reliable every time.
Sampling Precision: The 3-4 inch depth recommendation in Step 1 isn't arbitrary—it targets the root zone where most plants actively grow. For vegetable gardens, dig slightly deeper (4 inches) since roots often extend further. Container gardens are the exception: stick to the top 2 inches since potted soil mixes differently. I've found that skipping this depth rule can give misleadingly high pH readings near the surface where organic matter accumulates.
Moisture Consistency: That 5-10 minute waiting period in Step 2 is your quality control window. Too dry? The test strip won't activate properly. Too wet? You'll dilute the soil chemistry. I've learned to test the consistency by rolling a small amount between my fingers—it should hold its shape but crumble easily. This "damp sand" texture is non-negotiable for accurate readings, especially in sandy soils that drain quickly.
Lighting Matters: When comparing colors in Step 3, natural daylight or bright LED lighting makes all the difference. Fluorescent lights can cast a greenish tint that alters color perception. I keep a small LED desk lamp handy for indoor testing—it's more consistent than relying on kitchen lighting. The 10-30 second wait time is also critical: some strips develop faster in warm conditions, so always check the manufacturer's chart for your specific brand.
Record Keeping: That date, location, and plant type labeling in Step 5 transforms one-time tests into valuable data. I maintain a simple spreadsheet tracking pH readings over seasons. This helps me spot trends—like how my vegetable beds naturally acidify after tomato harvests—so I can adjust amendments proactively. The 4-6 week stabilization period after amendments is why I test again before planting season.
Pro Tips for Test Soil Ph With Test Strips
- Testing soil pH doesn't have to be complicated—these pro tips ensure your results are reliable every time.
- Sampling Precision: The 3-4 inch depth recommendation in Step 1 isn't arbitrary—it targets the root zone where most plants actively grow.
- Moisture Consistency: That 5-10 minute waiting period in Step 2 is your quality control window.
Frequently asked questions
Got questions about testing soil pH with test strips? You’re not alone! Here are some of the most common concerns—plus quick, easy answers to help you get the most accurate results.
Can I reuse soil test strips?
Nope! Test strips are designed for single-use only. Reusing them can lead to inaccurate readings or even damage the strip. Always grab a fresh strip for each test to ensure reliable results.
How long do I have to wait for accurate results?
Most test strips give you results in 30 seconds to 2 minutes. Check the package instructions for the exact timing—some brands require a full minute for the color to fully develop. Don’t rush it!
Do I need to moisten the soil before testing?
Yes! Test strips work best with moist (not soggy) soil. Mix a small sample with distilled water (about a 1:1 ratio) to create a slurry. This helps the strip absorb enough moisture for an accurate pH reading.
What if my test strip changes color but the reading doesn’t match my expectations?
Double-check a few things:
- Compare the strip to the color chart in bright light,
- Ensure the strip was fully immersed, and
- Test a new strip—sometimes strips can be defective. If results still seem off, consider a lab test for confirmation.
Are test strips as accurate as a lab test?
Test strips are quick and convenient but may not be as precise as lab tests. For critical projects (like large-scale gardening or commercial farming), a lab test is the gold standard. However, strips are perfect for routine monitoring and adjusting soil amendments.
Can I test the same soil spot multiple times?
Just stir the soil well between tests to ensure consistency. Avoid testing the exact same spot repeatedly, as pH can vary slightly in different areas of your garden or pot.
Wrapping up and next steps
Testing your soil’s pH with test strips is a simple, cost-effective way to ensure your plants thrive! 🌱 By following these steps, you’ll gain quick insights into your soil’s health and adjust nutrients as needed.
Now that you’re armed with the knowledge, take action—grab those strips and give your garden the perfect foundation for growth. Happy planting!
- Next step: Compare your results to plant-specific pH ranges and tweak your soil with amendments like lime (for alkaline) or sulfur (for acidic).