
How To
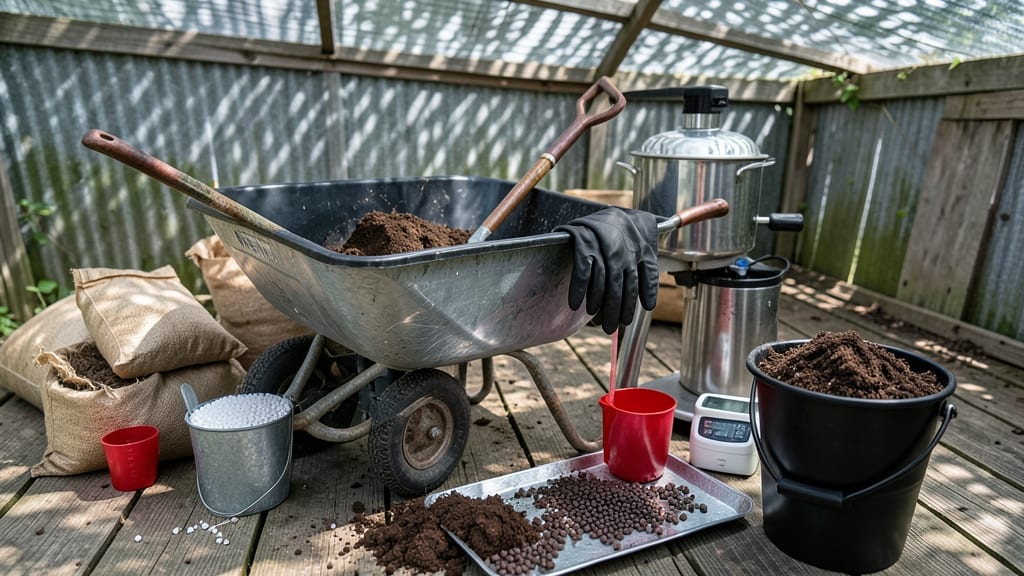
A potting soil mixer saved my azaleas when store-bought blends left their roots smothered and stunted. 🌿 Instead of guessing at the right texture or pH, I learned to blend my own—tailored to acid-loving plants like rhododendrons, blueberries, and gardenias that thrive in soil with a pH below 6.0.
The difference? Plants that drink up water instead of drowning in it, with roots that spread like eager fingers through airy, nutrient-rich soil.
You don’t need fancy equipment—just a wheelbarrow or large bin, a sturdy shovel, and a few key ingredients: peat moss or coconut coir for acidity, pine bark fines for chunkiness, compost for nutrients, and perlite or vermiculite to keep roots breathing.
The magic happens when you mix them in a 3:2:1:1 ratio (peat/bark:compost:perlite)—simple math that transforms fluffy ingredients into soil that holds moisture but never stays soggy. For beginners, start with pre-mixed components to avoid the guesswork.
Your acid-loving plants will reward you with glossy leaves, vibrant blooms, and fewer yellowing tips—signs they’re finally getting the conditions they crave. The best part? This mix lasts 6–12 months before refreshing, and you’ll never again waste money on blends that fail your picky plants.
Once you master the basics, you can tweak ratios for specific needs, like adding more compost for heavy feeders or extra perlite for drought-prone varieties.
Here’s the secret I learned the hard way: never skip the moisture test. Squeeze a handful of your mix—it should crumble easily when dry but hold shape when damp. Too dense? Add perlite. Too loose?
Mix in more peat. And if your plants still look unhappy after a month, check that pH with a simple kit—sometimes the soil’s acidity isn’t the issue, but knowing where to start makes all the difference.
📚 In This Guide
- What you need
- Instructions
- Tips and common mistakes
- Wrapping up and next steps
What you need
- ● Peat moss or coco coir: 3 parts (holds moisture, lowers pH naturally)
- ● Pine bark fines or orchid bark: 2 parts (improves aeration, mimics forest floor)
- ● Perlite or vermiculite: 1 part (adds lightness, prevents compaction)
- ○ Slow-release fertilizer (optional but recommended): 1 tsp per gallon of mix (e.g., Osmocote or Azomite)
- ○ Lime (optional, for fine-tuning pH): ½ tsp per gallon (if your mix tests too acidic)
- ○ Sulfur (optional, for acidity boost): 1 tsp per gallon (if pH is too high)
- ● 5-gallon bucket or wheelbarrow: For mixing (or a large tarp if outdoors)
- ● Garden trowel or shovel: For scooping and blending
- ● pH testing kit: Digital or liquid test strips (to monitor acidity, ideal pH: 4.5–6.0)
- ● Gloves & dust mask: Protect your hands and lungs from fine particles
- ● Watering can or hose: For moistening ingredients before mixing
- ● Worm castings: ½ cup per gallon (boosts nutrients, improves structure)
- ● Hydrogel crystals: 1 tbsp per gallon (retains moisture for drought-prone plants)
- ● Charcoal or biochar: ¼ cup per gallon (reduces odors, improves drainage)
- ● Composted pine needles: 1 part (enhances acidity, mimics natural habitat)
Step-by-step instructions for crafting a custom acid-loving potting mix
This blend will give your blueberries, azaleas, and rhododendrons the perfect growing medium.
🪴 Step 1: Measure and Combine Base Ingredients
Start with 4 parts peat moss—this is your acidifying foundation. I like to use sphagnum peat because it holds moisture while maintaining excellent aeration. Add 2 parts perlite to prevent compaction and improve drainage. The perlite will feel gritty when you handle it, and that’s exactly what you want for root health.
Next, incorporate 1 part horticultural charcoal. This isn’t just for looks—it helps prevent fungal issues by filtering out impurities. Mix these three components thoroughly in a large container or wheelbarrow. Use your hands or a sturdy trowel to break up any remaining clumps in the peat moss. The blend should look uniformly dark with visible specks of perlite and charcoal.
🌱 Step 2: Add Organic Matter for Nutrient Density
To this base, blend in 2 parts pine bark fines. These create a loose, fibrous structure that mimics natural forest floor conditions. I sift mine through a quarter-inch mesh screen to remove any large chunks that could disrupt root growth. Now add 1 part composted pine needles—this is where the acidity really kicks in. The needles will add a reddish-brown tint to your mix.
For extra nutrient boost, stir in 1 cup of worm castings per 4 cubic feet of mix. The castings introduce beneficial microbes and slow-release nutrients. If you’re using this for container plants, you can reduce the castings to ½ cup—containers need less organic matter to prevent overfeeding. Mix everything until the blend looks uniformly speckled with brown and black particles.
💧 Step 3: Adjust pH and Test Moisture Retention
This blend should naturally test between pH 4.5 and 5.5—ideal for acid-loving plants. To verify, use a soil pH meter or test kit. If it reads higher than 5.5, add 1 tablespoon of aluminum sulfate per 5 gallons of mix and remix thoroughly. For moisture testing, scoop a handful and squeeze gently—it should hold together but not drip water. If it crumbles, add 1 part coconut coir to improve water retention.
Here’s the thing—this mix will settle over time. To maintain structure, I like to top-dress established plants with ½ inch of fresh pine fines every 3-4 months. For containers, simply fluff the surface with a fork to restore aeration. The blend should feel light yet dense enough to support roots without feeling like sand.
✂️ Step 4: Customize for Specific Plant Needs
For container-grown plants, reduce the peat moss to 3 parts and increase perlite to 3 parts—this prevents waterlogging in small pots. If you’re planting bare-root shrubs, add 1 part sand to improve drainage around roots. The sand should be coarse, not fine beach sand, to avoid clumping.
For seed starting, blend this mix with 50% vermiculite to create a lighter, faster-draining medium. The vermiculite helps retain moisture while preventing damping-off. I always sterilize my custom mixes by baking them at 200°F for 30 minutes before use—this kills any lurking pathogens that could harm delicate seedlings.
☀️ Step 5: Store and Use Your Custom Mix
Keep your finished blend in a sealed plastic bin with a tight lid to preserve moisture and prevent contamination. Store in a cool, dry place—never in direct sunlight, which can degrade organic matter. Label each batch with the date and intended use. This mix stays fresh for 6-9 months if stored properly.
When repotting or planting, fill containers to 1 inch below the rim—this prevents overflow when watering. For in-ground amendments, work 2-3 inches of the blend into the topsoil around established plants. You’ll notice within 4-6 weeks that foliage darkens and new growth appears more vigorous. That’s your sign the pH is just right!
Tips & tricks for perfect acid-loving potting mix
Creating the ideal growing medium for acid-loving plants is all about precision and balance—here's how to elevate your blend from good to exceptional.
Ingredient Selection Tip: When choosing your peat moss, opt for sphagnum peat specifically—it has the perfect moisture retention without becoming waterlogged. I've found that bagged sphagnum peat often contains additives, so if you're sourcing in bulk, give it a quick rinse before using to remove any dust or contaminants that could affect your pH balance.
Mixing Technique: In Step 1, don't just eyeball your measurements—use a large mixing container with clear markings or a wheelbarrow where you can visually verify the 4:2:1 ratio of peat moss, perlite, and horticultural charcoal. I like to weigh my components when possible, as volume measurements can vary dramatically between brands. For example, a "part" of perlite might look like half a part by volume due to its light weight.
pH Adjustment: The instructions mention adjusting pH if it reads above 5.5, but here's what I've learned: aluminum sulfate is potent—start with half the recommended amount and test again after mixing. I've ruined entire batches by overcorrecting, so always test a small sample first. For a more gradual adjustment, you can also use elemental sulfur, which works more slowly but gives you finer control over the final pH.
Sterilization Strategy: The 200°F for 30 minutes sterilization step is non-negotiable for seed starting mixes, but for established plants, you can skip this if you're confident in your ingredient sources. If you do sterilize, place your mix on a baking sheet lined with parchment paper to prevent moisture loss during the process. This also prevents your oven from getting messy—trust me, you don't want peat moss residue in your convection fan!
Pro Tips for Potting Soil Mixer
- Creating the ideal growing medium for acid-loving plants is all about precision and balance—here's how to elevate your blend from good to exceptional.
- Ingredient Selection Tip: When choosing your peat moss, opt for sphagnum peat specifically—it has the perfect moisture retention without becoming waterlogged.
- I like to weigh my components when possible, as volume measurements can vary dramatically between brands.
Frequently asked questions
Got questions about creating the perfect potting soil mix for your acid-loving plants? You’re not alone! Here are some of the most common queries—and straightforward answers—to help you blend like a pro.
What’s the best ratio for mixing potting soil for acid-loving plants?
For most acid-loving plants like azaleas, blueberries, or gardenias, aim for a 50% peat moss or coconut coir (for moisture retention and acidity), 30% pine bark fines (for aeration), and 20% perlite or vermiculite (for drainage). Adjust based on your plant’s specific needs—e.g., orchids may need more bark!
How long does a homemade potting soil mix last before it breaks down?
A well-balanced mix can last 1–2 years if stored in a dry, sealed container. Over time, organic matter like peat moss decomposes, so check for compaction or sour smells. Refresh with 10–20% new peat moss or compost annually to maintain structure and acidity.
Can I use regular garden soil instead of potting soil in my mixer?
Not ideal! Garden soil is often too dense, alkaline, and packed with weeds/seeds. Stick to sterile potting soil or components like peat moss, bark, and perlite to avoid clumping, pests, and poor drainage. For a budget-friendly tweak, mix 70% potting soil + 30% compost—just test the pH first!
Why does my homemade mix smell bad after mixing?
A funky odor usually means too much organic matter (like uncomposted leaves or manure) or poor drainage. Fix it by adding more perlite or sand to improve aeration, and let the mix sit for 1–2 weeks before use. If the smell persists, start fresh with high-quality, sterile components.
How do I adjust the pH of my mix if it’s not acidic enough?
Test your mix with a pH meter or kit—aim for 4.5–6.0 for acid-lovers. To lower pH (make it more acidic), add sulfur, pine needles, or sphagnum peat moss. For a quick fix, mix in 1 tbsp of aluminum sulfate per gallon of mix (follow package instructions carefully!).
Wrapping up and next steps
Creating the perfect potting soil mix for your acid-loving plants doesn’t have to be complicated—with the right potting soil mixer, you’re well on your way to nurturing a thriving garden! 🌱 Whether you’re blending peat moss, pine bark, or compost, the key is balance and customization.
Now that you’re armed with knowledge, it’s time to roll up those sleeves and get mixing!
Start small with a test batch to refine your blend, then scale up as confidence grows. Happy gardening—your plants will thank you with lush, vibrant growth! 🌿
- Next step: Grab your potting soil mixer and experiment with ratios!