
Companion Plants
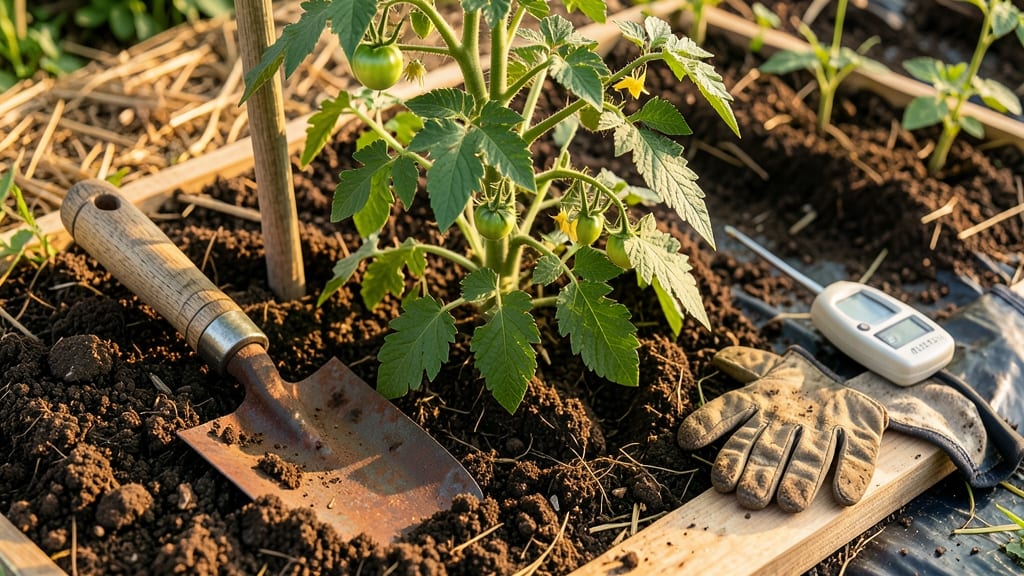
Preparing soil for tomato plants isn’t just about digging a hole—it’s about creating a luxurious, airy foundation where roots can spread like a five-star hotel for plants. 🌱 I learned the hard way that compacted, nutrient-poor soil equals stunted growth and sad, yellowing leaves. The secret?
A mix that’s loose enough for roots to explore but rich enough to feed them all season. Start with a 50/50 blend of existing soil and compost—think of it as a spa day for your tomatoes.
Add a handful of balanced fertilizer (like 10-10-10) to kickstart growth, and if your soil tests acidic, toss in some lime to keep the pH between 6.0 and 6.8. Drainage is key: if water pools after 30 minutes, amend with perlite or sand to keep roots breathing.
By the time you plant, your soil should crumble like a fresh muffin—not hard like a brick. The payoff? Plants that bolt upward instead of struggling, with deep red fruit and fewer diseases.
Even in containers, this mix works—just swap the 50/50 ratio for 60% potting soil, 30% compost, and 10% perlite for that perfect balance. Avoid these pitfalls: over-fertilizing (burns roots), skipping the compost (nutrient starvation), or planting too deep (stem rot).
Trust me, your tomatoes will thank you with bucketfuls of flavor—and maybe even a few extra jars for your neighbors.
📚 In This Guide
- What you need
- Instructions
- Tips and common mistakes
- Wrapping up and next steps
What you need
- ● Garden fork or broadfork – For loosening compacted soil (rent or borrow if needed).
- ● Garden trowel or spade – For digging and mixing amendments (5–7" blade recommended).
- ● Garden gloves – Protect your hands from thorns, dirt, and sharp tools.
- ● Wheelbarrow or large bucket – To haul soil, compost, or amendments (5+ gallon capacity).
- ○ Soil test kit – Optional but helpful to check pH and nutrient levels (aim for 6.0–6.8 pH).
- ● Compost or well-aged manure – 2–3 inches per planting area (cow, horse, or chicken manure works).
- ● Balanced fertilizer (10-10-10 or 5-5-5) – 1–2 cups per 10 sq ft (organic options like bone meal or fish emulsion are great too!).
- ● Peat moss or coconut coir – 1–2 inches to improve drainage and moisture retention.
- ○ Wood ash (optional) – ½ cup per plant to raise pH if soil is too acidic (test first!).
- ● Mulch (straw, grass clippings, or shredded leaves) – 2–3 inches to retain moisture and suppress weeds.
- ● Sunny spot – Tomatoes need 6–8+ hours of direct sunlight daily.
- ● Well-draining soil – Avoid soggy spots; raised beds or mounds work well in clay soil.
- ● Time – 4–6 weeks before planting to amend soil (longer for heavy clay).
- ● Patience – Let amendments settle into the soil before transplanting seedlings.
Step-by-Step guide to preparing soil for tomato plants
Tomatoes thrive in soil that’s airy, fertile, and well-draining—here’s how to create the perfect foundation.
🌱 Step 1: Clear and Loosen the Planting Area
Remove all weeds, grass, and debris from the 12-inch deep planting zone. Tomatoes need unobstructed roots, so I pull weeds by hand (they’re easier to remove when soil is moist). Use a garden fork or broadfork to loosen compacted soil—this breaks up hardpan and encourages deep root growth. Work the fork 8-10 inches deep, lifting and dropping it to aerate naturally.
If your soil feels dense or clay-heavy, mix in 2-3 inches of compost at this stage. This improves texture immediately and provides slow-release nutrients. Avoid tilling—it disrupts soil structure and exposes buried weeds. Instead, focus on fork work to create channels for roots to explore.
💧 Step 2: Test and Amend Soil pH and Nutrients
Tomatoes prefer a pH between 6.0 and 6.8. Test your soil with a kit—if it’s outside this range, adjust with pelletized lime (for acidic soil) or elemental sulfur (for alkaline soil). I like to add 1 cup of bone meal per 10 square feet for phosphorus, which strengthens root development. Spread amendments evenly and work them into the top 6 inches of soil.
For sandy soil, add 2 inches of peat moss or coconut coir to retain moisture. For clay soil, incorporate 1 inch of perlite or coarse sand to improve drainage. Mix these amendments in thoroughly—you’ll know it’s right when the soil crumbles easily between your fingers, not sticking together.
☀️ Step 3: Build a Nutrient-Rich Top Layer
Create a 6-inch deep top layer using a mix of 50% compost, 25% aged manure, and 25% garden soil. This blend provides immediate fertility while supporting long-term microbial activity. Spread the mix evenly over the amended area and rake to level. For each planting hole, add 1 handful of balanced fertilizer (10-10-10) at the bottom—this jumpstarts root growth without burning tender seedlings.
Water the bed deeply (1 inch of water) to settle the amendments and activate microbial activity. Let it drain completely before planting. The surface should feel slightly damp but not soggy—like a wrung-out sponge. This step ensures your tomatoes start with a nutrient-rich foundation that supports strong, vigorous growth from day one.
✂️ Step 4: Prepare Individual Planting Holes
Dig holes twice as wide as the tomato root ball but only as deep as the container’s drainage holes. This encourages roots to spread horizontally while preventing stem rot from buried stems. For each hole, add 1 tablespoon of Epsom salt (magnesium sulfate) to prevent blossom-end rot—a common tomato issue. Mix it into the bottom inch of soil.
Loosen the sides of the hole with your hands or a trowel—this reduces root circling when you transplant. Add a handful of compost to the bottom of each hole to give roots instant nutrients. Water the hole lightly before planting to help settle the soil around roots later. The goal is a loose, fluffy environment that invites roots to explore.
🪴 Step 5: Mulch and Protect the Soil
Spread 3-4 inches of organic mulch (straw, grass clippings, or shredded leaves) around each plant, keeping it 2 inches away from stems to prevent rot. Mulch conserves moisture, suppresses weeds, and gradually enriches the soil as it breaks down. For extra protection, add 1 inch of coarse sand around the base if your soil drains poorly—this creates a barrier against waterlogging.
Finally, water the entire bed again to 1 inch deep, ensuring the mulch stays in place. Avoid wetting the leaves—direct water on the soil to prevent fungal diseases. Your soil is now ready: loose, nutrient-rich, and primed for healthy tomato roots that will support a bountiful harvest.
Tips & tricks for perfect tomato plant soil preparation
Here's what nobody tells you about creating that ideal foundation for your tomato plants—details that make all the difference between struggling plants and thriving vines.
The Depth Factor: When loosening soil in Step 1, think of it like fluffing a pillow—you're creating air pockets for roots to breathe. The 8-10 inch depth with your broadfork isn't just about breaking up hardpan; it's about mimicking nature's loose topsoil. If you're working with particularly compacted clay, consider renting a tiller for this step only—just be gentle to avoid overworking the soil.
pH Precision: That 6.0-6.8 range in Step 2 is critical, but here's the secret: test your soil again after amending. I've seen gardeners add lime or sulfur, wait a few weeks, then test again—sometimes you need to adjust a second time. For quick results, use a liquid pH amendment that shows color changes immediately. And remember, bone meal works wonders for phosphorus, but it's not a complete fertilizer—pair it with a balanced 10-10-10 for best results.
Layering Like a Pro: The 6-inch top layer in Step 3 deserves special attention. Think of it as building a lasagna—each component has a purpose. The 50% compost provides microbial life, the 25% aged manure adds nitrogen, and the 25% garden soil gives structure. Pro tip: If you're short on compost, you can substitute up to 10% of that with well-rotted leaf mold for a similar effect. The key is maintaining that crumbly texture between your fingers.
Mulch Mastery: That 3-4 inch mulch layer in Step 5 isn't just for looks—it's your plant's insulation system. For maximum effectiveness, apply it after your soil has settled from the initial watering. I like to use straw because it breaks down slowly and doesn't mat like grass clippings. And that 2 inch clearance from stems prevents rot while still protecting the soil. For extra insurance against waterlogging, create small ridges around plant bases to channel water away.
Pro Tips for Preparing Soil For Tomato Plants
- Here's what nobody tells you about creating that ideal foundation for your tomato plants—details that make all the difference between struggling plants and thriving vines.
- The Depth Factor: When loosening soil in Step 1, think of it like fluffing a pillow—you're creating air pockets for roots to breathe.
- pH Precision: That 6.0-6.8 range in Step 2 is critical, but here's the secret: test your soil again after amending.
Frequently asked questions
Got questions about prepping soil for your tomato plants? You’re not alone! Here are answers to the most common queries to help you grow a bountiful harvest.
What’s the best time of year to prepare soil for tomatoes?
For most climates, prepare your soil 4–6 weeks before transplanting seedlings (spring for warm regions, early spring for cooler zones). This gives microbes time to break down amendments like compost. In colder areas, start indoors in late winter if using containers.
Can I plant tomatoes in soil that’s too wet or too dry?
No—tomatoes thrive in well-draining, moist (but not soggy) soil. If your soil is too wet, mix in coarse sand or perlite; if dry, add compost or aged manure to retain moisture. Test drainage by digging a hole, filling it with water, and checking if it drains within 30 minutes.
Do I need to remove all weeds before planting?
Yes! Weeds compete for nutrients and water, so pull them out before amending the soil. Use a hoe or hand-trowel to uproot them, then add a 2–3 inch layer of mulch (straw or grass clippings) to suppress regrowth after planting.
What if my soil is rocky or clay-heavy?
Amend clay soil with organic matter (compost, peat moss, or coconut coir) to improve aeration. For rocky soil, raise beds or use containers filled with a mix of 50% topsoil, 30% compost, and 20% perlite. Tomatoes adapt well to raised beds with proper drainage!
How do I fix soil that smells bad or has pests?
Bad smells or pests (like grubs) mean poor drainage or excess organic matter. Add sand or vermiculite to improve aeration, and treat pests with neem oil or diatomaceous earth. Avoid fresh manure—it can burn roots and attract pests. Let soil sit for 2–3 weeks after amending to stabilize.
Wrapping up and next steps
Preparing your soil for tomato plants is the foundation of a bountiful harvest—it’s all about giving those roots the perfect loose, nutrient-rich home to thrive! 🌱 With the right mix of organic matter, balanced nutrients, and proper drainage, you’re setting your tomatoes up for success.
Now that you’re armed with the knowledge, roll up your sleeves and get planting!
Your next step? Watch those seedlings grow and adjust care as needed—watering, mulching, and protecting from pests will keep your tomatoes flourishing. Happy gardening, and may your harvest be juicy and plentiful! 🍅✨